A mixing elbow is an external part on a diesel engine that combines the sea water (used for cooling the engine) with the combustion exhaust gases. The mixture is usually directed downwards into the bilge through a large diameter wet exhaust pipe leading to a thru-hull exiting the boat at the stern. An anti-siphon loop is somewhere in the exit hose to prevent water from coming in from the thru-hull in a following sea. Because of the harsh environment of hot gases and saltwater, mixing elbows have a lifetime of around 6-10 years and engine manufacturers suggest inspection every 3 years. OEM mixing elbows are typically made of steel and last a lot shorter time than ones made of 316 stainless steel.
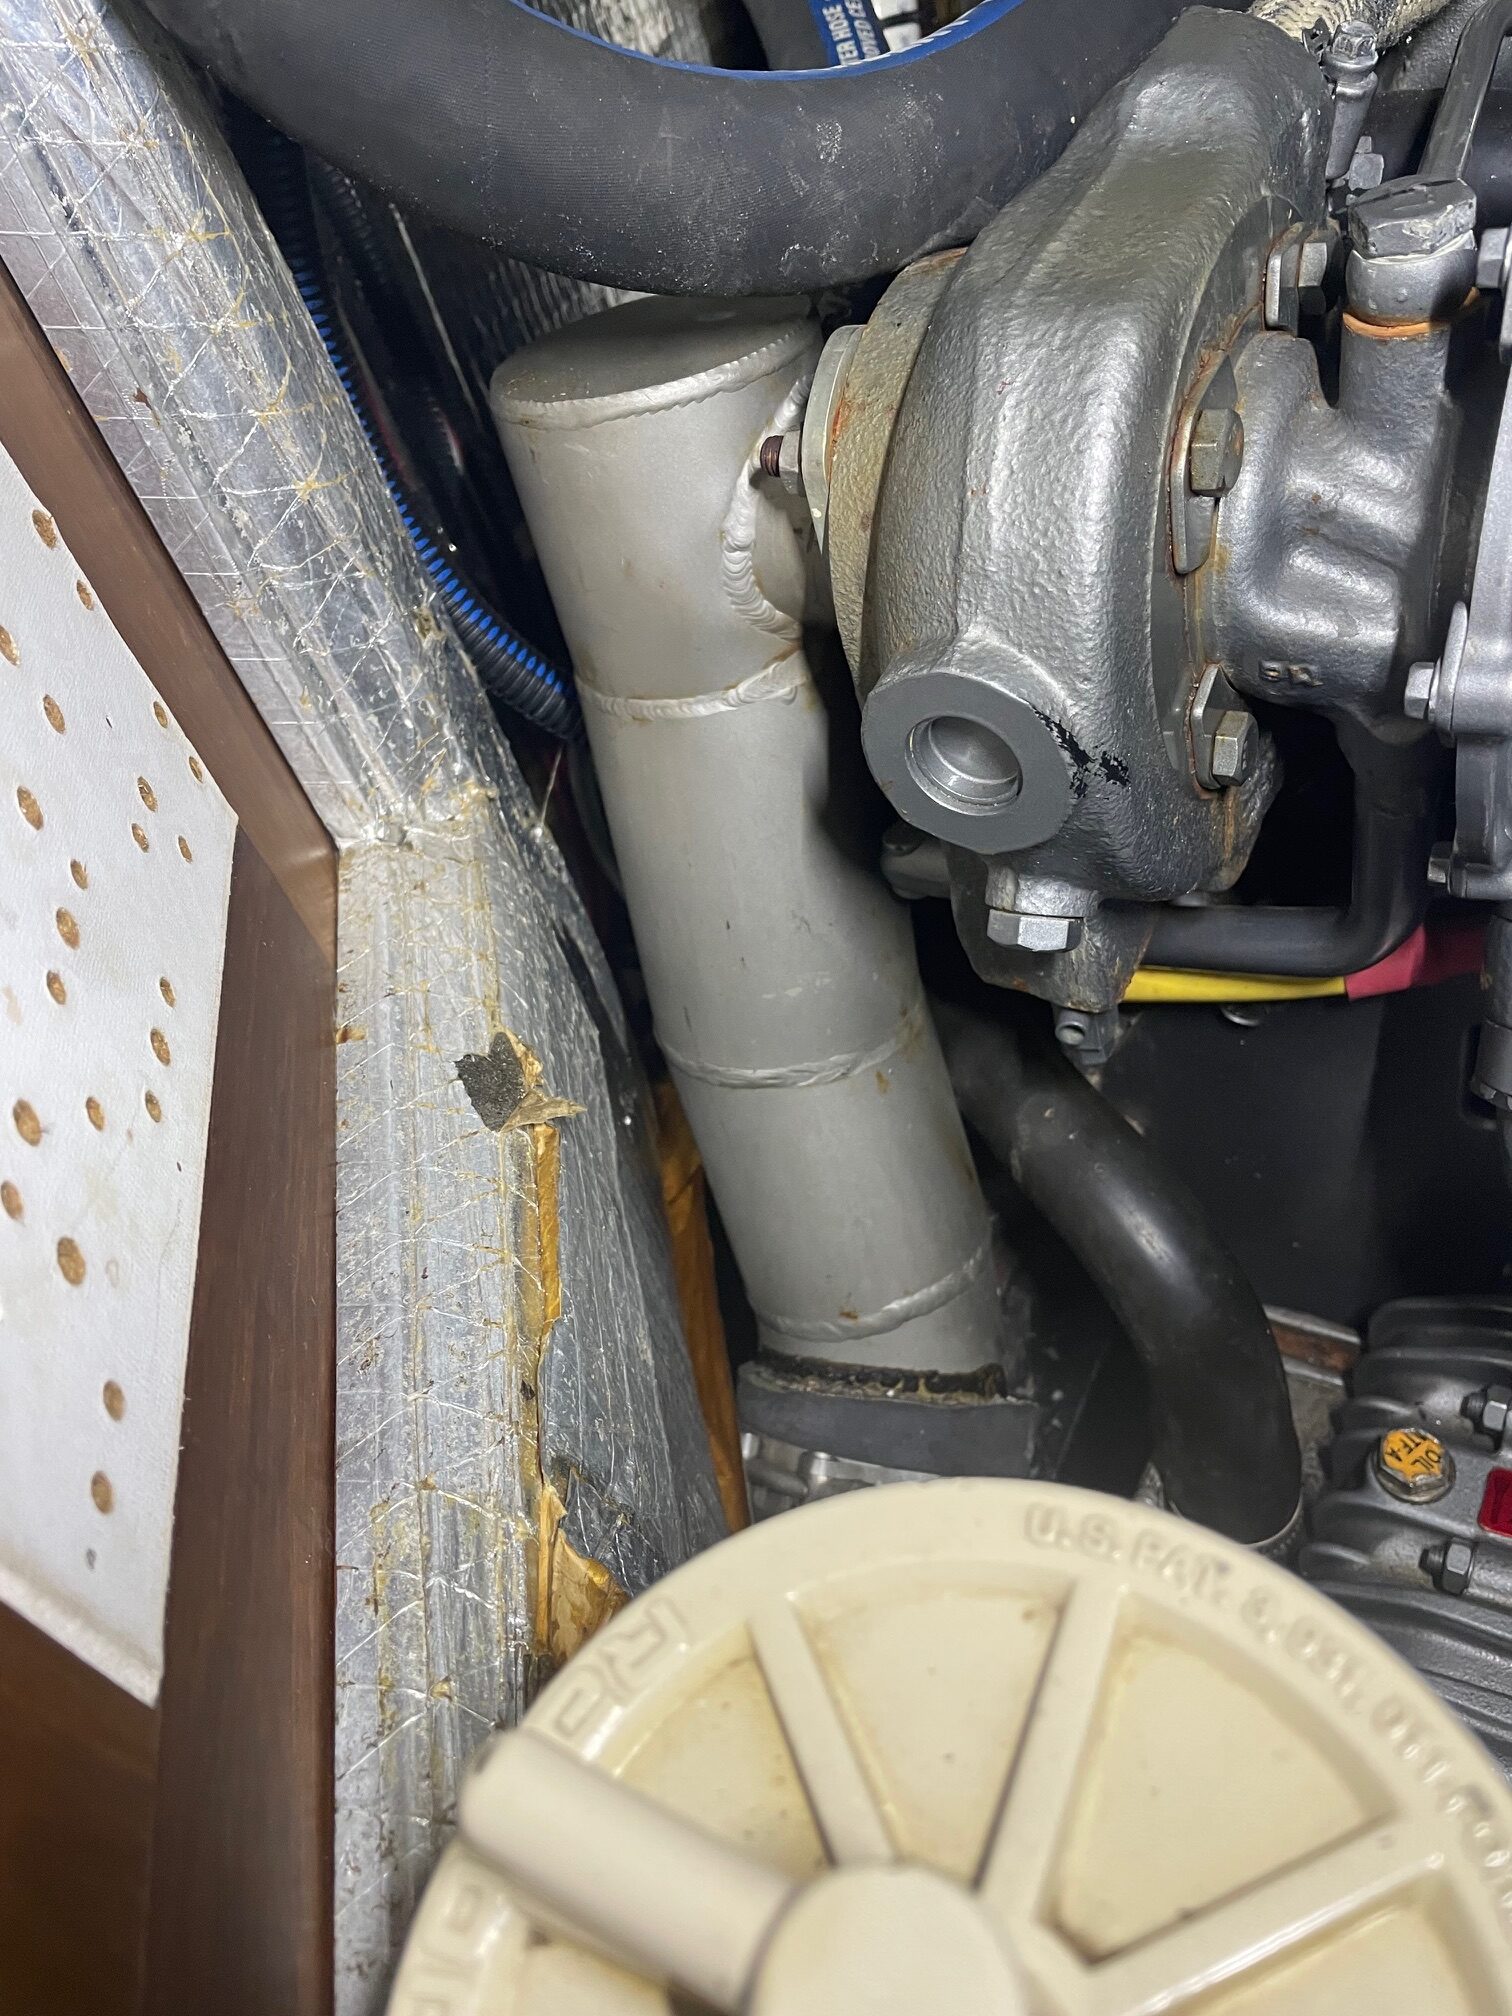
The mixing elbow on Apropos was a stainless steel custom-made part that was 20 years old with 2850 engine hours. Space constraints in the engine bay required a custom part with specific bends and angles to clear the cabinetry. I periodically inspected the welds which are typically what fails first. It probably lasted so long because the boat has been moored in fresh water for 18 of the past 20 years. I also run the engine hard on my way back to the dock which helps clean out the exhaust elbow. Removing it was easy–3 bolts attaching it to the engine, the fresh water input hose, and the wet exhaust output hose. The 3″ diameter exhaust hose was only 30″ long, so I decided to slice the ends to make it easier to remove from the exhaust elbow. I also cut the other end which was attached to a fitting on the exhaust muffler. I bought a new 34″ hose (Trident-Flex) at Fisheries Supply for half price since it was a remnant, and used an angle grinder with a cutting disc to cut it to the correct length.
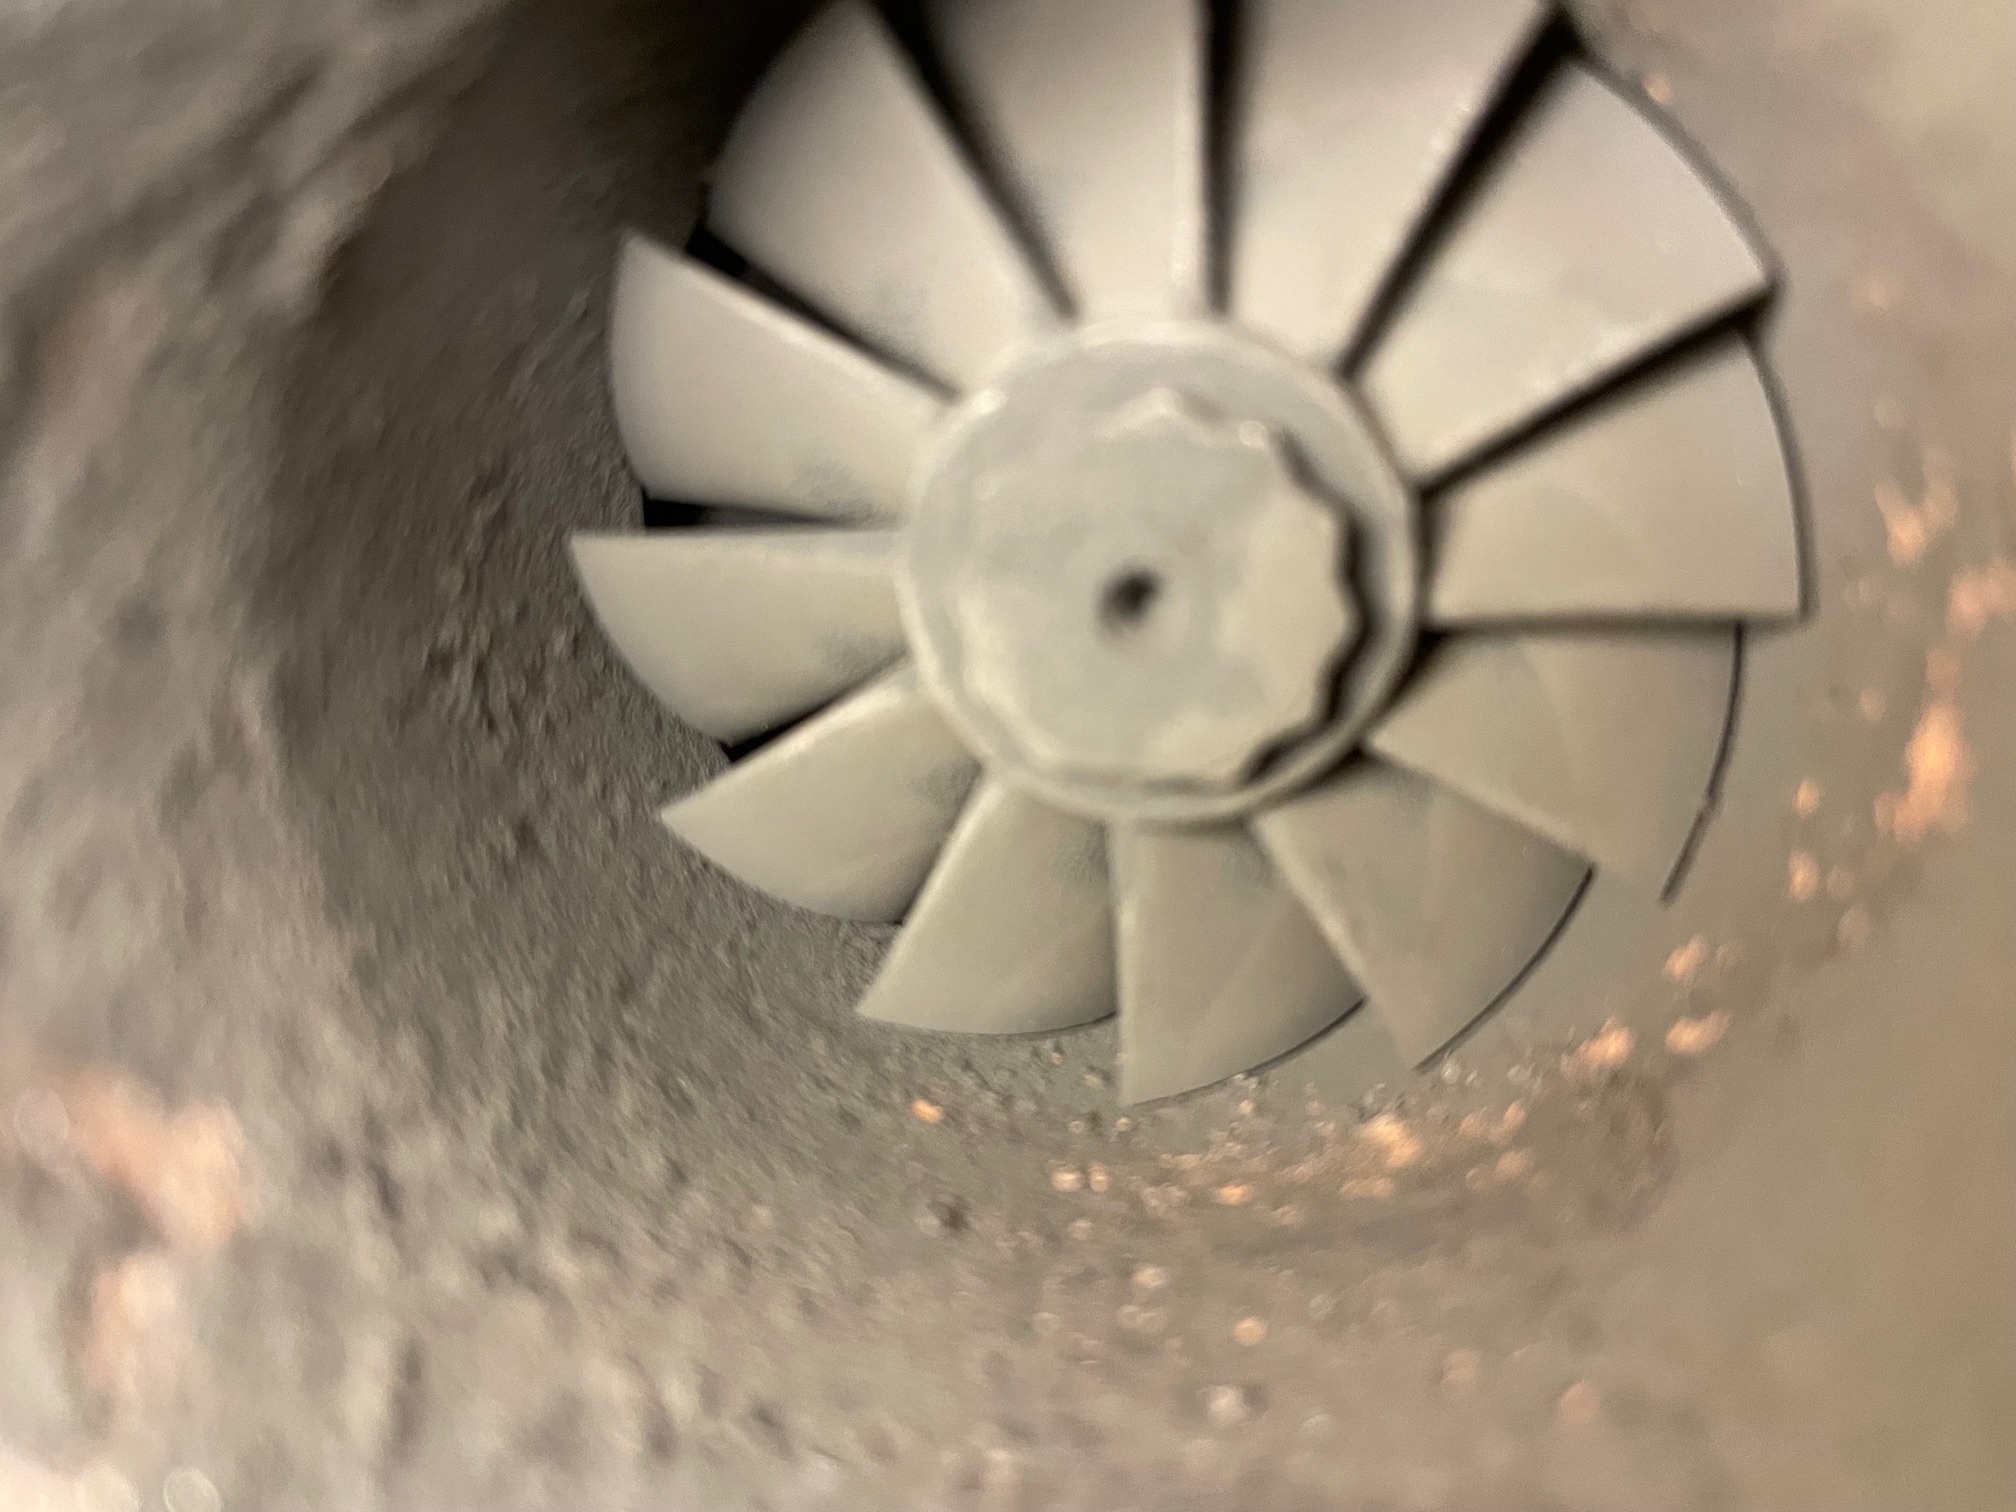
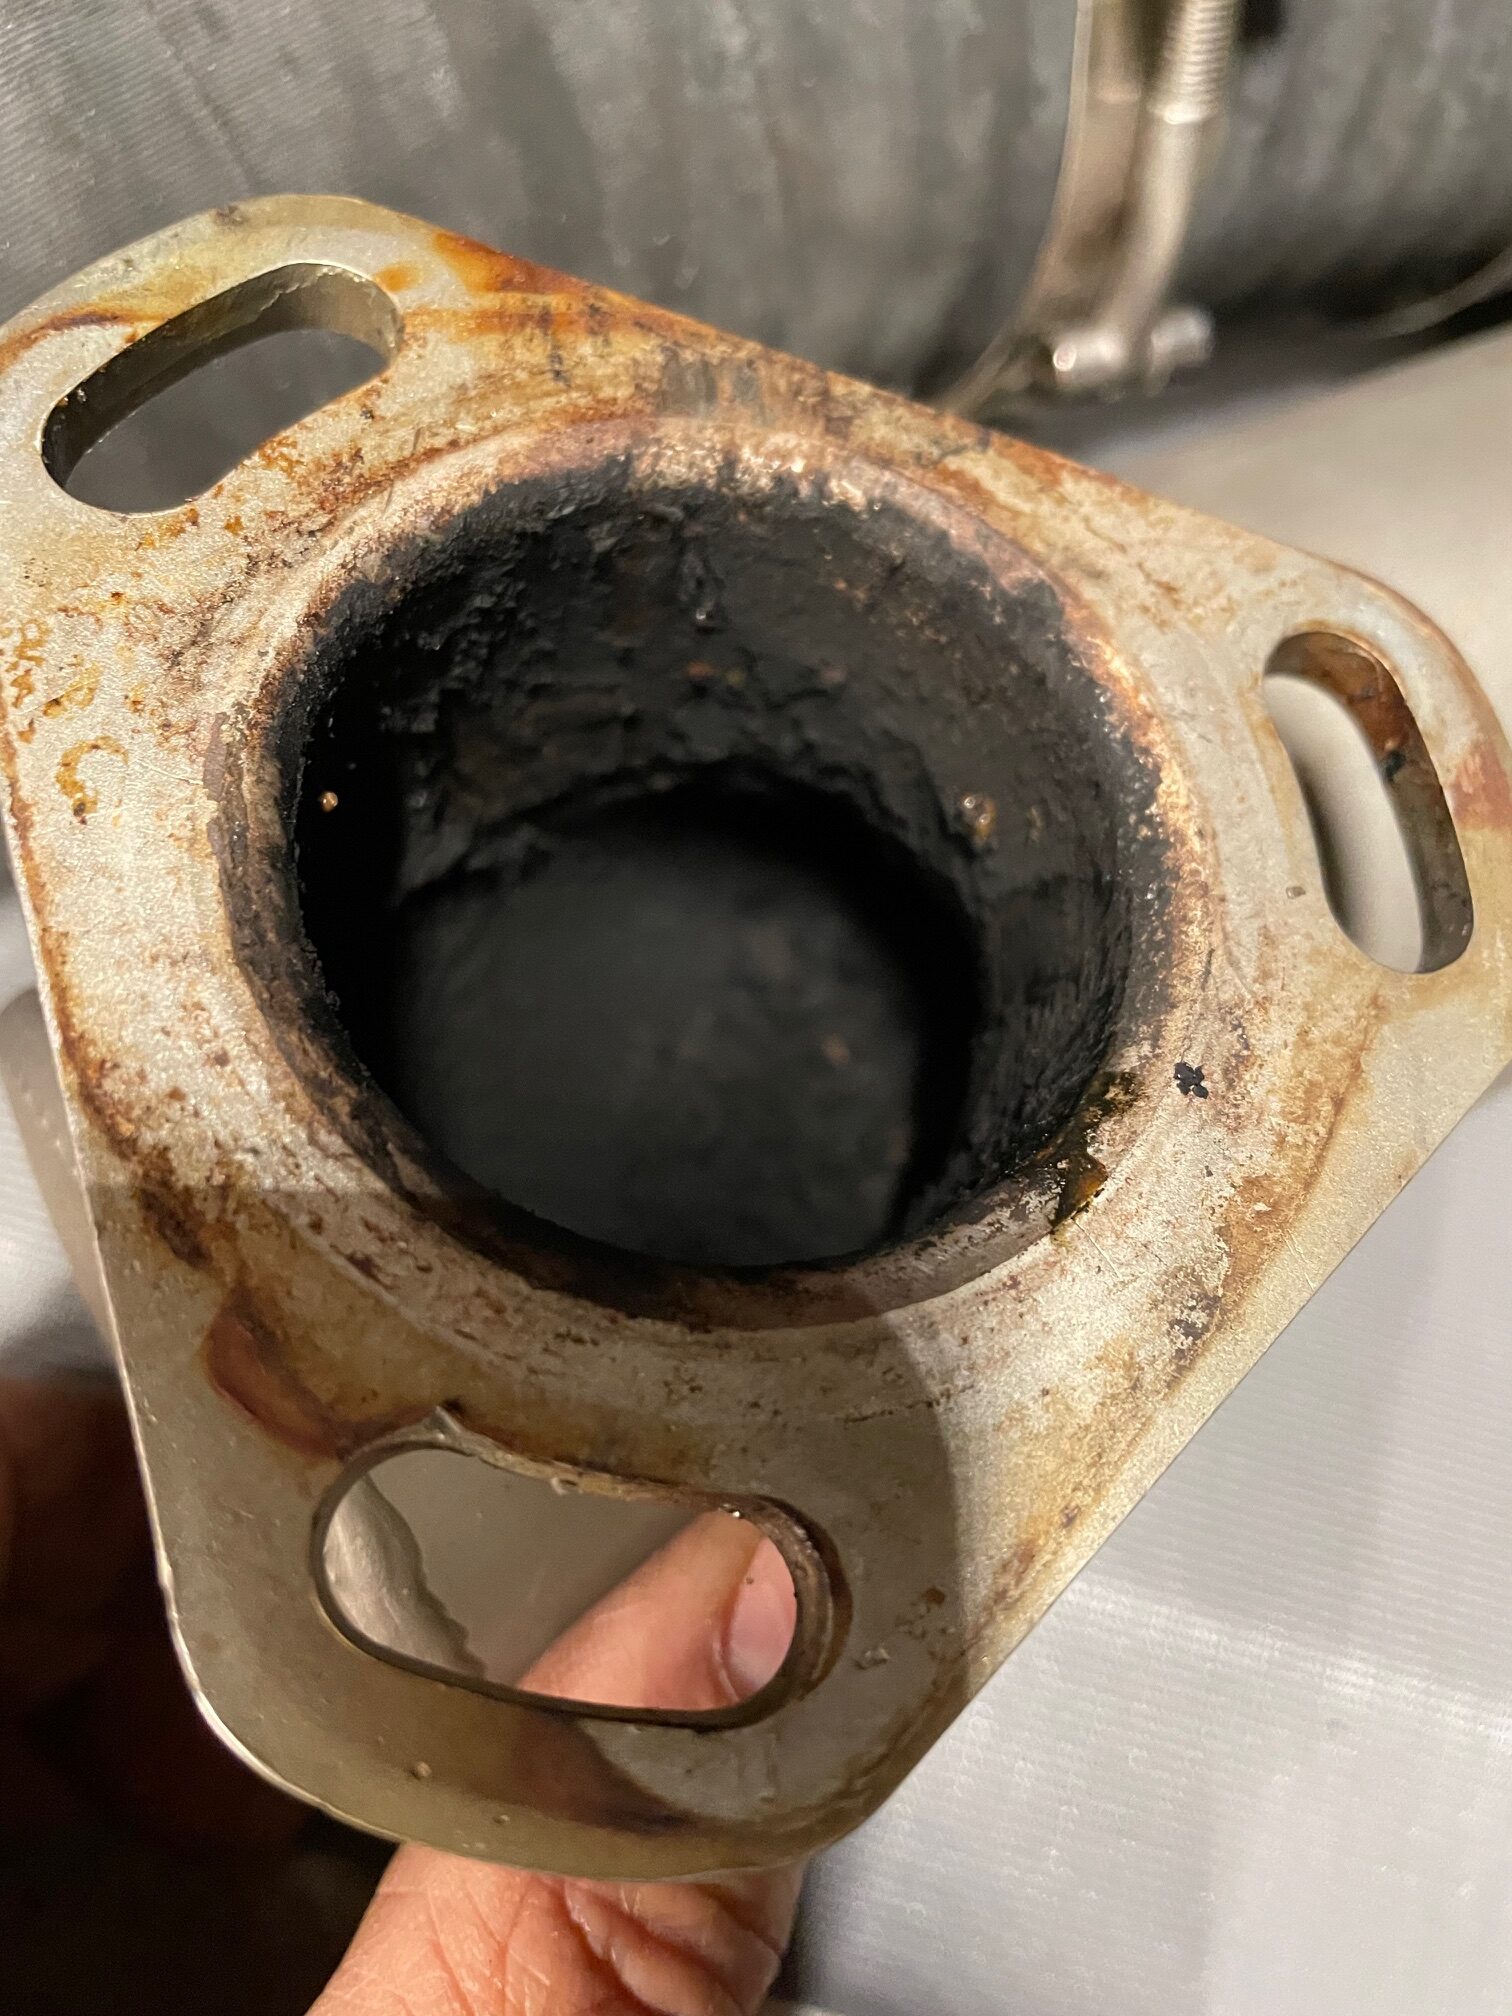
Original ElbowTurbo Fan (before cleaning)Old Elbow
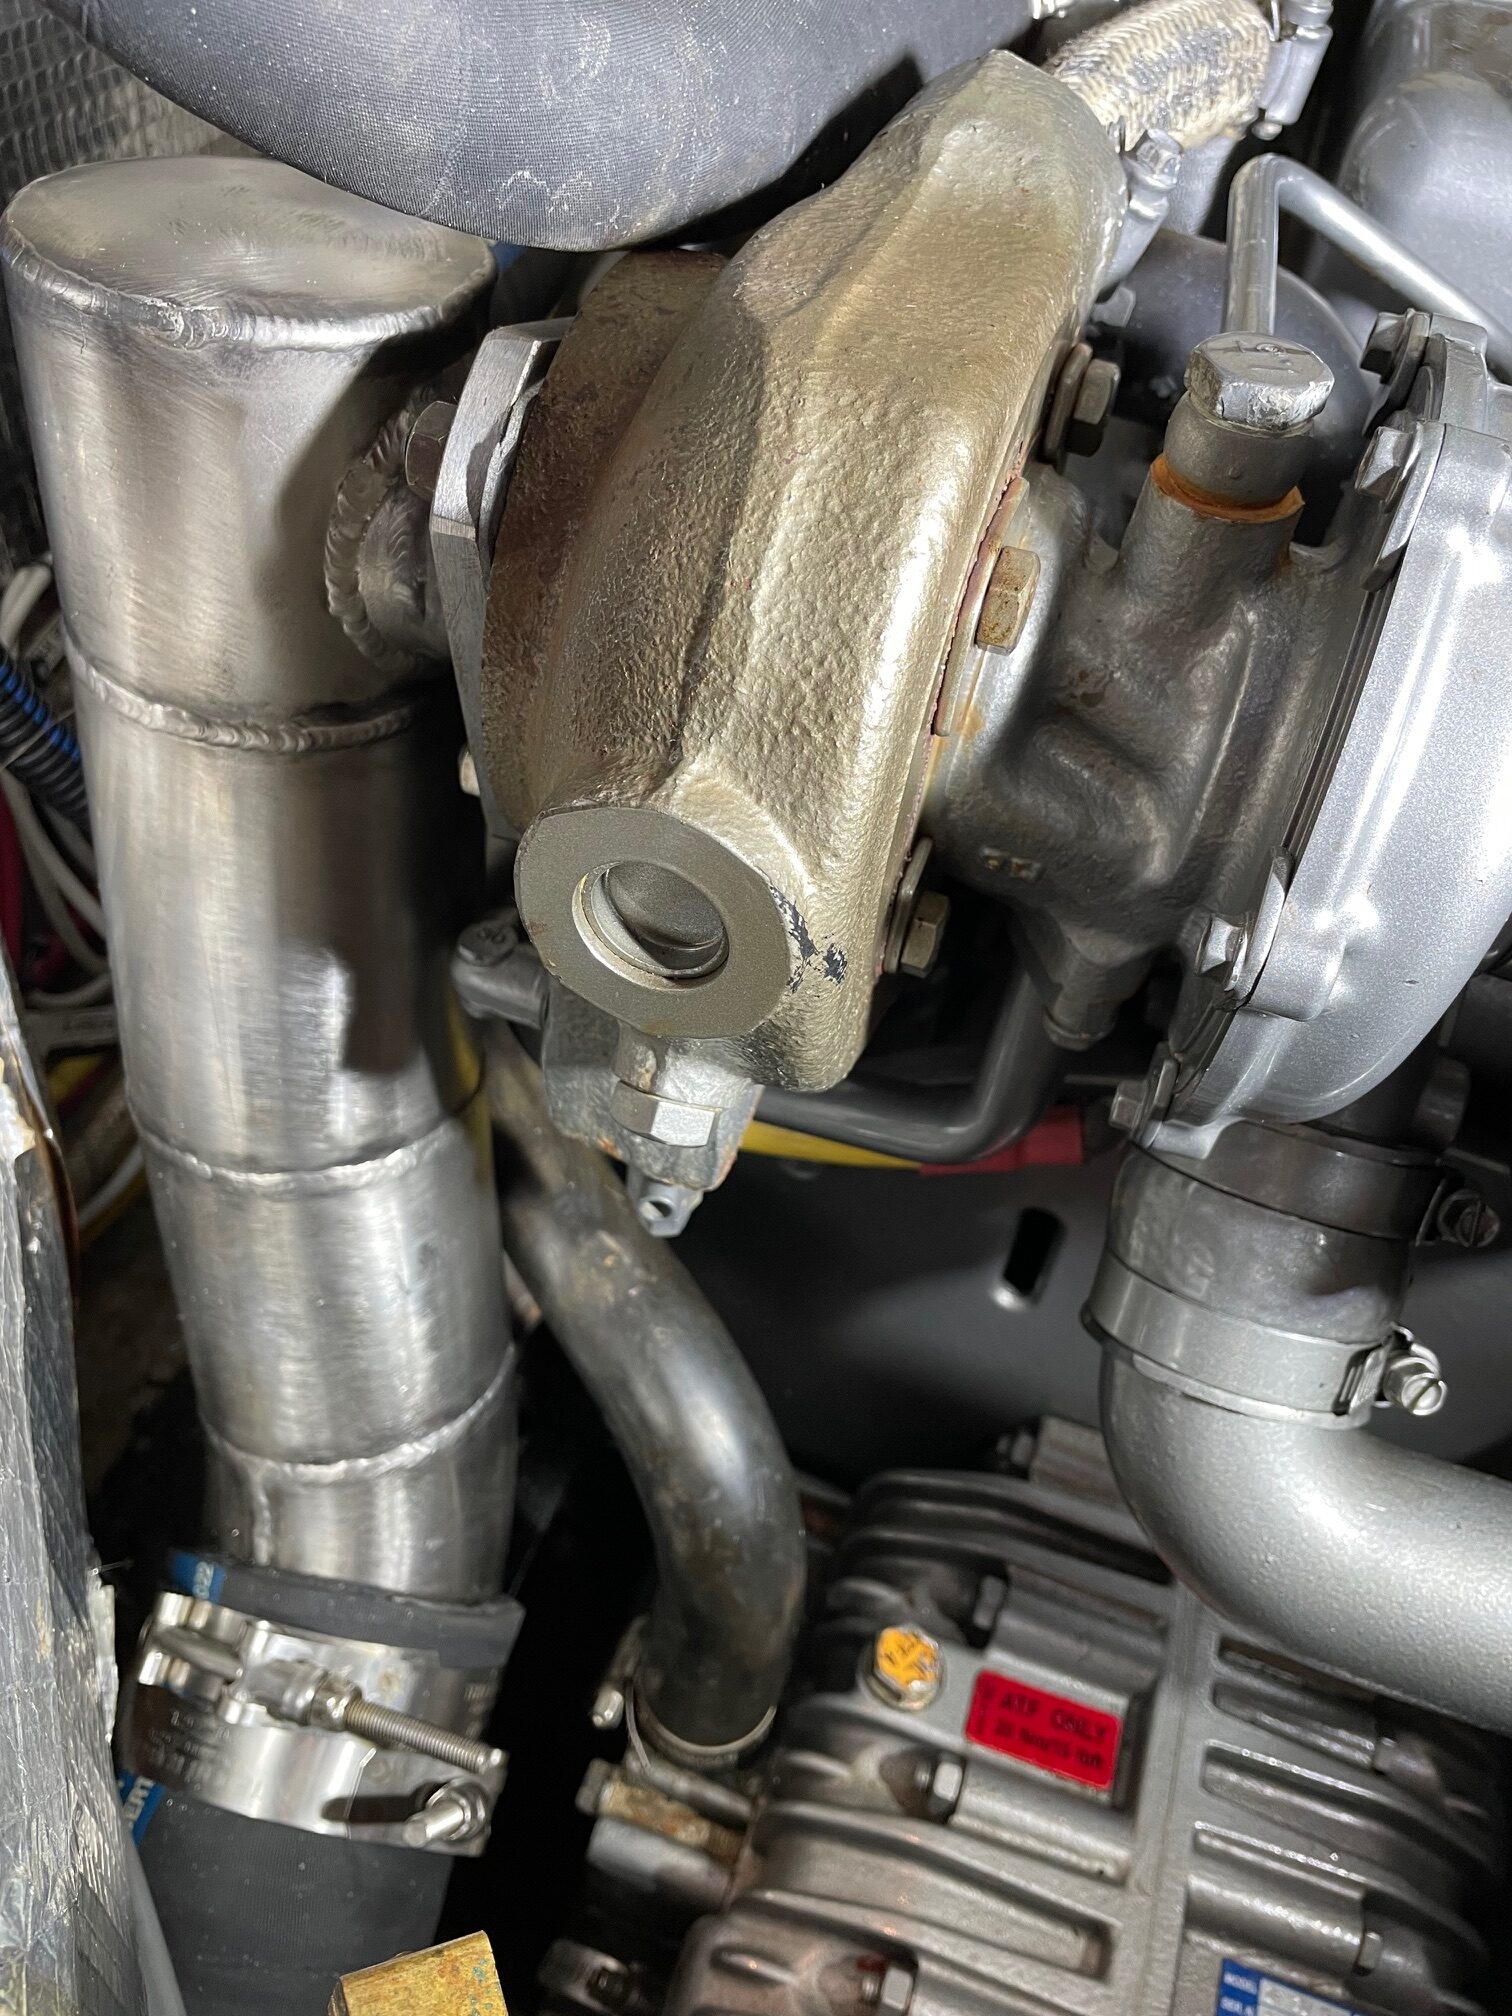
I delivered the old part to National Marine Exhaust (Marysville, WA) for them to duplicate. A week later I had the new exhaust elbow. It’s made of 316L (low carbon) stainless steel. Something they did different was to run the inner pipe (for exhaust) all the way to the output end. In the original part, the inner pipe only went 6″ from the sea water inlet. I guess the new design would cool the hot exhaust gasses more before they are combined with the sea water at the beginning of the wet exhaust hose.
Installing the mixing elbow and new wet exhaust hose was a little harder than removal. I chose a 30 deg F day so the boat inside temperature was in the 40s. The first thing I did was to use bronze wool on the surface where the elbow attaches to the engine exhaust manifold to make it smooth for the fiber gasket. The Trident-Flex is anything but flexible, especially when cold. I warmed it up a bit using a heat gun, but it was still a struggle trying to bend it while fitting the ends onto the muffler and exhaust elbow. After a few attempts, I decided it would be easier to attach the hose first to the muffler using the 2 heavy duty ss hose clamps, then attach the other end of the hose to the mixing elbow, then attach the mixing elbow to the engine while bending the hose (the hard part). Eventually it all went back together. The final step was to run the engine to check for any leaks.
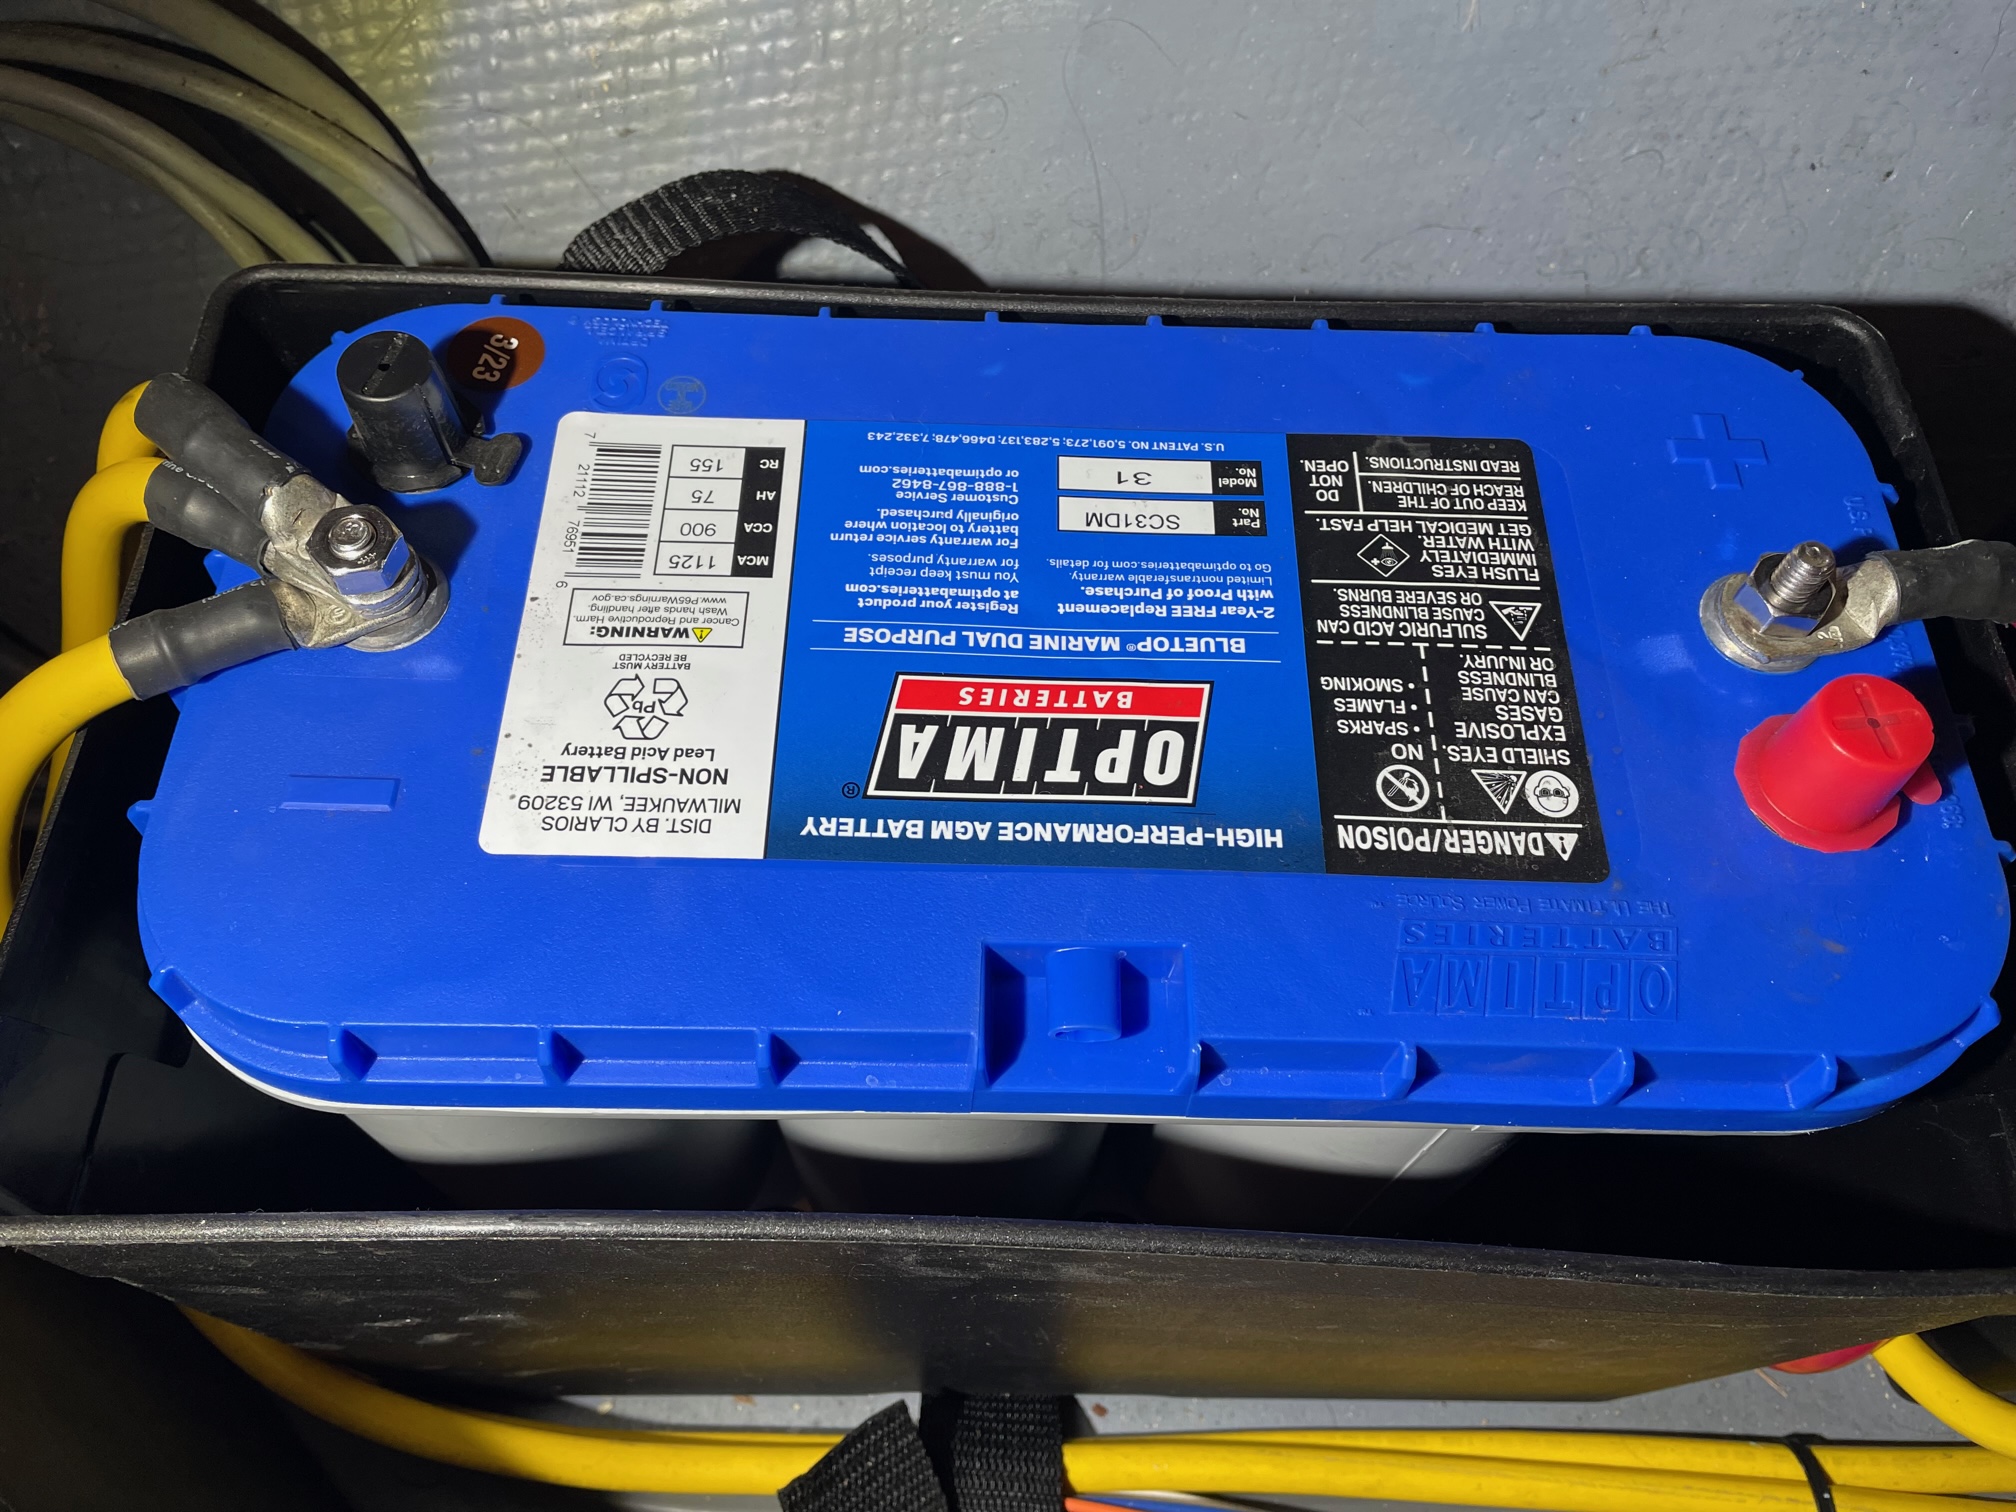
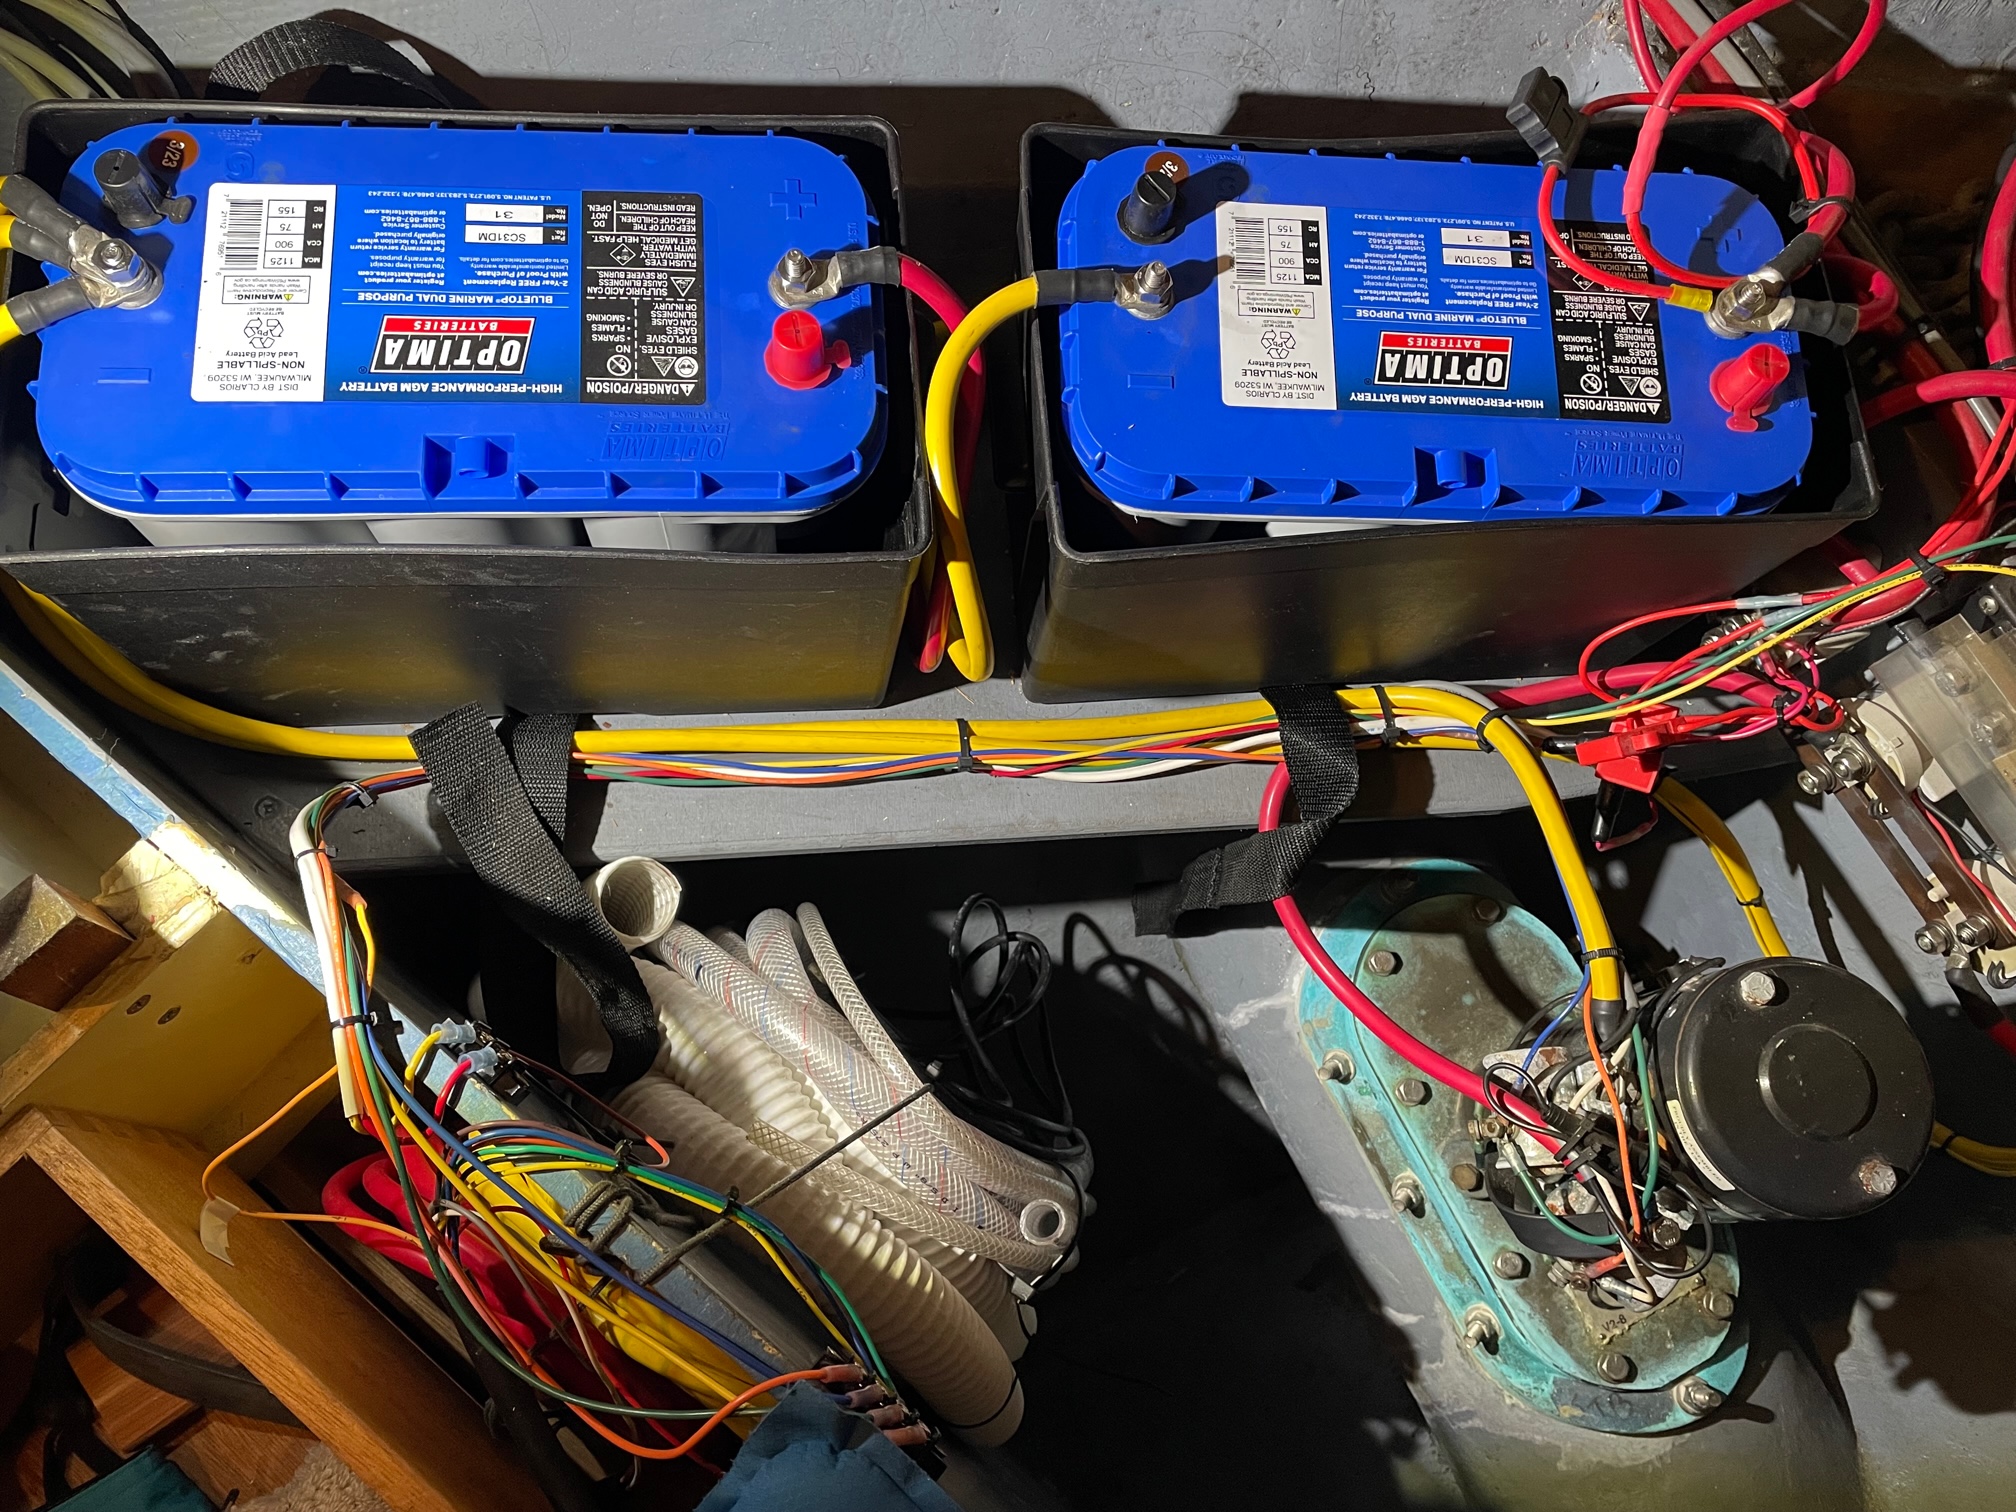
There are 2 deep cycle batteries in the v-berth that provide power to the bow thruster and anchor windlass. They are 20 years old and I’ve been meaning to replace them for several years, but they were still pulling up the anchor and running the thruster. I did notice the bow thruster would get weaker if I used it for more than 30 seconds, but I tend to not rely on it when getting into and out of the slip, and 15 seconds is more than adequate. But this summer we’re planning on a 2 week trip where there will be lots of anchoring, so I thought now would be a good time to replace them.
I decided on replacing them with the same brand–Optima AGM (blue top) with 900 CCA. The old ones were actually yellow top, which are not the “marine purpose” type but the only difference I could see is the blue top has the optional studs for wire connectors vs just the lugs.
The 2 batteries are parallel connected, so total AHrs is 150. All wires and crimps looked fine so it was an easy replacement. These batteries get charged through a Balmar Digital Duo Charge connected to the House bank. There’s never been a way to monitor these batteries, so if the Balmar charger ever failed, I wouldn’t know it until it was too late and could risk ruining the batteries. A simple voltage monitor with alarm would be a good addition.
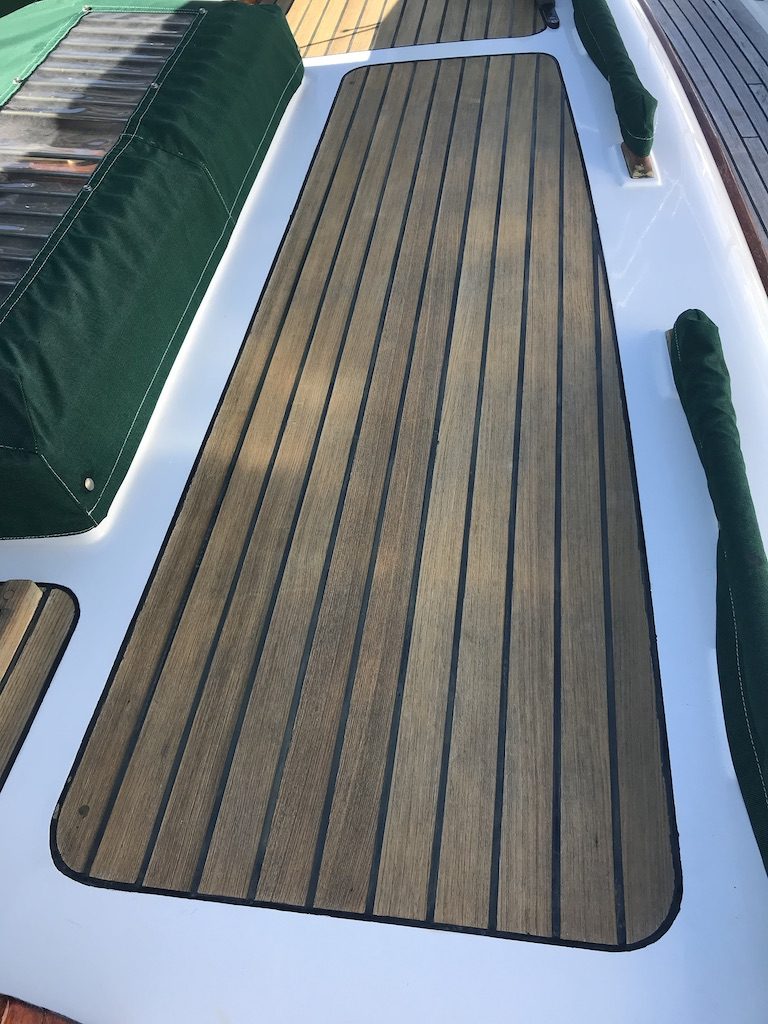
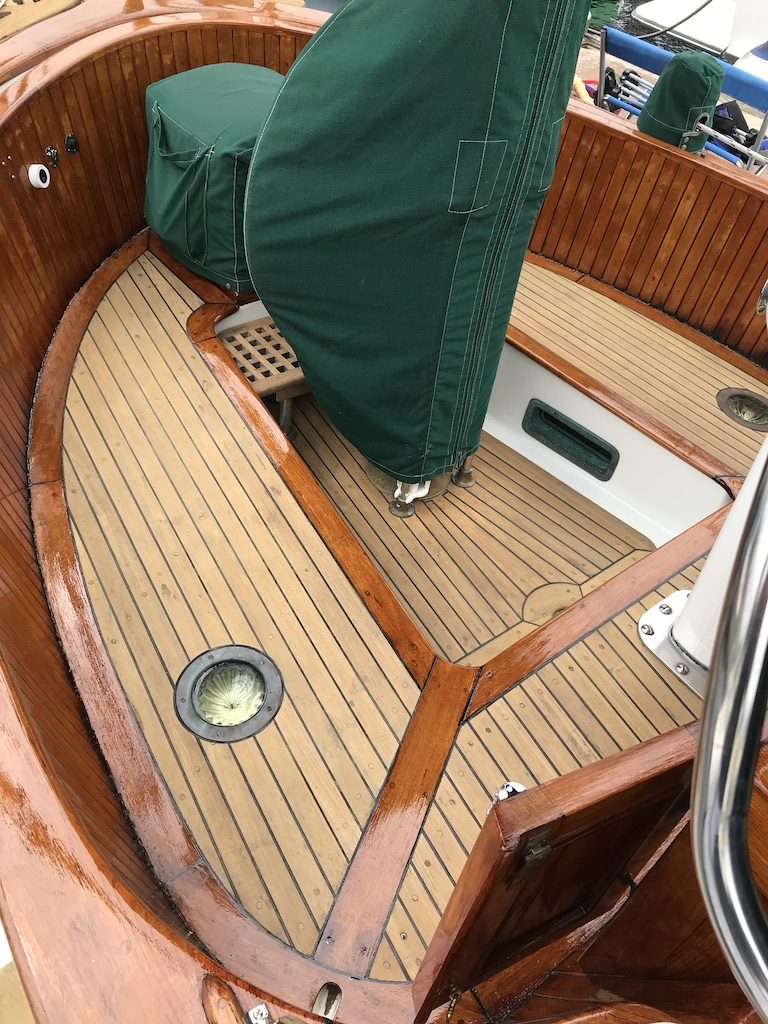
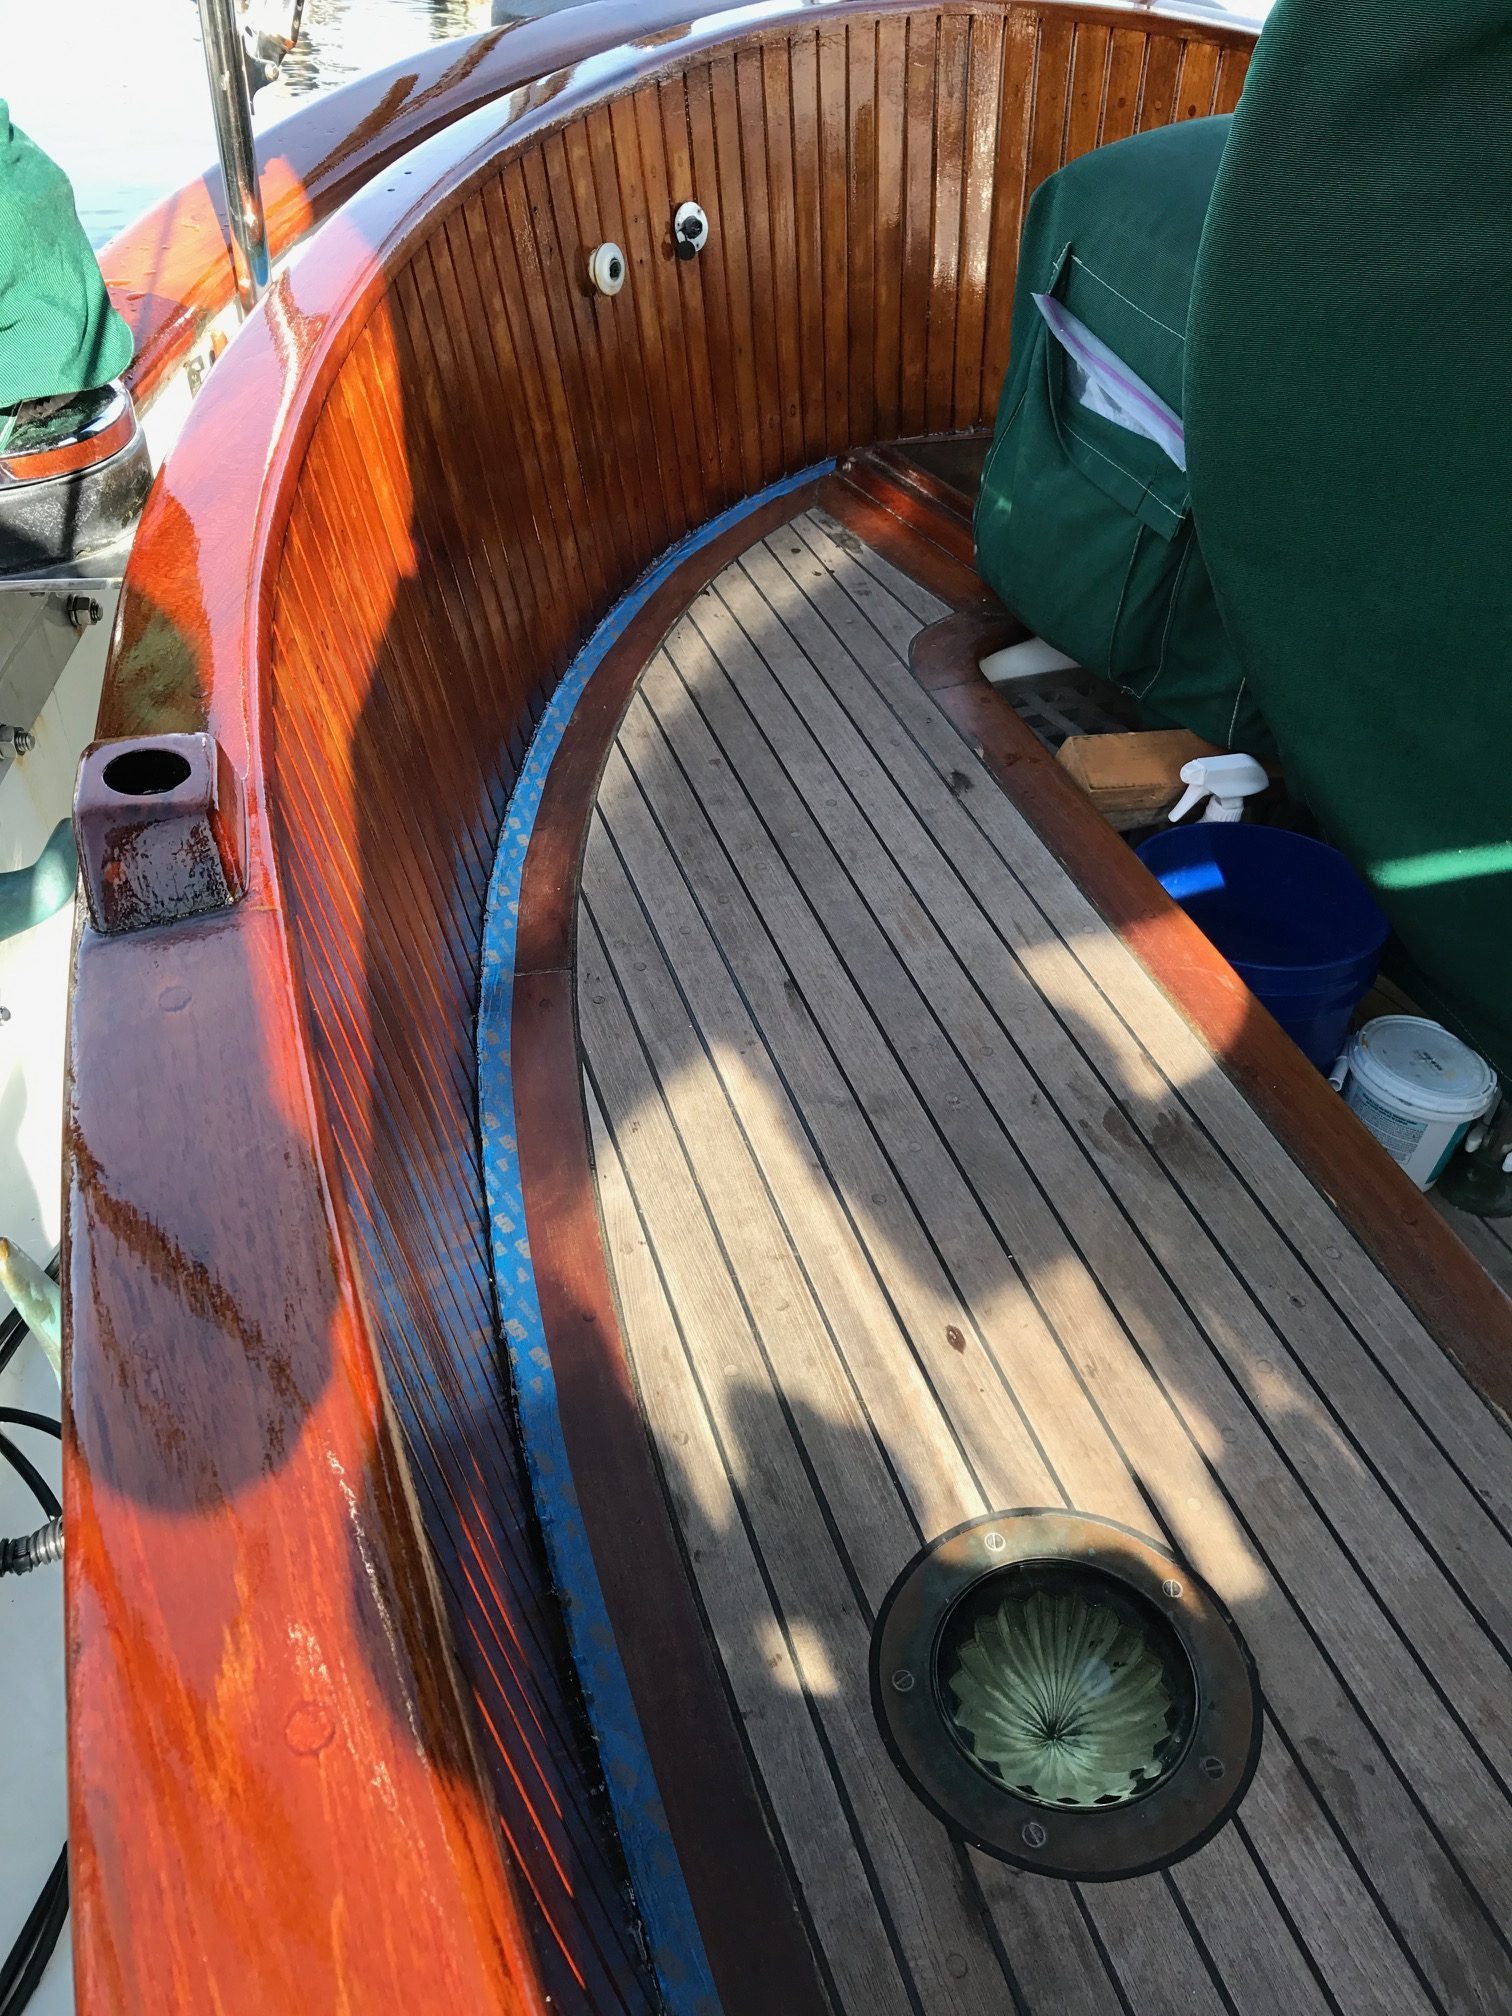
I’ve always let my teak decks go to their natural grey color. A lot of boats with 36 year old teak are ripping up the teak planks and replacing it with low maintenance finishing such as Awlgrip Nonskid. Usually the reasons are because the teak has worn thin from age, scrubbing and bleaching or the deck is beginning to leak. I love the look and feel of teak decks and am starting to worry about the remaining life of the teak on Apropos, so I decided to take some action. First of all, I believe there is plenty of thickness to the teak planks on Apropos, and I don’t know of any leaks in the decks. I figured since the boat sat covered on the hard in arid San Diego for 12 years (by the previous owner), the teak hasn’t aged as much as most boats the same age. Plus I’ve been careful about not scrubbing them with stiff-bristle brushes, and have never pressure washed them. I also believe the best shape they were in was during our trip where they were constantly bathed in saltwater, which is a good natural cleaner for teak.
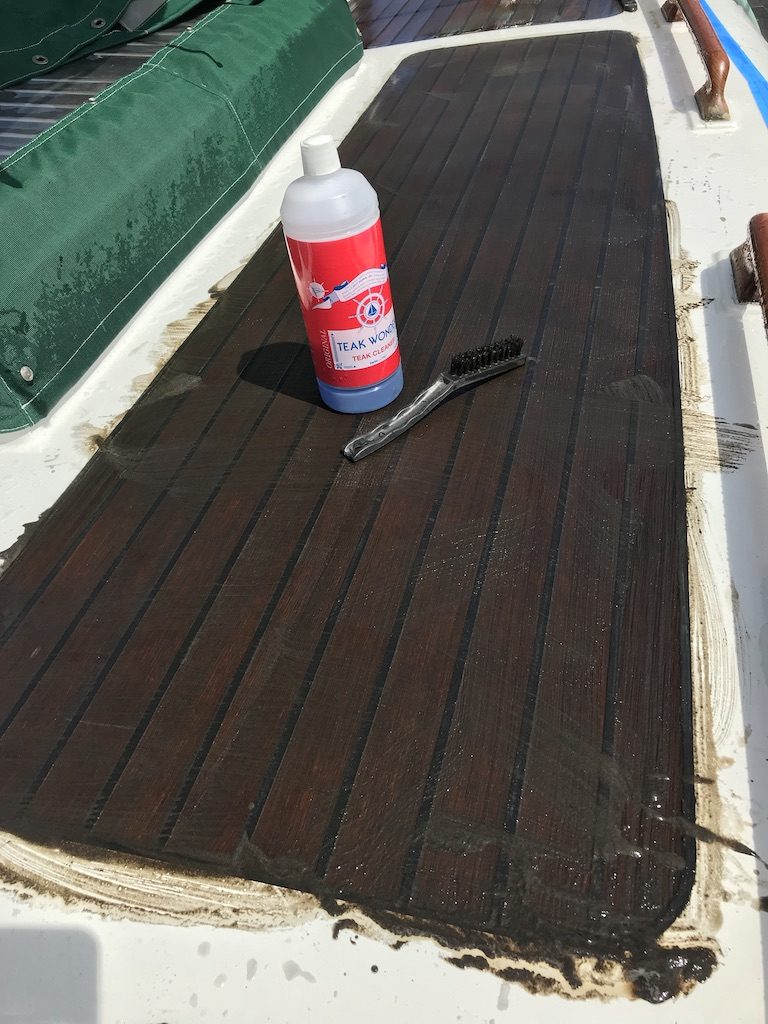
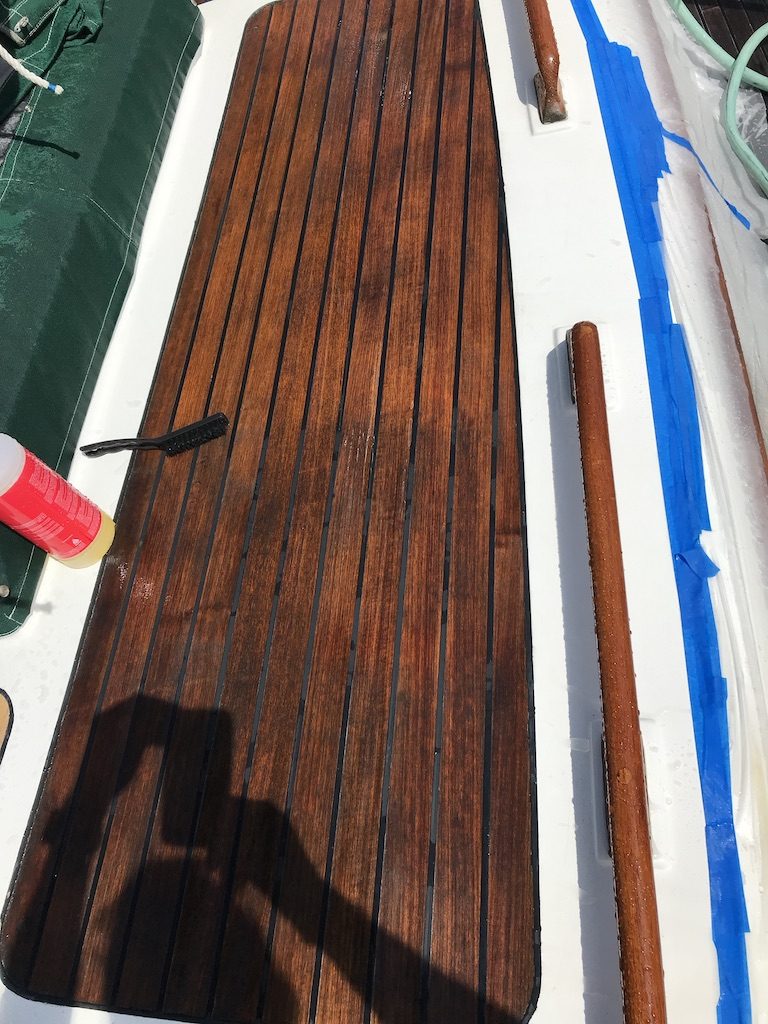
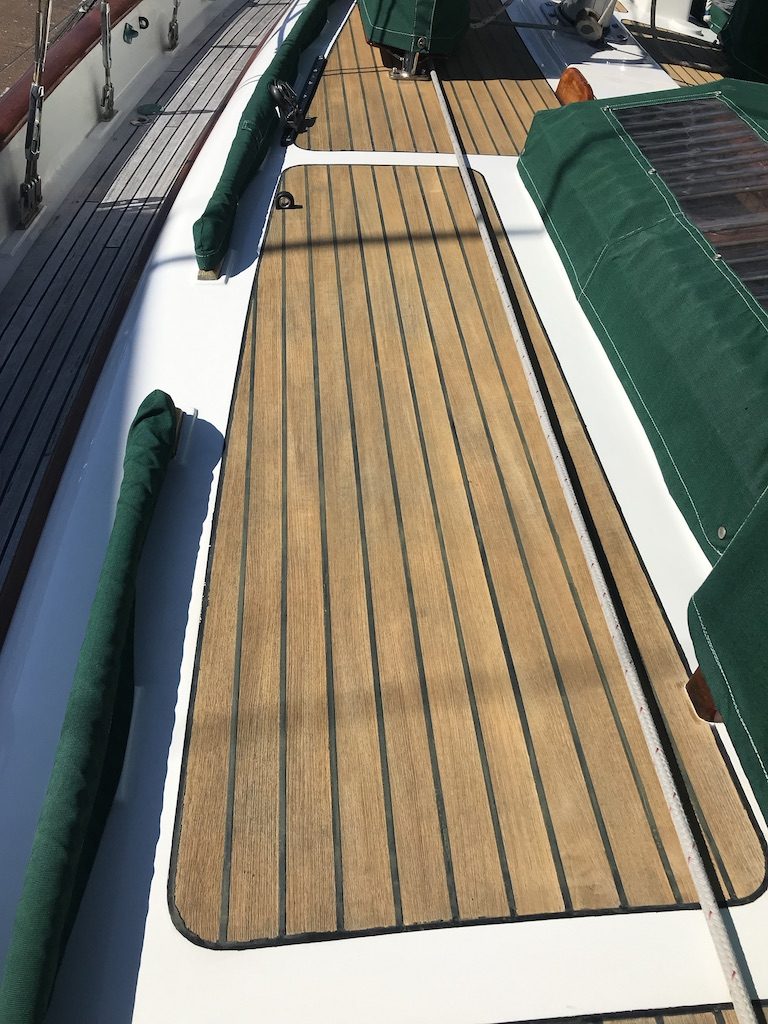
I’ve been hearing and reading about a product called Semco that is used to seal teak decks and thought I’d give it a try. Initially I was only going to treat a small part of the boat–the cockpit, but I liked the results so much that I ended up doing the entire boat. The procedure is to first clean the teak, then brush on 2 coats of Semco in the same day. After that, a seasonal coat should be all it takes to keep the teak looking a natural color. And more importantly, it should help preserve the teak without scrubbing.
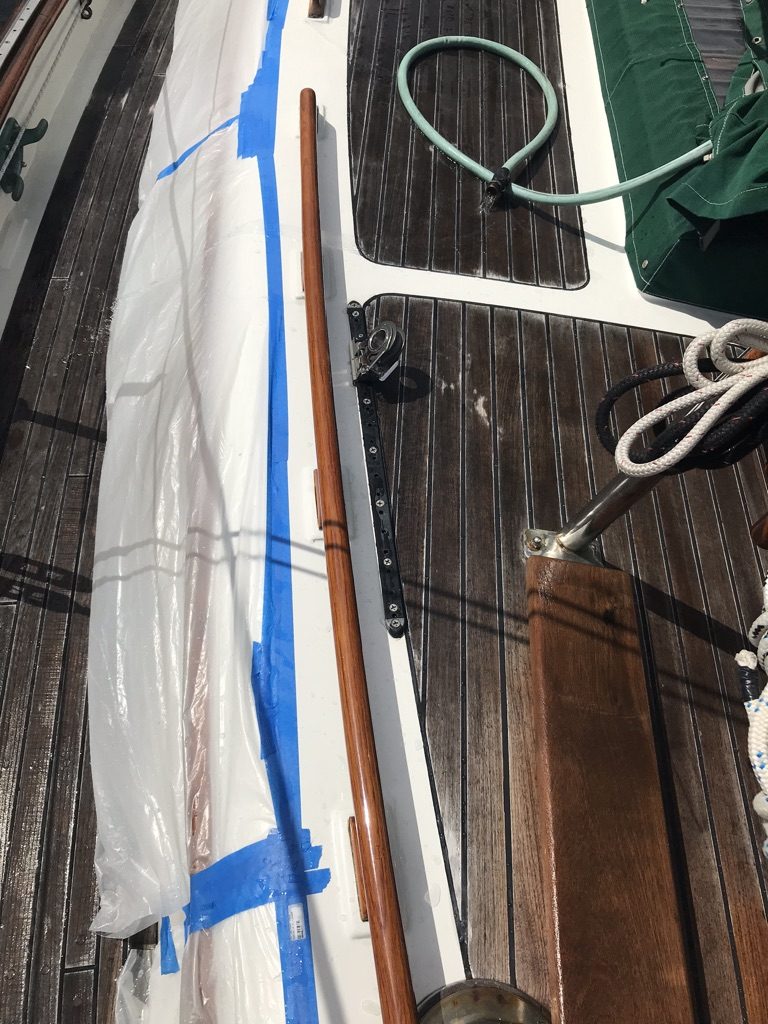
The cleaning is the worst part because it requires strong chemicals that could harm the deck if done incorrectly. There are several products for this and I chose Teak Wonder, which is applied in 2 steps. First is the Cleaner solution that is applied to a wet deck in small sections at a time, not allowing it to dry. I applied it from a squirt bottle and worked it into the wood with a soft nylon brush, scrubbing against the grain of the teak. I allowed it to work for a few minutes before hosing it off. It must take off a very thin layer of wood along with the dirt because it’s pretty grimy before hosing it off with lots of fresh water. The second step is to apply a brightener and gently brush it in, letting it sit for a few minutes before hosing off. I was careful about not letting the cleaning and brightening chemicals to come in contact with the brightwork by masking it with plastic. This cleaning is definitely something I wouldn’t want to do every season. If it works as advertised, I should only have to apply the sealer from here on.
Applying the Semco sealer is very easy–just brush it on with a foam brush. The first coat seemed to soak in more of the sealer, which has a natural pigment and is the consistency of water. The instructions recommended applying 2 coats in the same day. After drying, the decks looked pretty good and appeared to be well sealed as water beaded up when sprayed on the deck.
Grey weathered look before cleaning & sealingApplying Teak Wonder CleanerProtecting newly treated brightwork from the cleaner & brightenerAfter applying Teak Wonder cleanerApplied the Teak Wonder brightener to the top half of this panelAfter cleaner and brightener and allowed to dryAfter 2 coats of Semco sealer (contrast to side-deck that was done later)
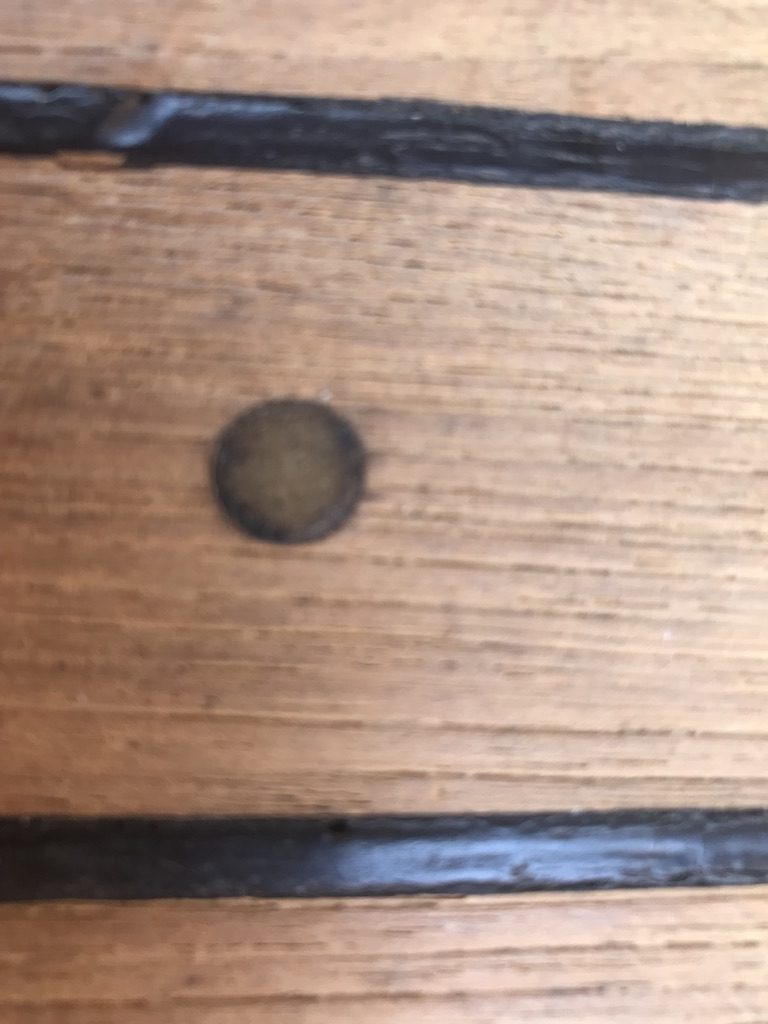
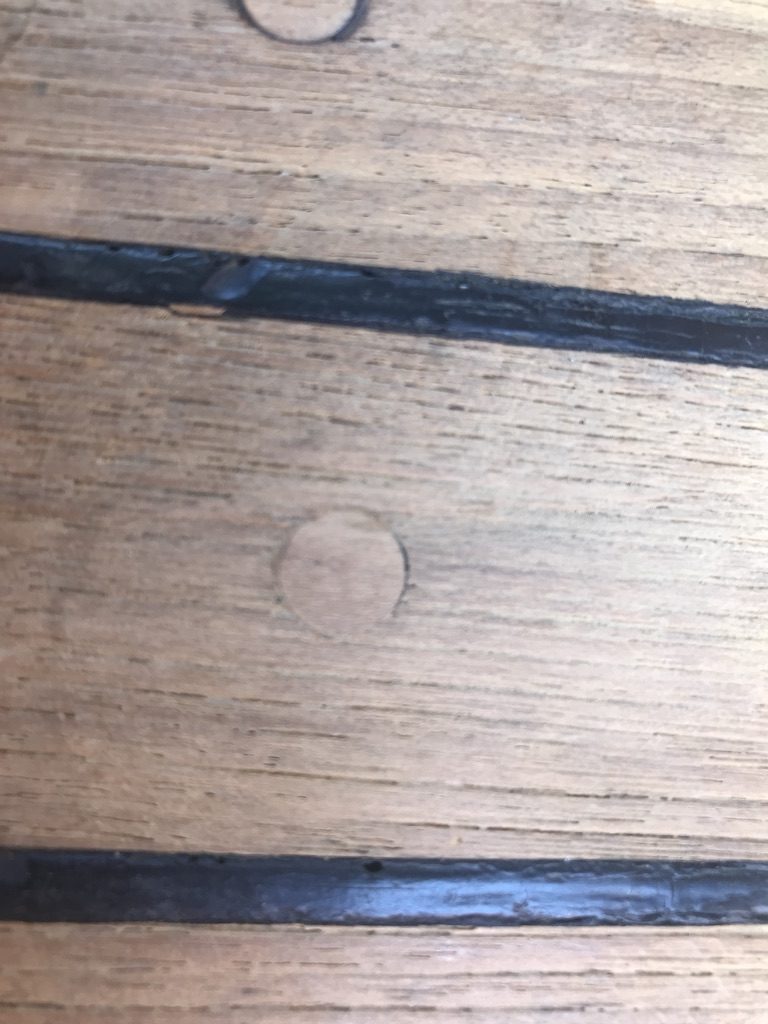
Teak Plug Replacement
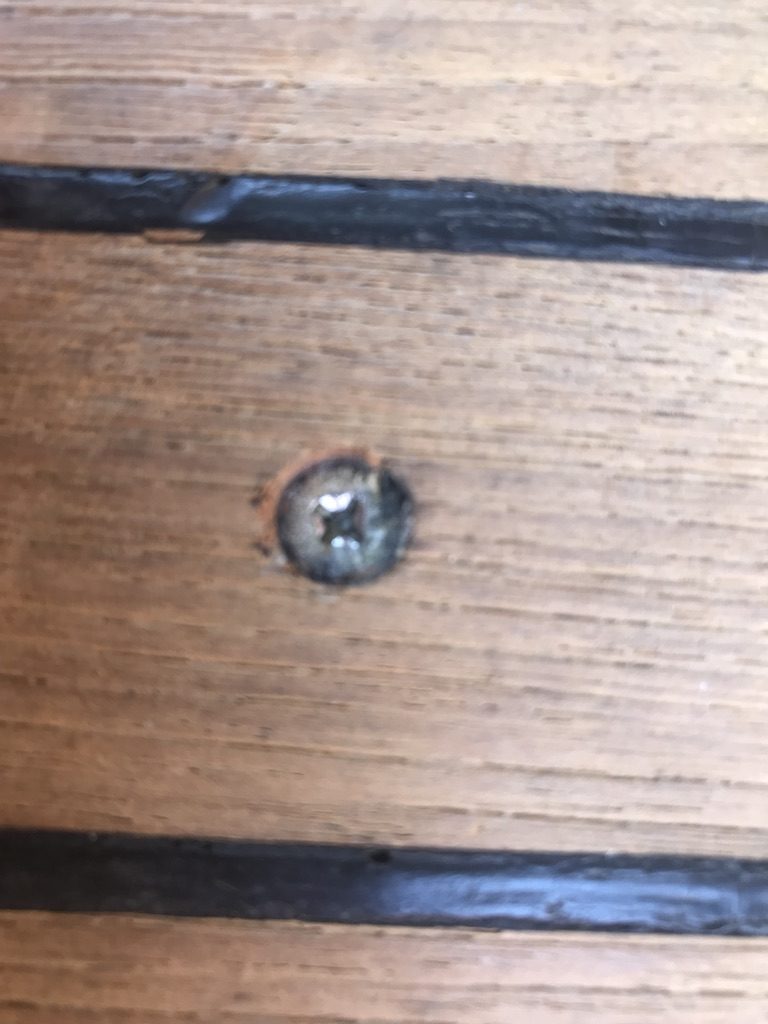
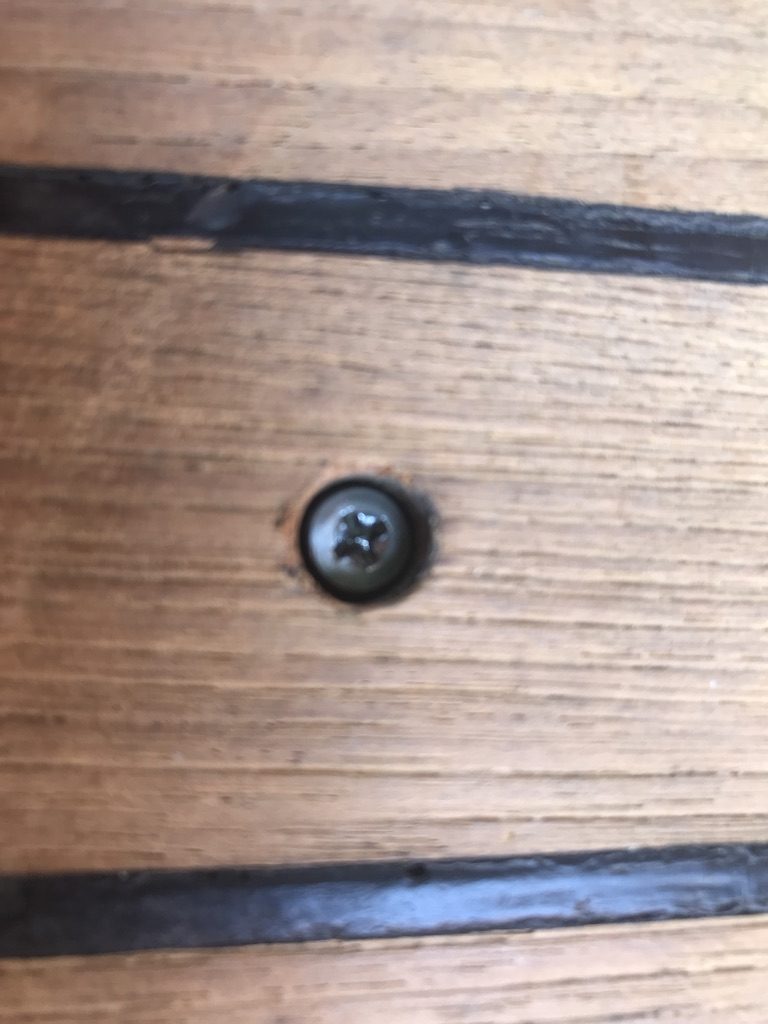
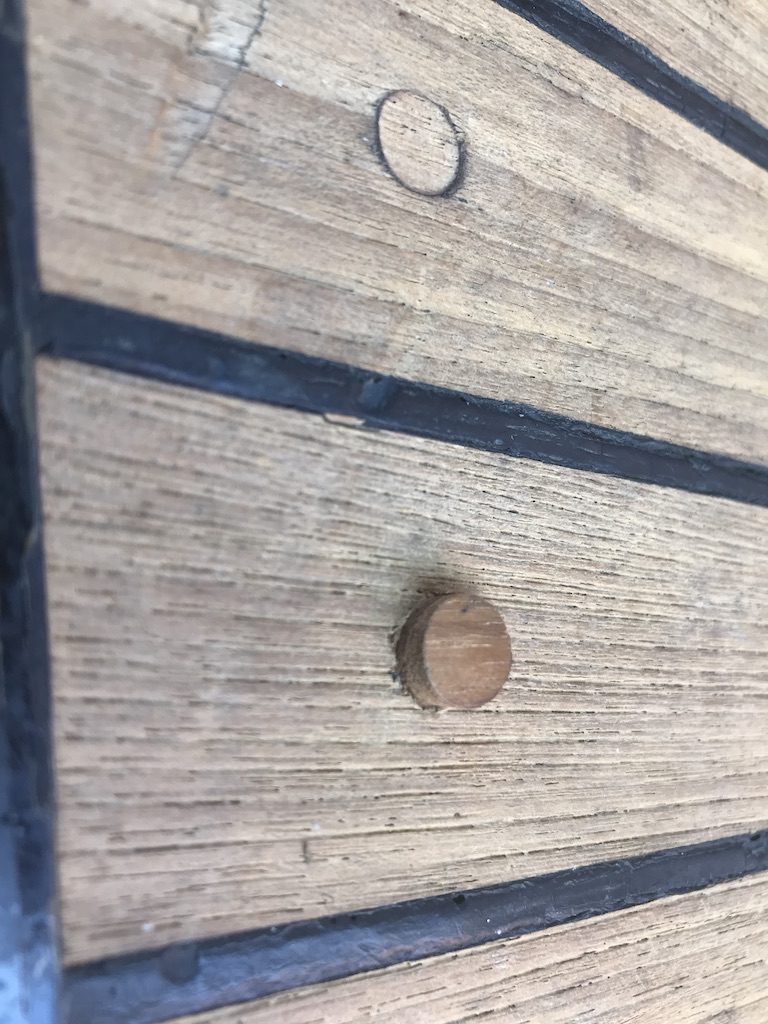
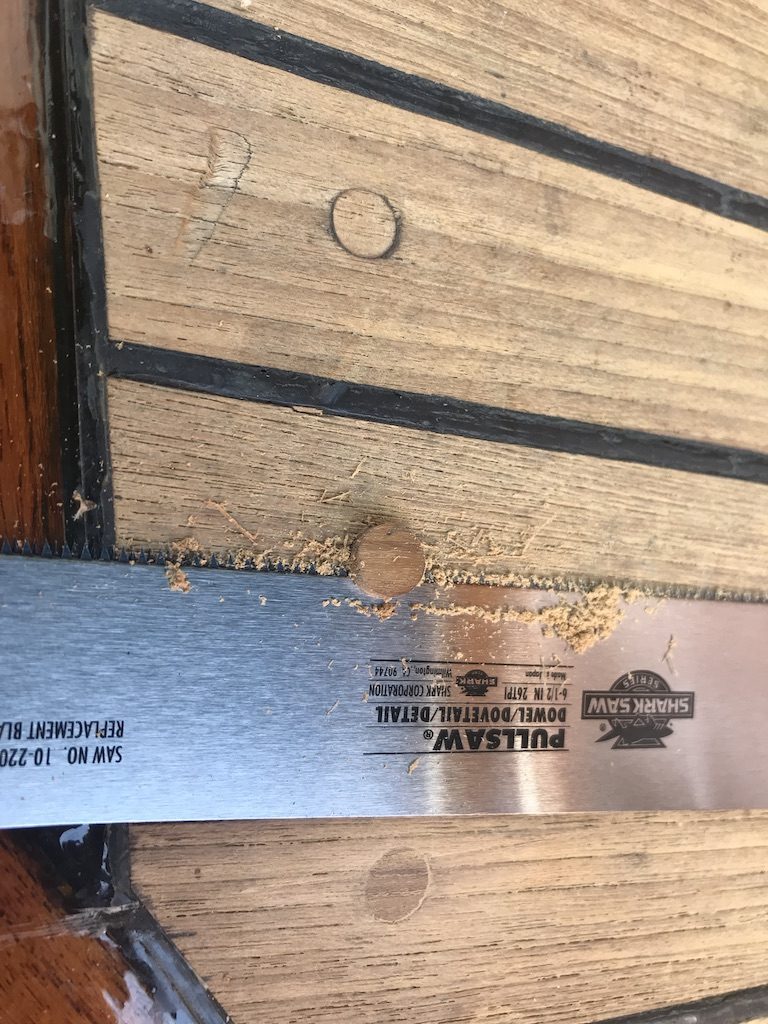
The cabin-top decking has no plugs so it must have been glued down, but the sidedecks and cockpit decking is all screwed down. Every now and then a teak plug, or bung, either falls out or wears thin. I recently went around the boat and replaced around 20 plugs. Here’s pics from one example:
This plug was filled with epoxy because it was too shallow for a teak plugAfter removing epoxy to expose screwAfter drilling a deeper hole and screwing in a shorter screwNew teak plug Cutting off excess with a flexible pullsawFinished after sanding
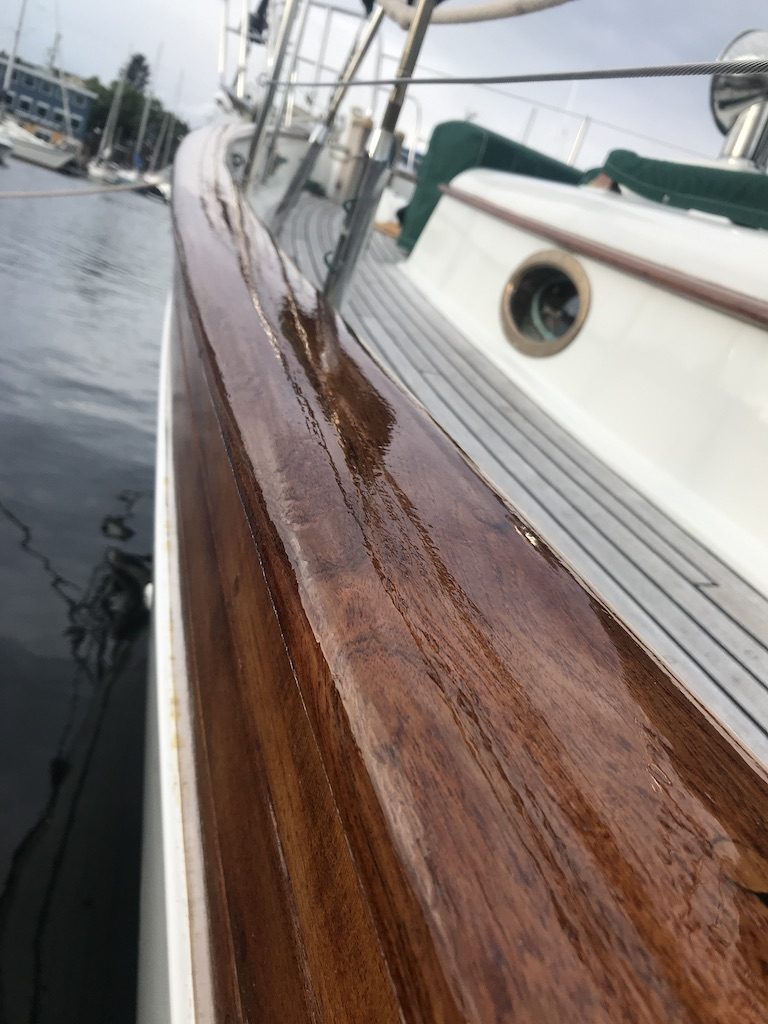
It took me 2 summers to restore all of the brightwork aboard Apropos by removing the old varnish and applying 7 coats of Awlwood MA Clear (varnish alternative). Some parts of the boat have gone 3 years and some 2 years since the new brightwork and it was holding up well, but starting to show minor wear and scratches (after all it is a boat and we have a dog). So I spent a couple of evenings and weekends lightly sanding and applying 2 refresher coats of Awlwood MA clear. It brought the shine back!
Cap rail after 2 refresher coats of Awlwood MA ClearCockpit Brightwork
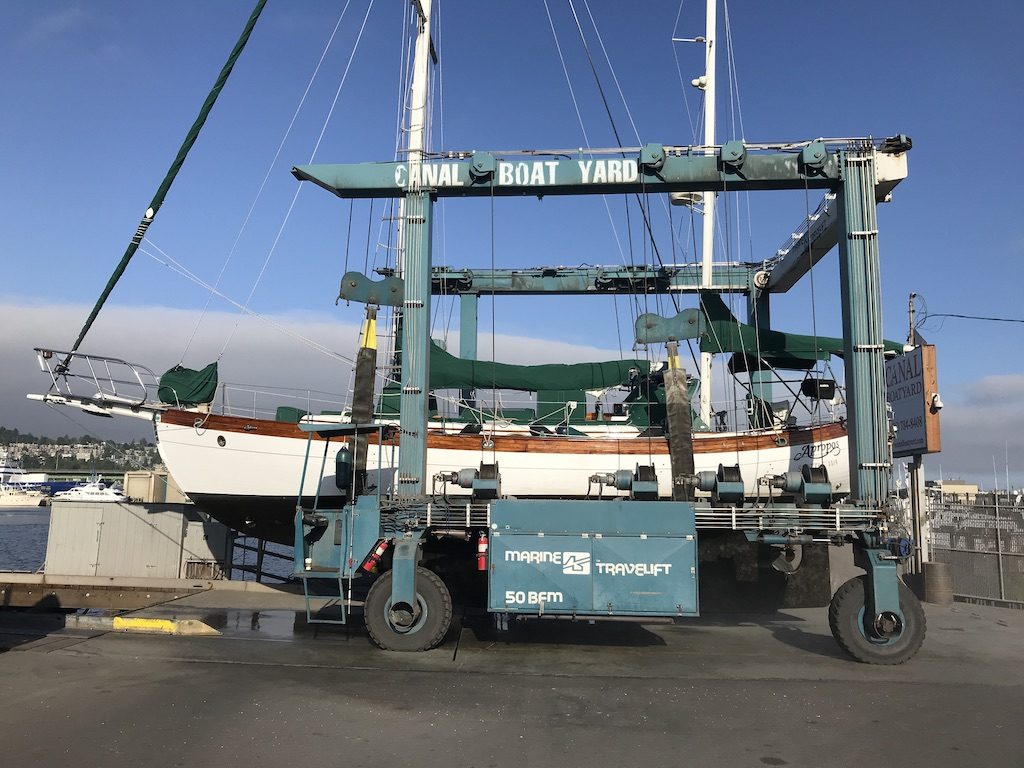
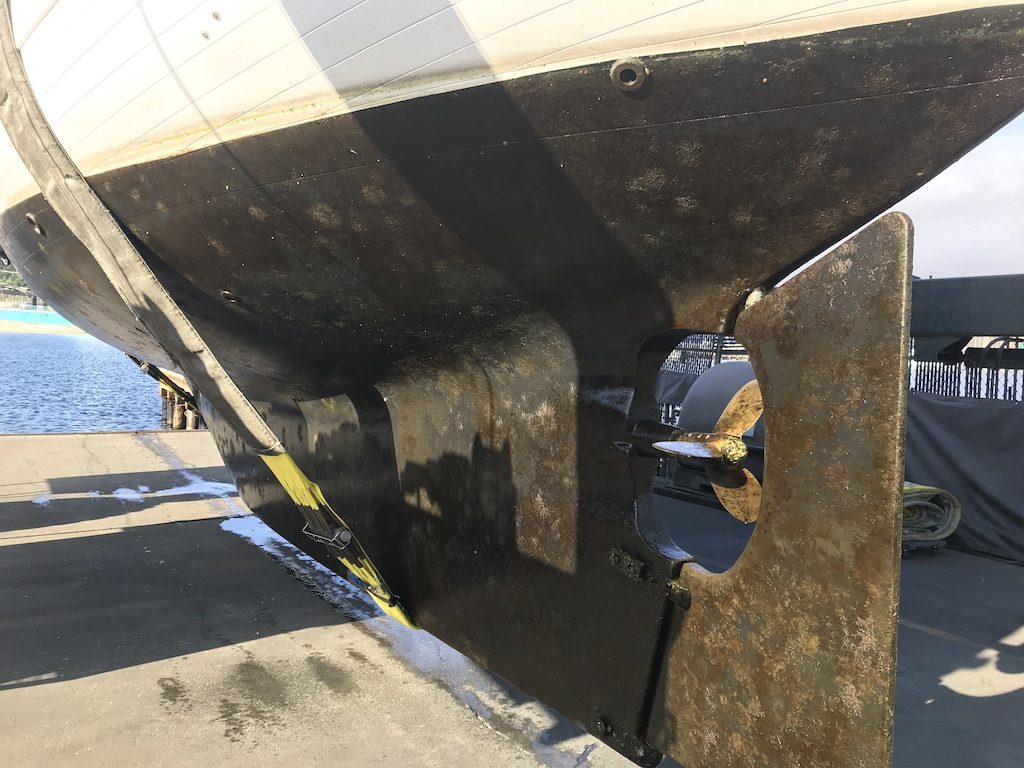
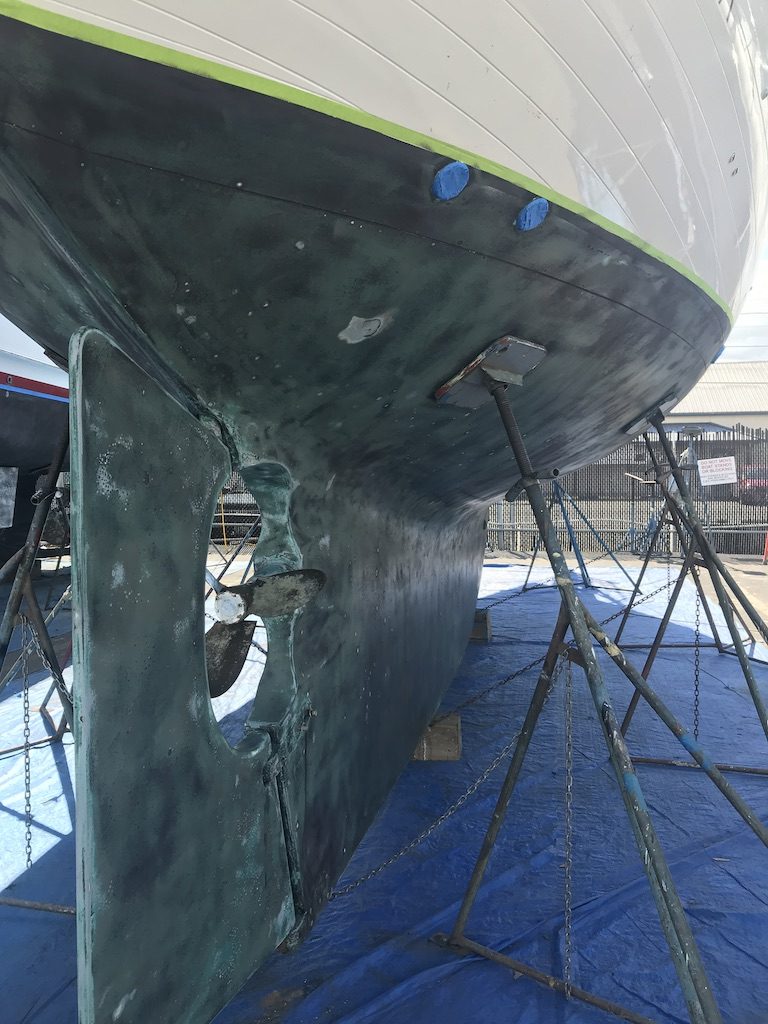
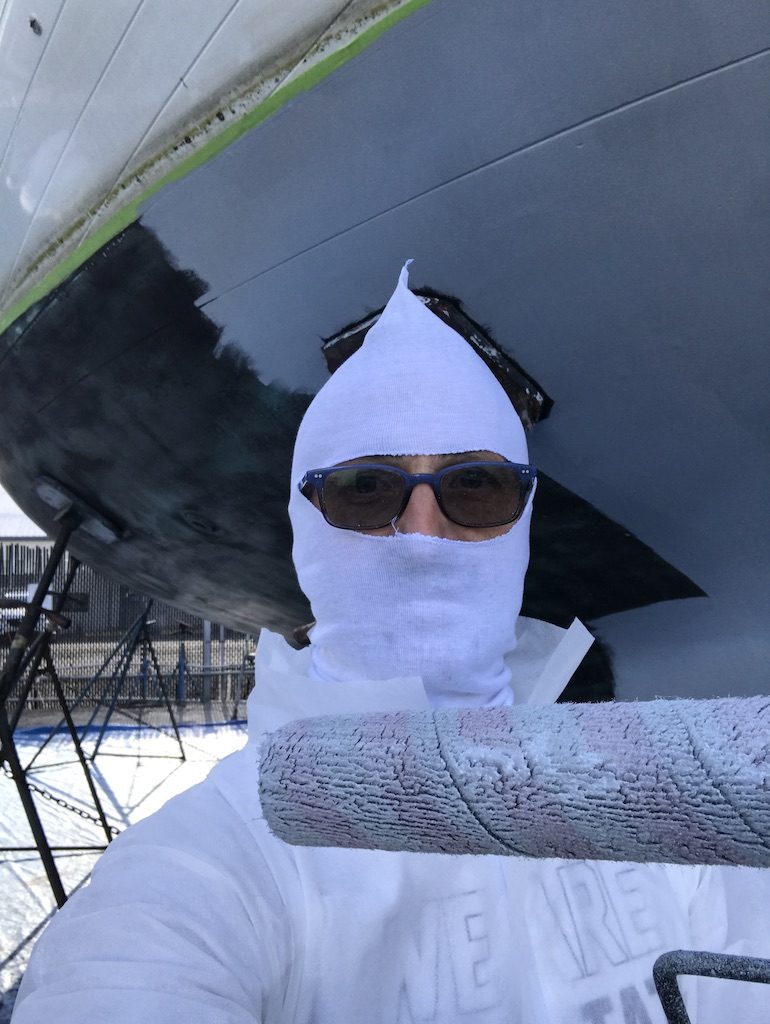
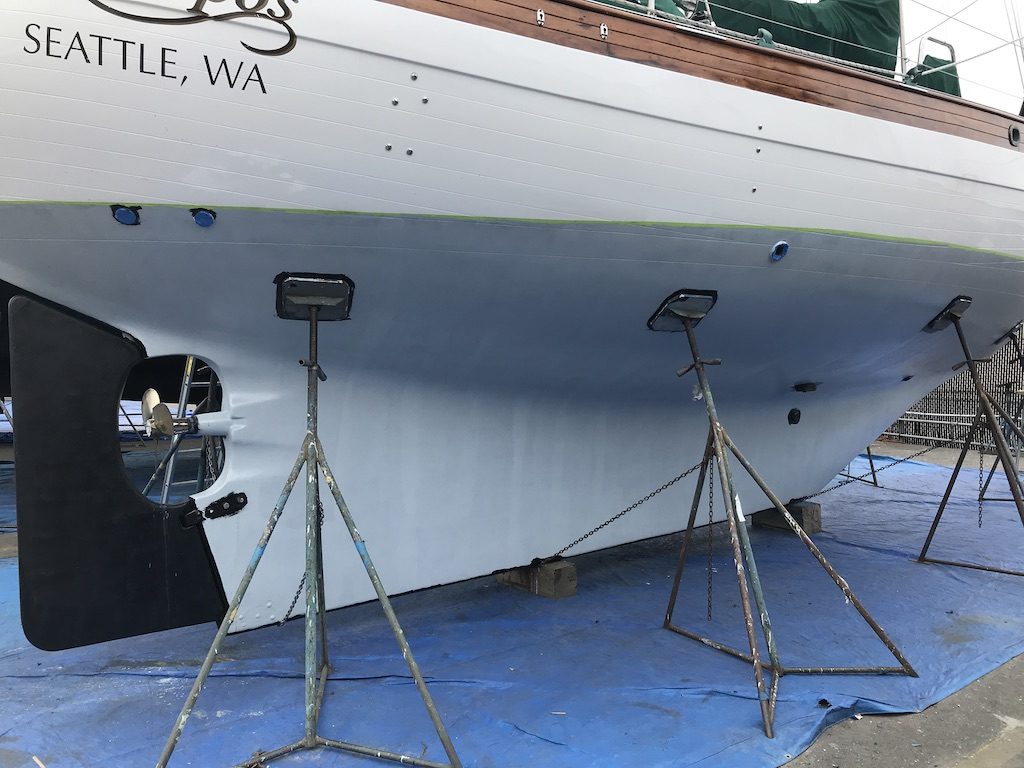
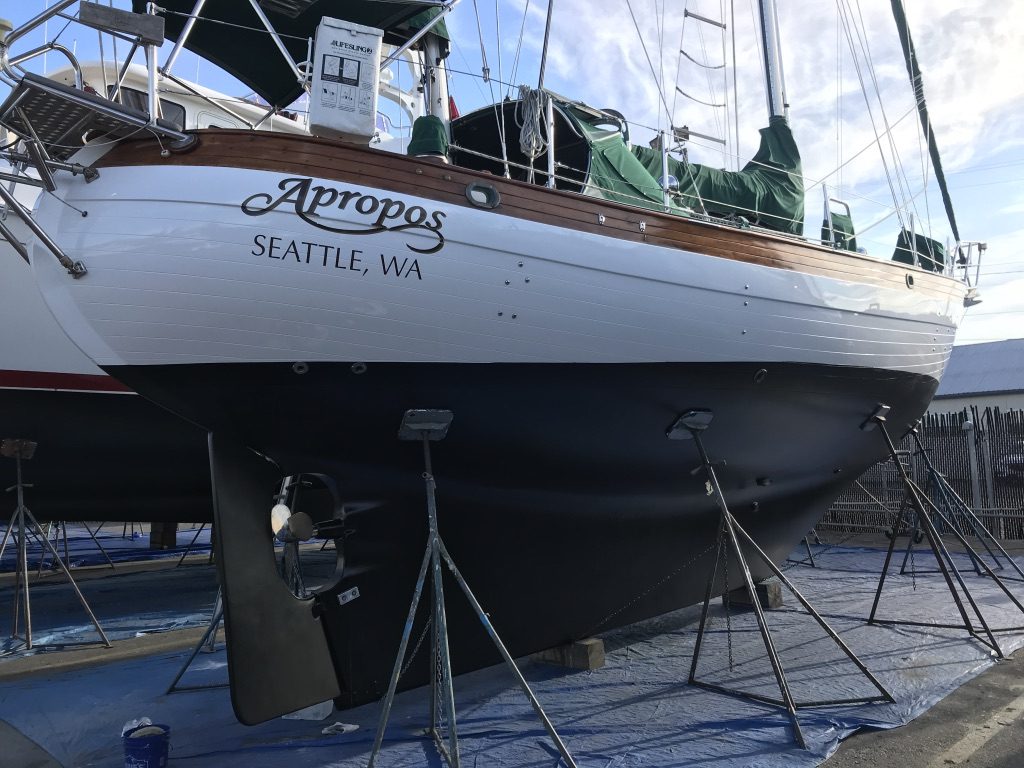
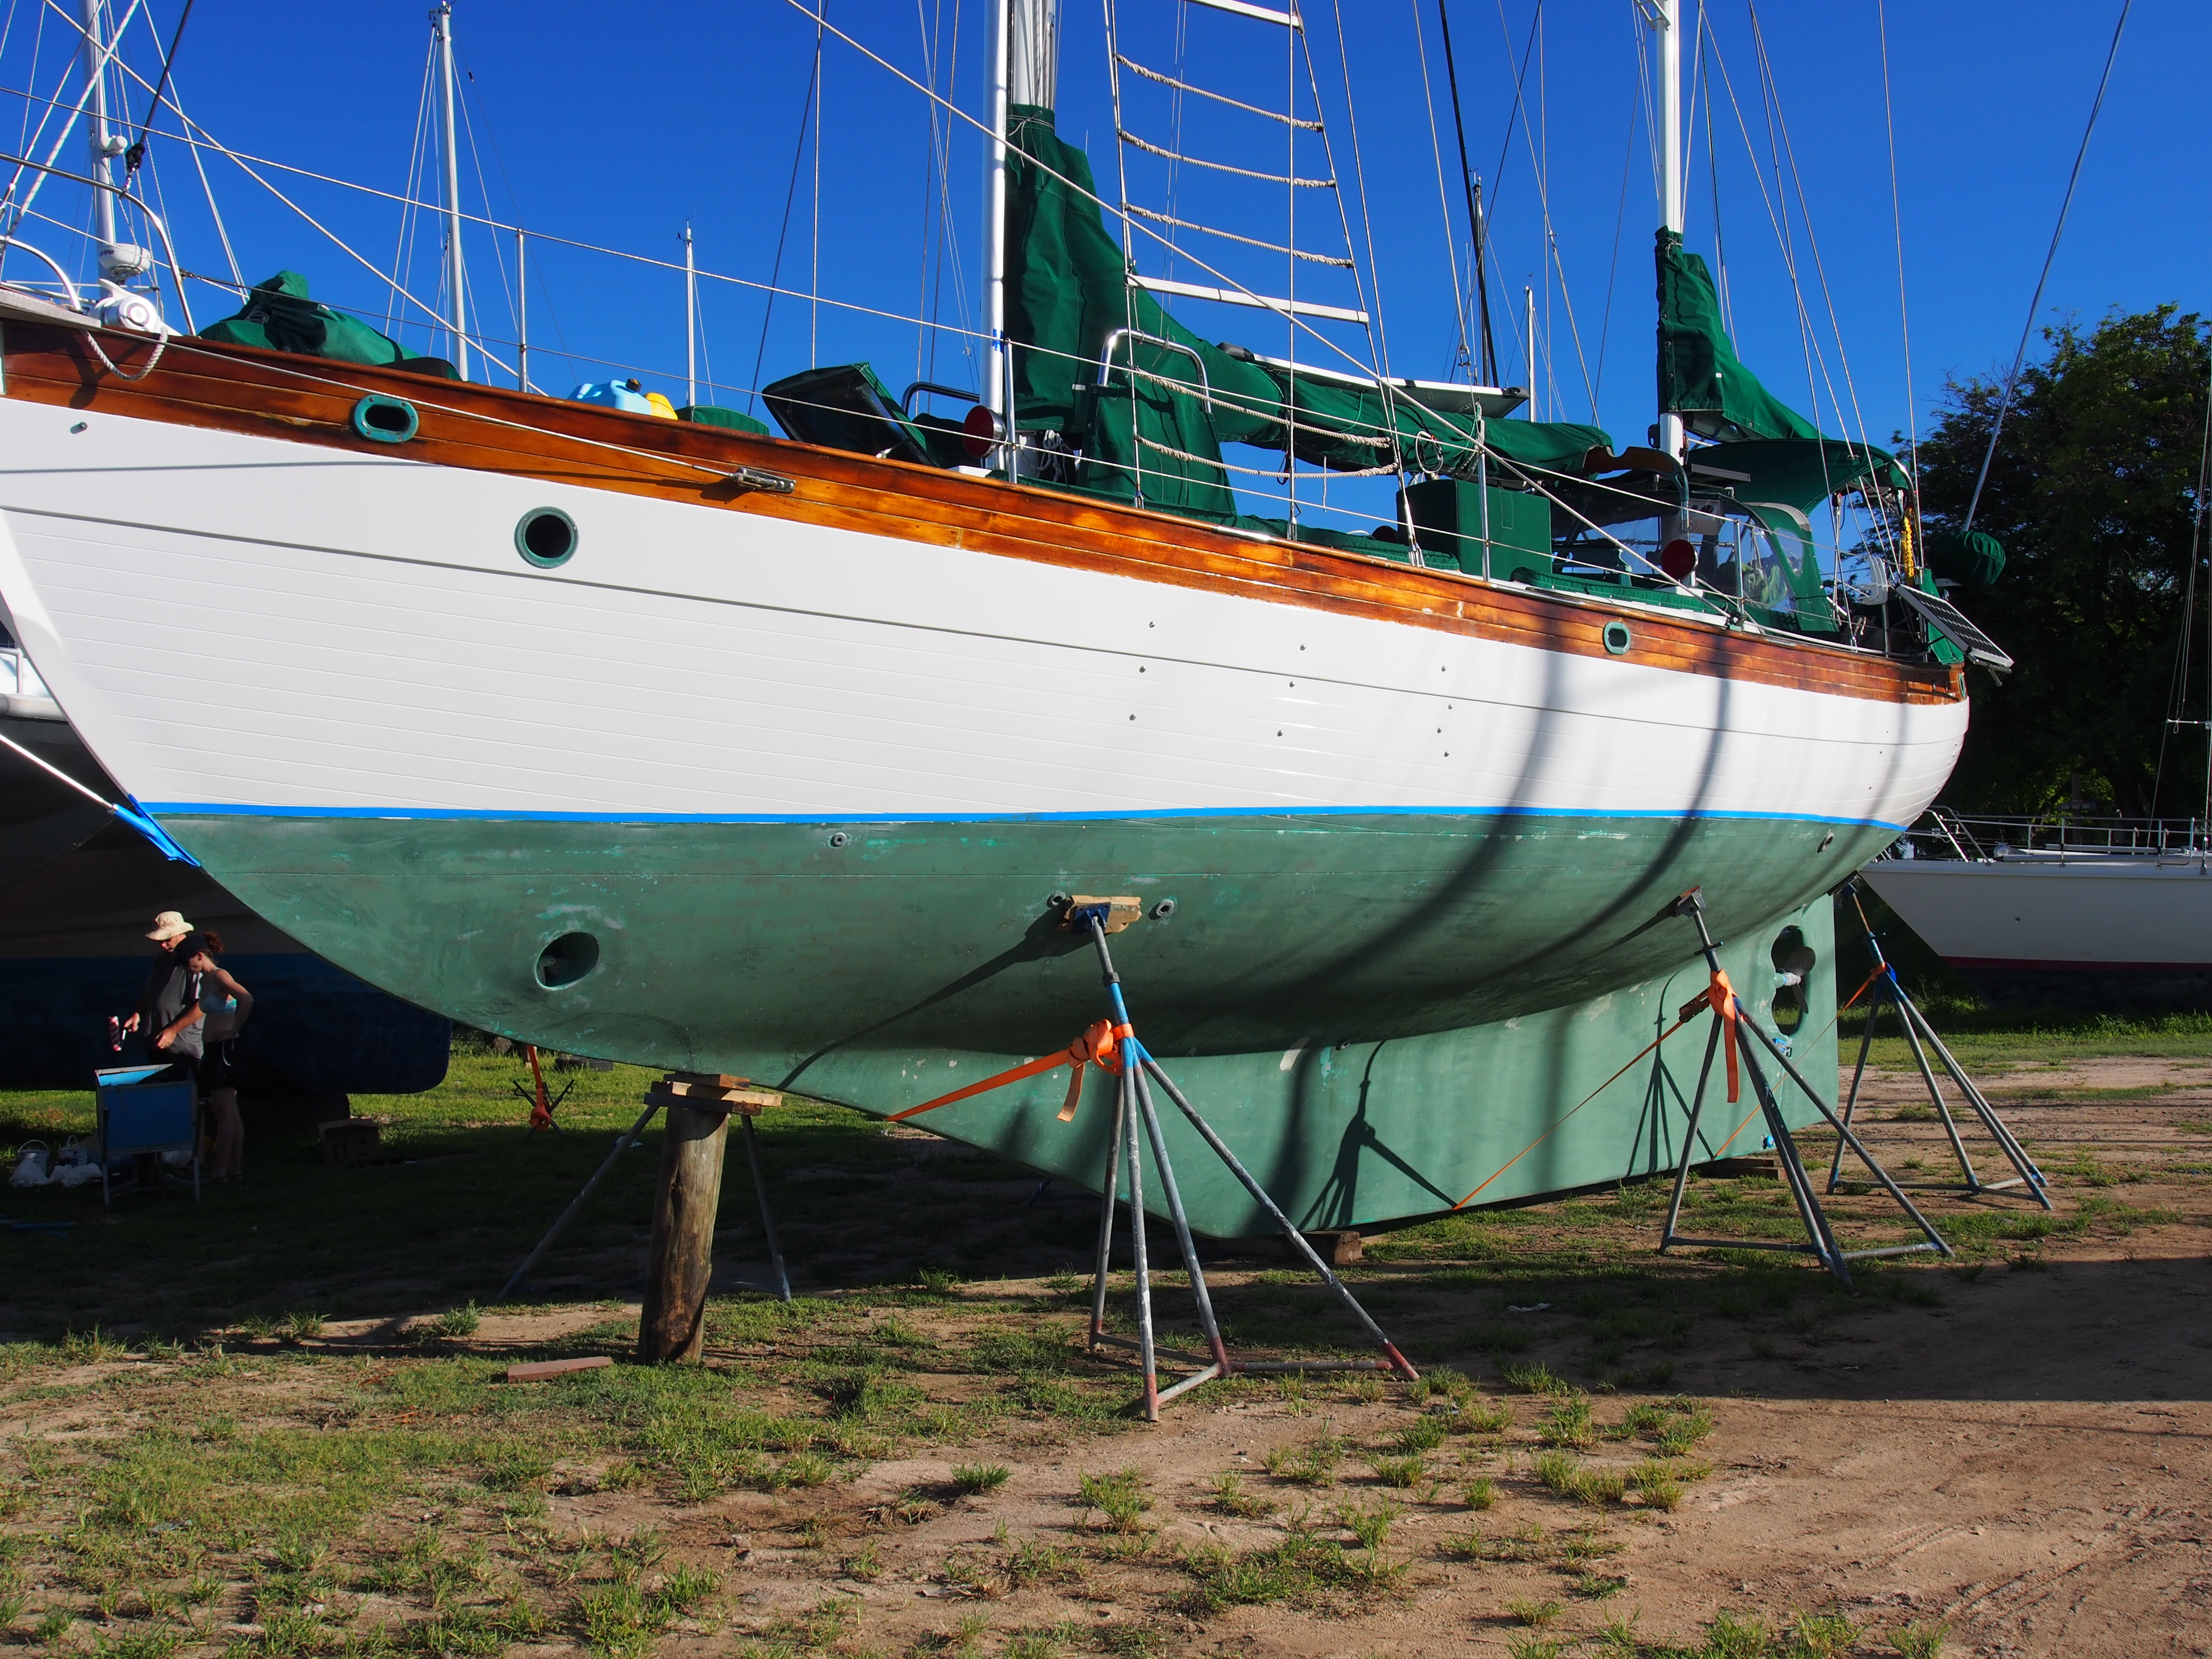
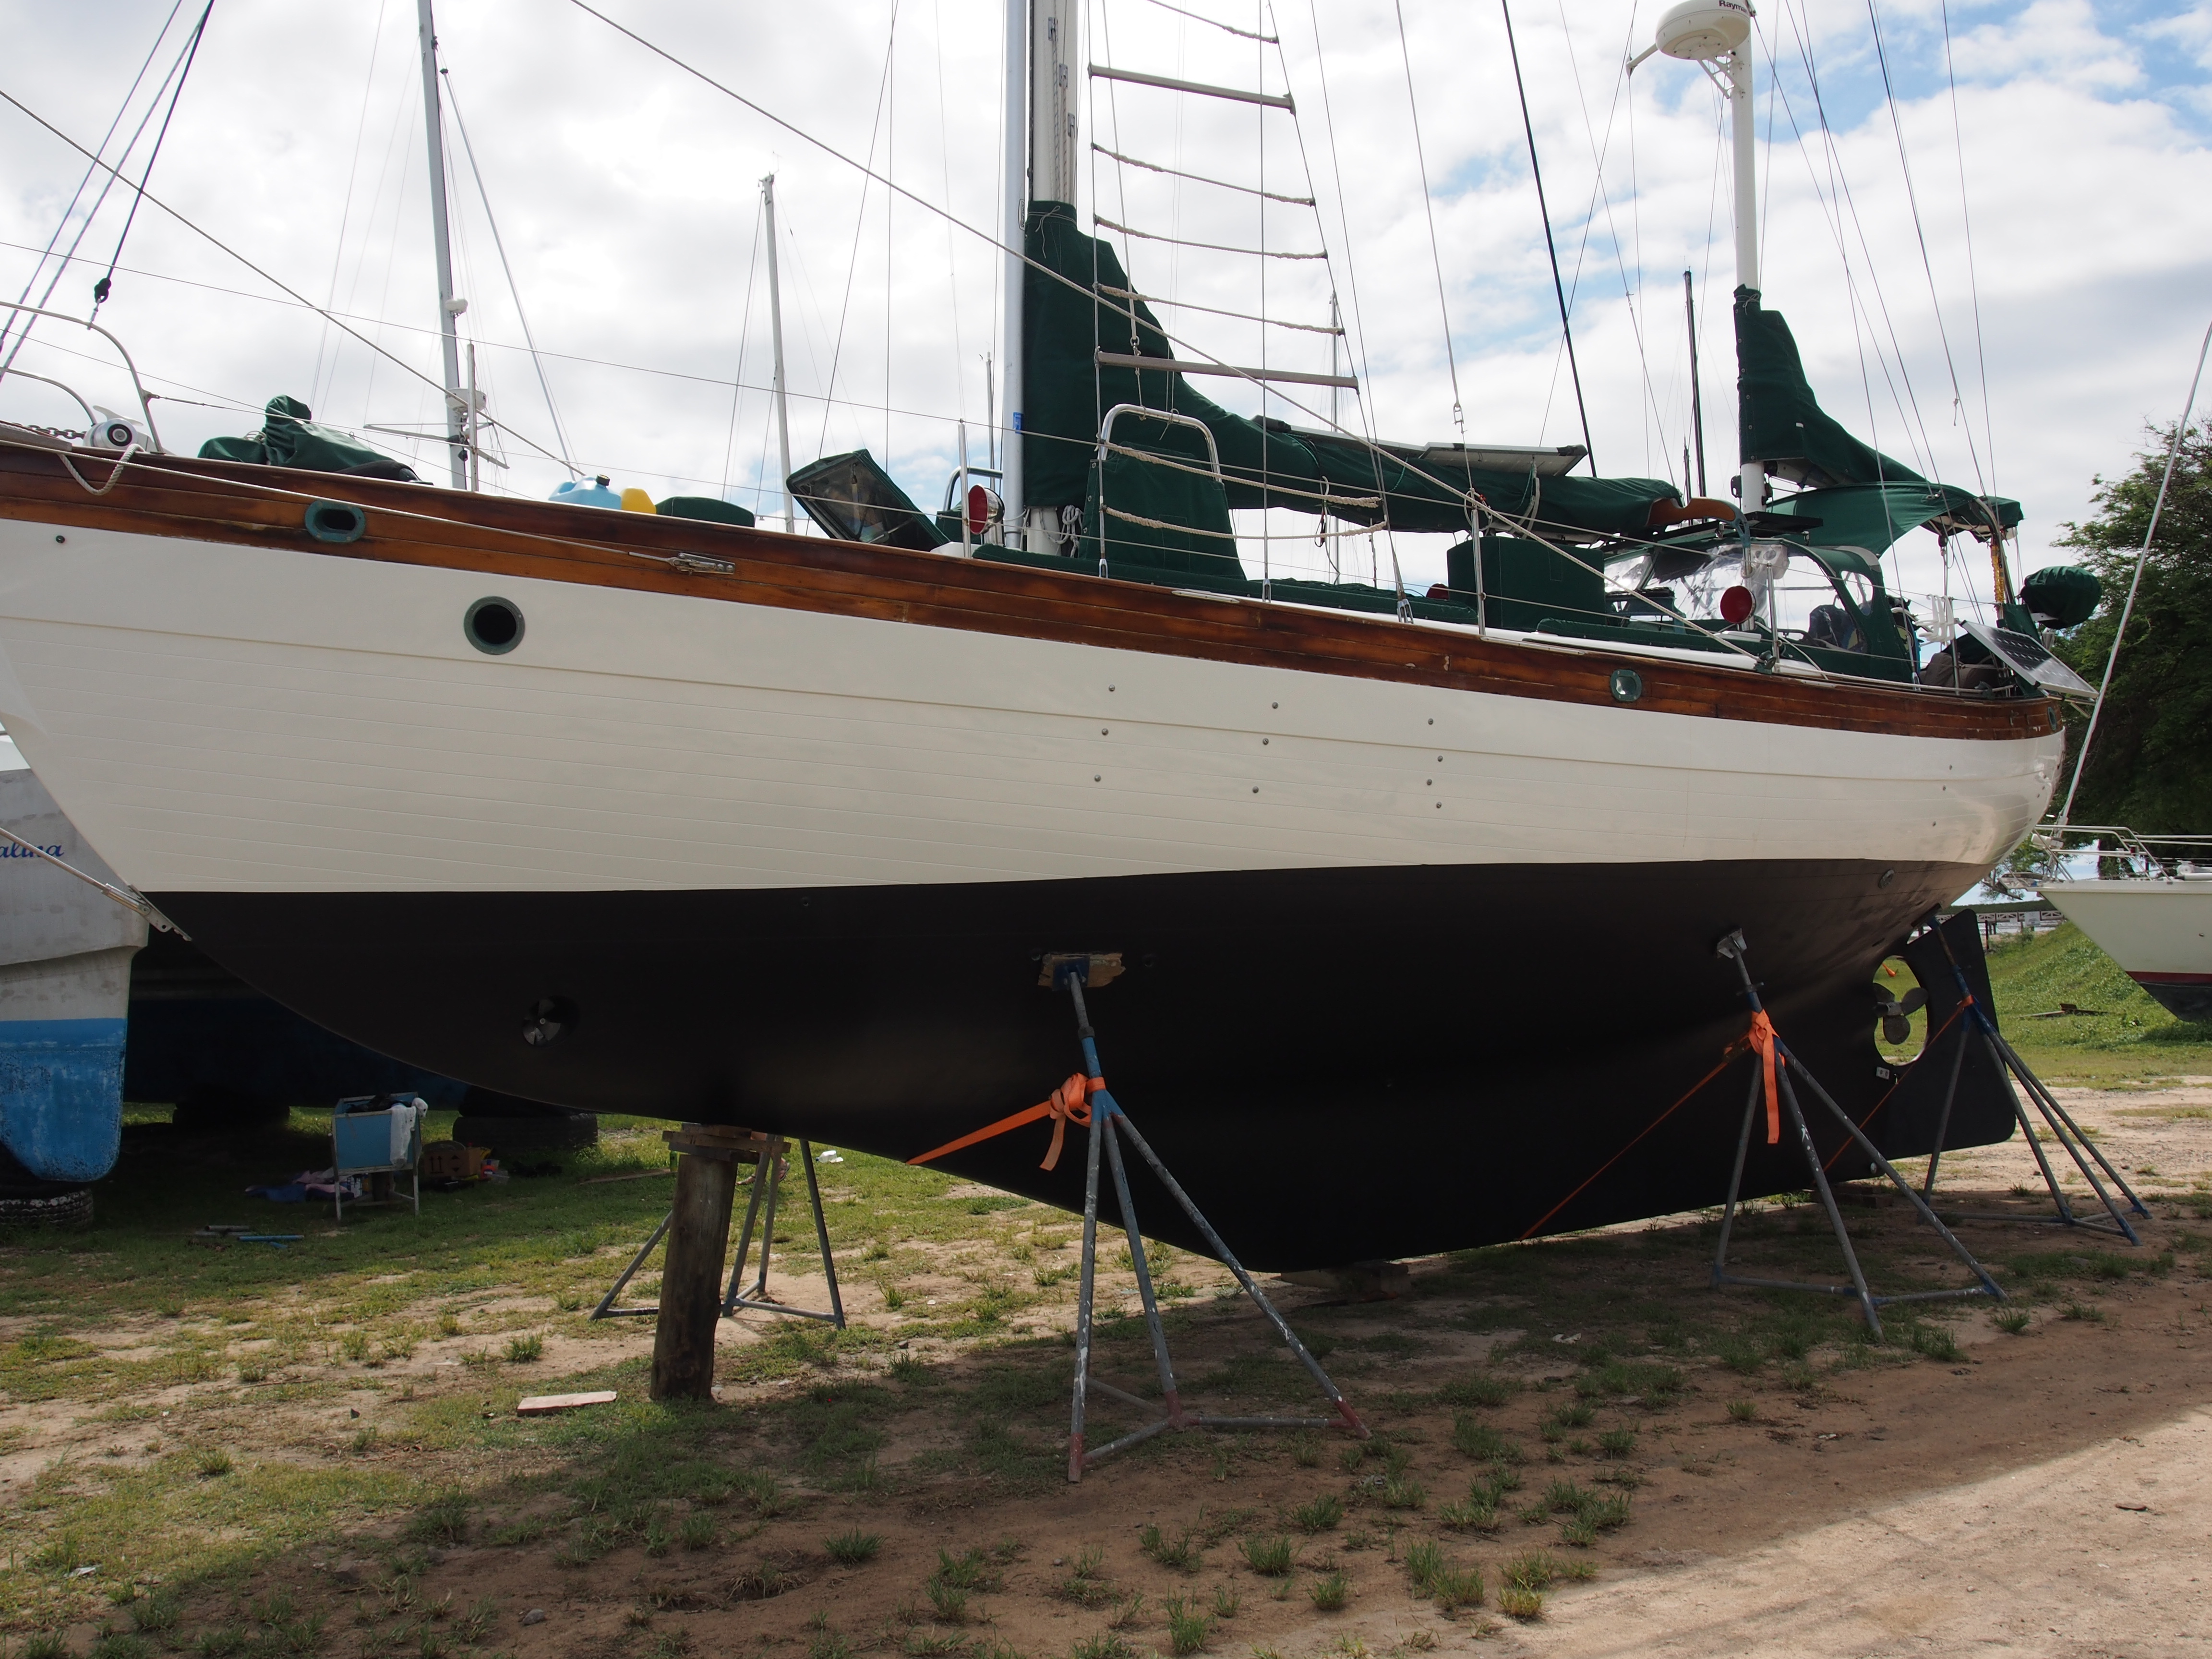
Apropos hasn’t been out of the water since April 2016 when she was in Fiji, so she was due for some new bottom maintenance. We hauled out on a Thursday morning and put back in the water the following Monday morning. During those 4 (*very long*) days, the following took place:
Roll on 2 coats of Interlux Micron Extra bottom paint (me)
Clean outer hull with Meguires Cleaner/wax (me)
Machine polish the outer hull with Marine Polish & variable speed polisher (me)
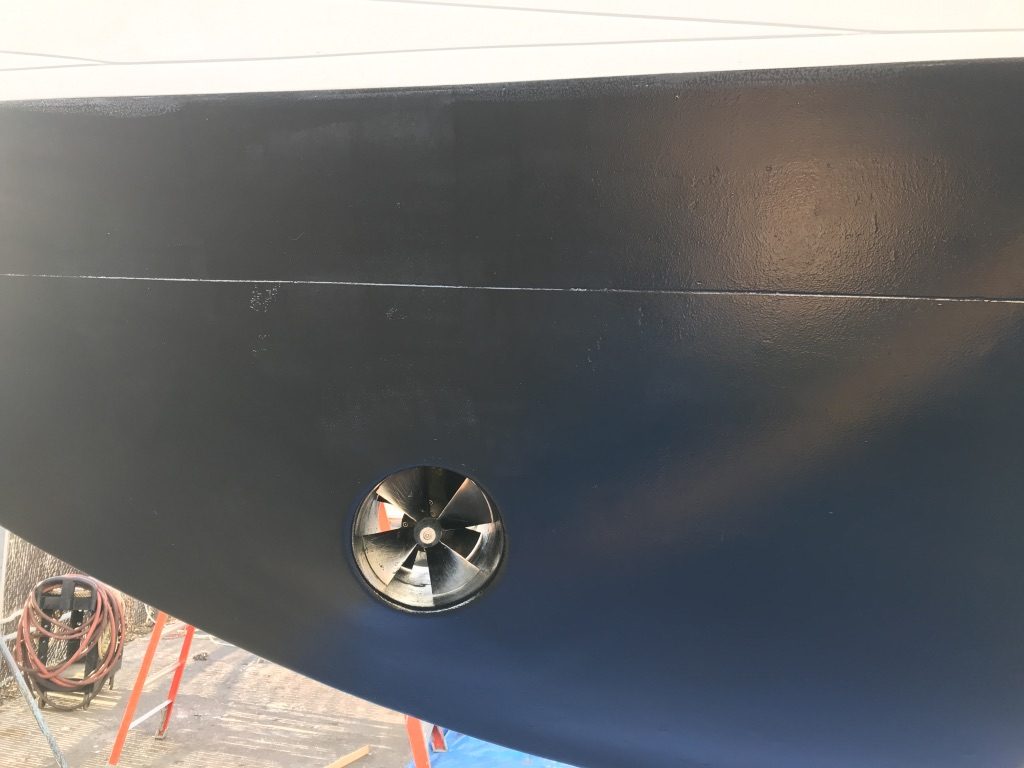
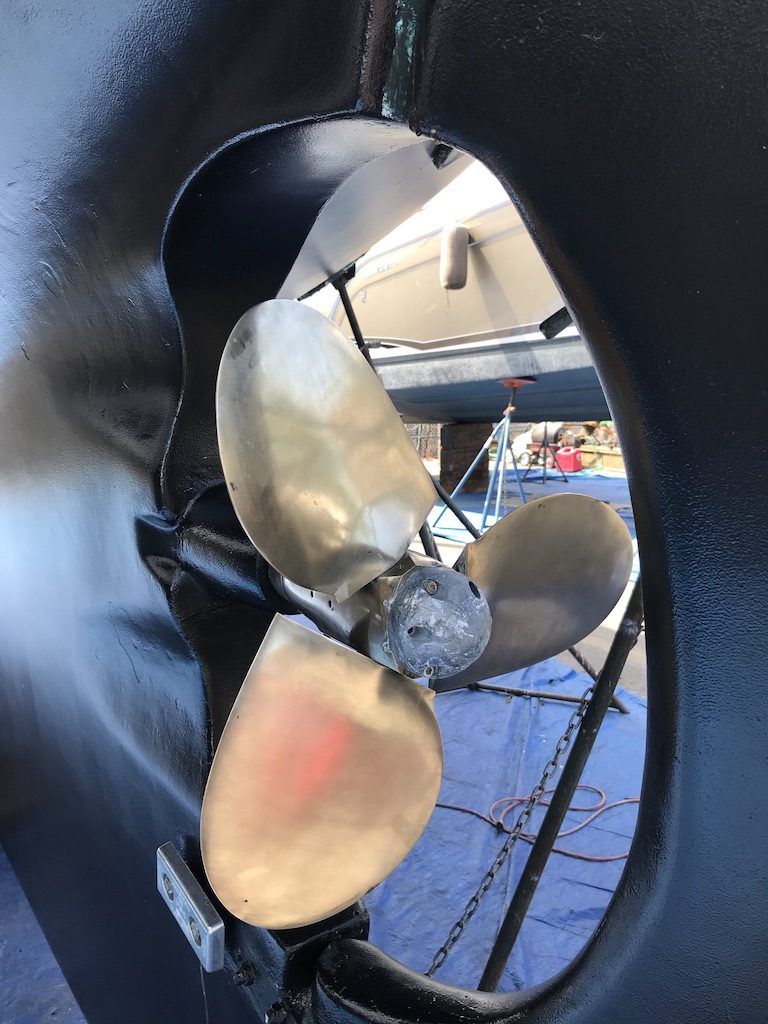
Change all 6 zinc anodes (me)
Polish and lubricate propeller (me)
Replace speed transducer and rewire (me)
Apropos in travel lift at Canal BoatyardOver 6000 nautical miles with that bottom paintAfter power sandingIt’s good to cover up as much as possible!First coat of bottom paint done in Shark Grey for contrast when applying 2nd coatFinished 2nd coat with blackCleaned up bow thruster and replaced zincsCleaned and greased Max Prop feathering propCleaned and polished hull
Main Halyard, Spinnaker Halyard, General purpose Halyard
4- 10, 1-speed
Mizzen Halyard, Mizzen Sheet, Main Out-haul, Main Reefing
Winch numbers (multiplied by 100), are standardized according to their strength. For example, size 28 is capable of 28,000 lbs of load.
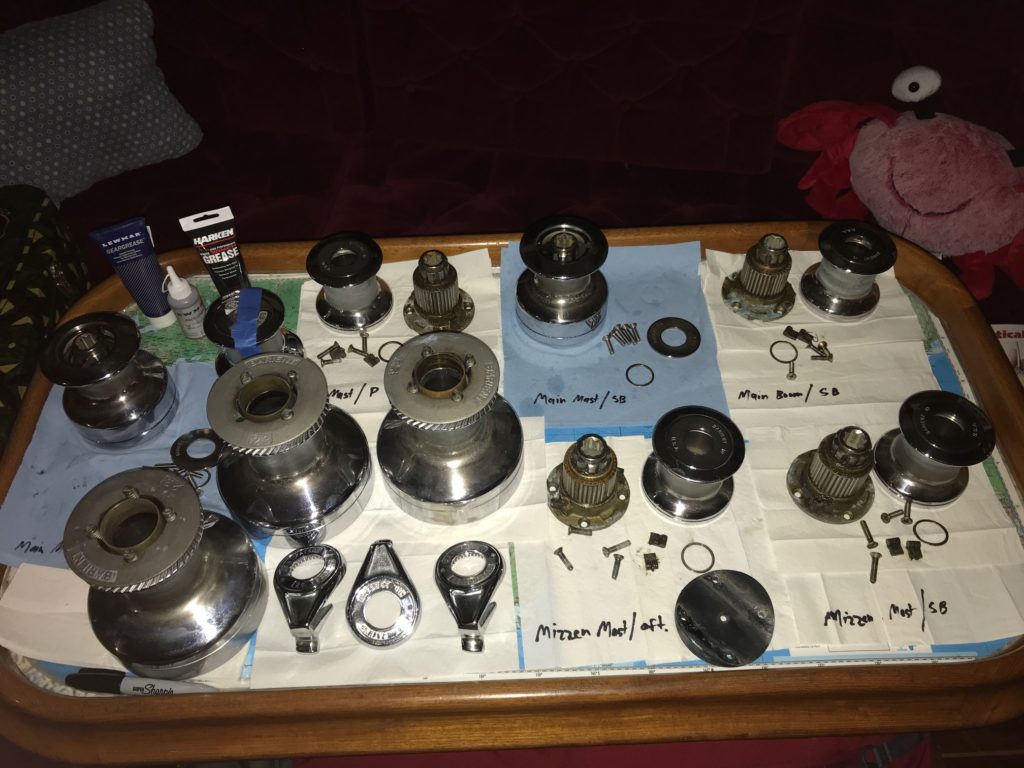
All winches were serviced in 2004 during a major refit just before I bought the boat. We serviced the 2-28s and 3-23s in 2014 before our South Pacific cruise. So we were far-overdue for a complete cleaning/lubing of all 12 winches.
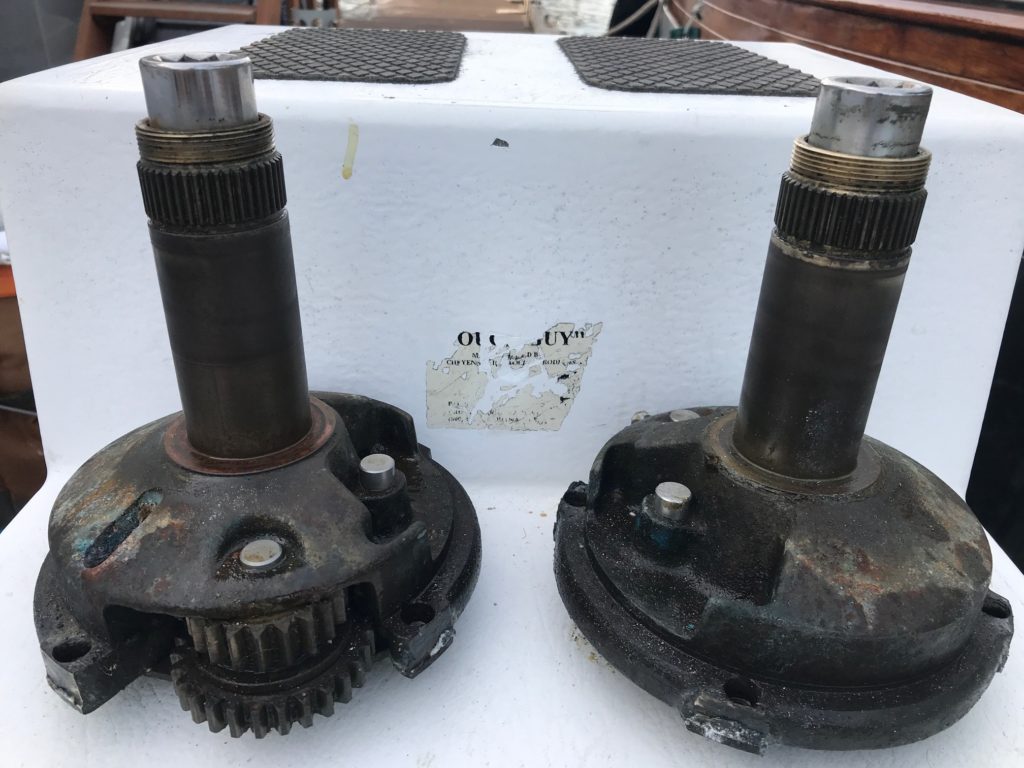
4 Barient 10s, 3 Barient 18s, and 3 Barient 23s
The 7 smaller winches (Barient 10s and 18s) are fastened to the masts or boom with 4 or 5 ss screws and can be easily removed for servicing. But the 3 Barient 23s are mounted with ss screws but also bedded down to the cabin top with something not easily removable. These can be serviced by disassembling the winch in place. The 2 Barient 28s can also be removed but requires unbolting 5 ss hex bolts that attach them to aluminum winch bases.
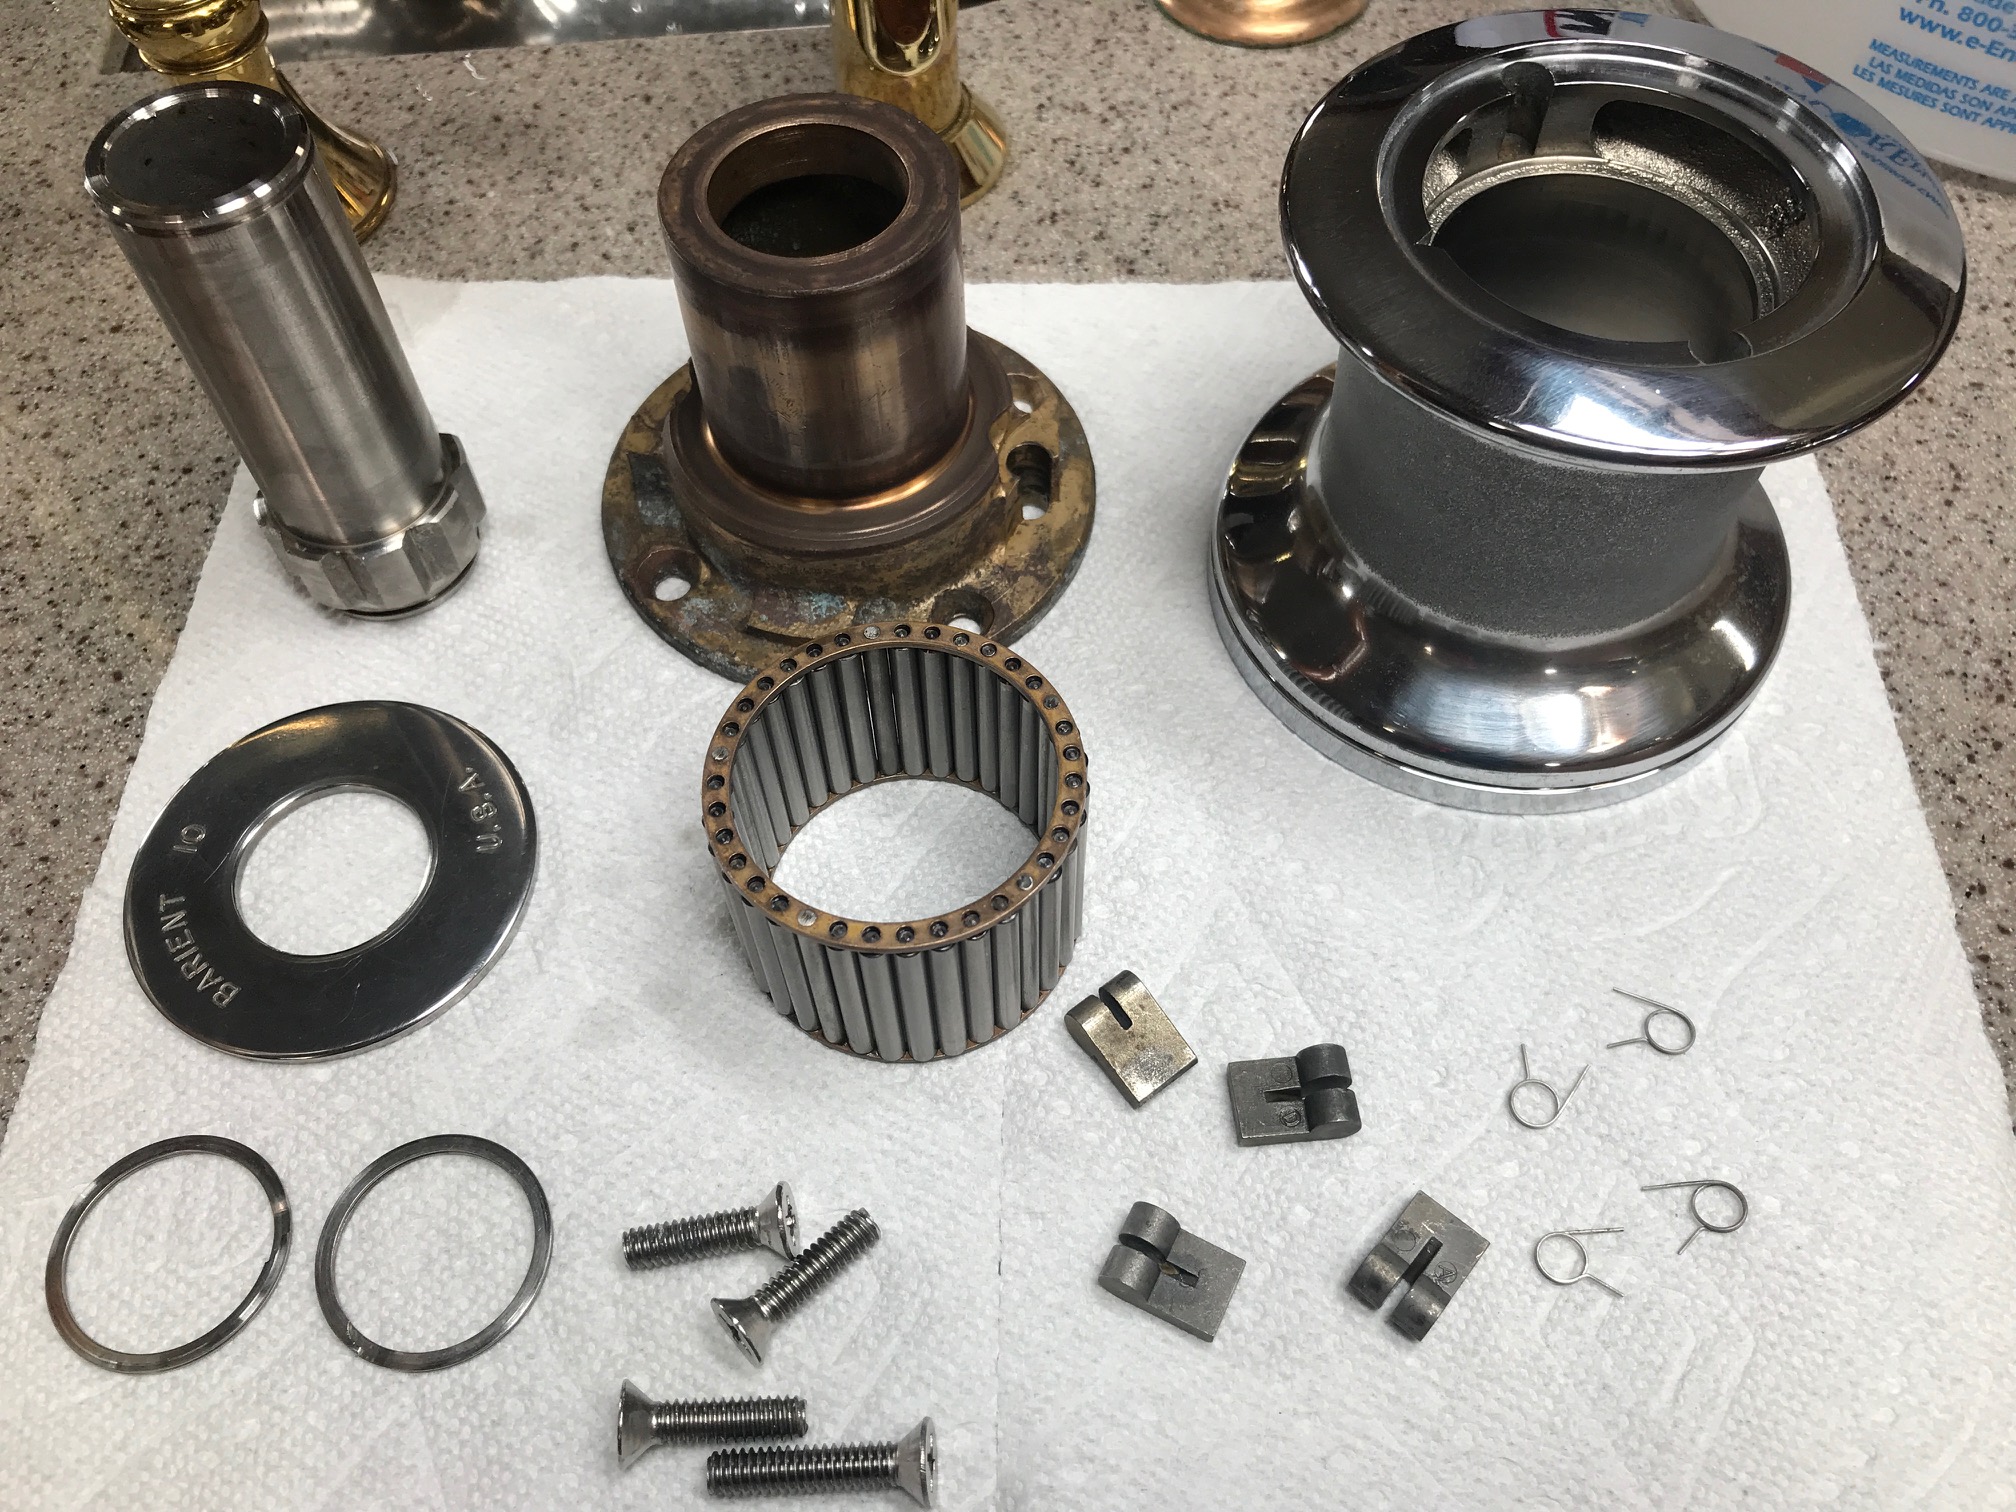
The Barient 10s and single speed winches and are the simplest to take apart and clean. Here are the basic steps for servicing these small winches:
Separate the drum from the internal parts by removing the snap spring and cover plate and carefully pulling the drum off. Remove the 2 pawls/springs at the top of the drum.
Remove the 4 ss screws that fasten the winch to the boat.
Disassemble the winch by first removing the snap spring on the bottom of the winch base and remove the 2 pawls/springs.
Slide the cage bearing off the shaft
Clean all parts with mineral spirits to remove grease and dirt. A toothbrush is helpful on the cage bearing and bronze wool can be used on the bronze and ss parts. The drum has a chrome plating and bronze wool is safe to use on it.
Assemble in reverse order. Oil the pawls/springs with pawl oil (never use grease). Lightly grease the bronze shaft and cage bearing with winch grease.
Screw winch in place using Tef-Gel on the ss screw threads when going into aluminum mast/boom. Carefully slide drum back onto the winch while squeezing the pawls (front 2 first, then back 2) so they clear the ratchet teeth.
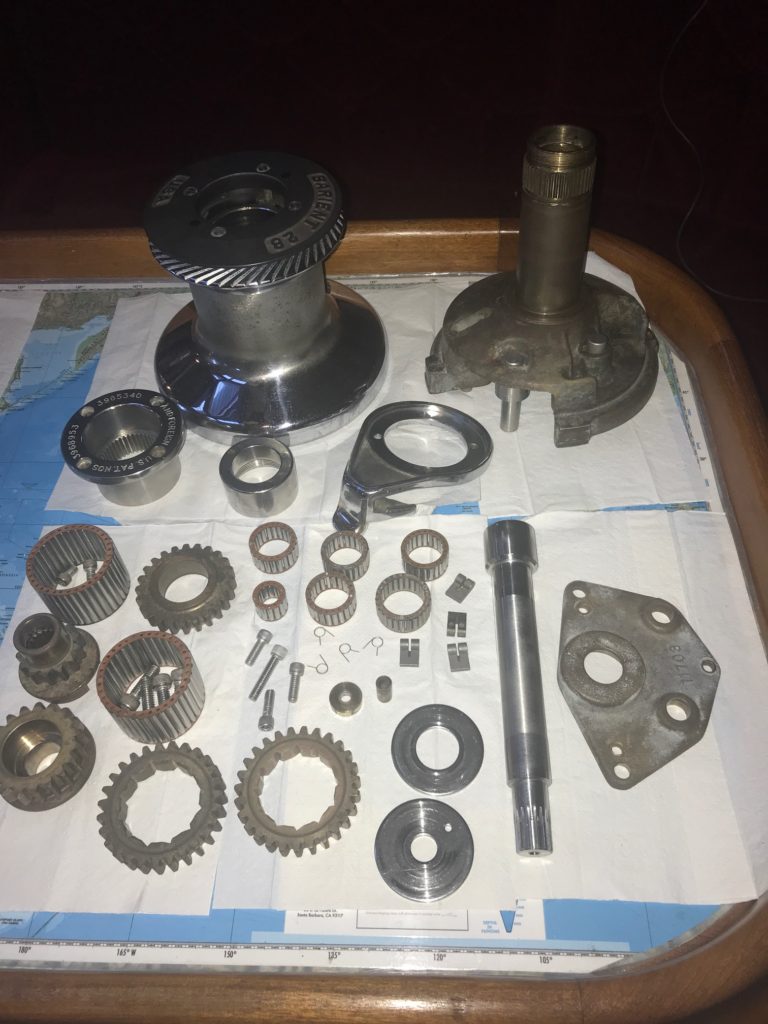
Barient 10 Parts
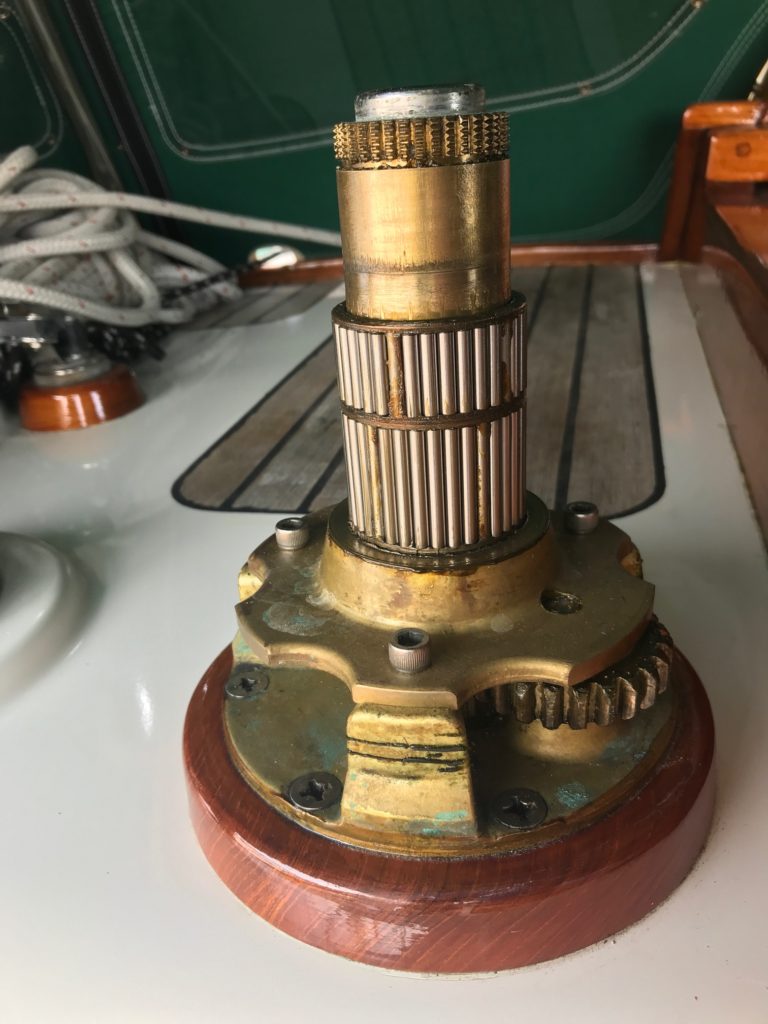
The larger 2-speed winches (Barient 18) steps are similar but there are more gears and bearings. The Barient 23s have even more parts (30 total!). It’s good to take pictures during disassembly to reference when putting it all back together. Apropos has 2 identical 23s next to each other so I was able to look at an assembled one while assembling the other.
Barient 23 2-speed self-tailing (before cleaning)
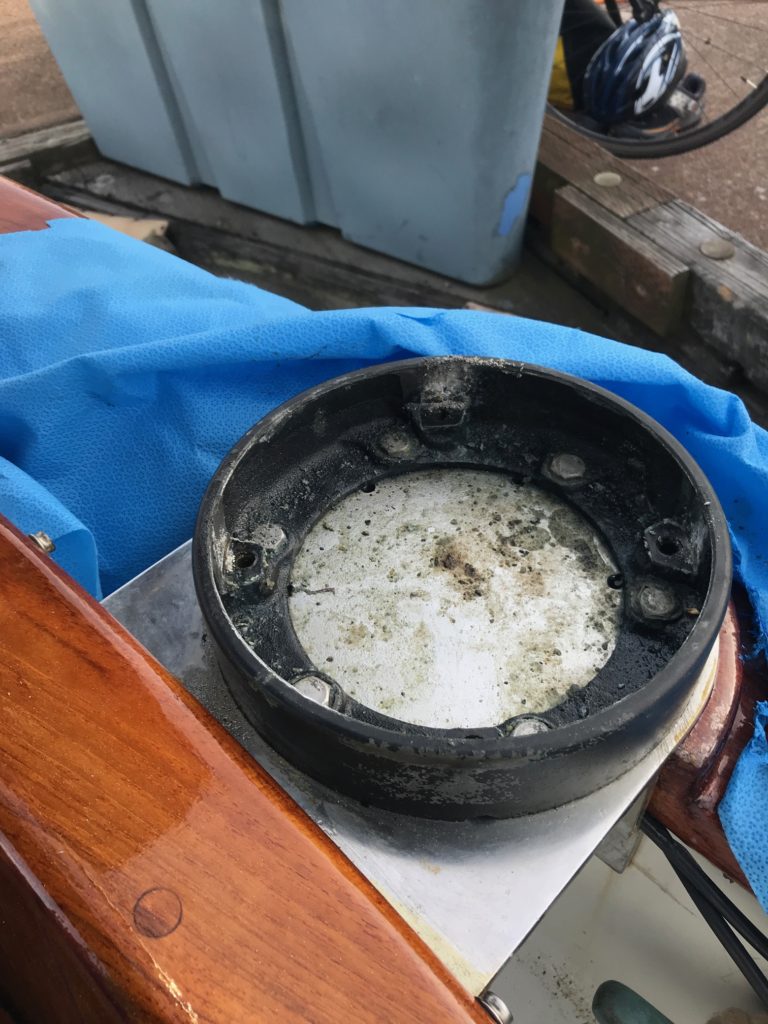
The largest winches on Apropos are the 2 Barient 28ST 2-speed jib-sheet winches. They are also the most exposed winches since they are outboard the cockpit and see the most seawater and dust/debris than the other winches that are under the dodger or on the masts and booms. After removing the drum, there were 4 ss screws holding the winch to the aluminum winch base. But after removing the 4 screws, the winch wouldn’t budge due to corrosion between the bronze and aluminum. We scraped away at the corrosion around the 4 feet and sprayed a generous amount of anti-seize solution on all 4 joints, then allowed it soak for 2 days. It still took some pretty hard hits with a hammer, using a wood block against the winch shaft, to free them.
Aluminum winch base after removing winch
Jib winches removed from base (before cleaning)Cleaned parts from Barient 28 ST 2-speed winchPolished the chrome and painted the black winch bases
Conclusion
Barient winches are built like tanks! There are no plastic parts like in some winches. All the gears are heavy-duty bronze with stainless steel shafts. The cage bearings , pawls & springs are all very high quality. My winches are over 35 years old and after servicing them, are as good as new. I even decided to use my original pawls since they were in great shape, and I read that replacement pawls are not made with as high of quality material as the original Barient pawls, and they cost was something like $12 each (there are 4 pawls per winch X 12 winches, so total cost for just the pawls was going to be $576!).
With so many winches on Apropos, it took a lot of time to service all of them. I estimate it took 2 hours for each of the single speed 10s, and 3 hours for the 2-speed 18s, 23s and 28s. That’s a total of 32 hours spaced out over a week. The only costs were pawl oil, winch grease, and mineral spirits.
A little bit about the history of Barient. The American company was founded by 2 sailing enthusiasts–Derek Baylis, owner of SV Orient, and Jim Michael, owner of SV Baruna. Their purpose of designing and building winches was for use on their own boat (and their friends’ boats). They ended up creating a business by combining the boat names (BARuna orIENT) and produced some of the best winches available. They never really intended to profit from the business, and eventually sold it to Lewmar. Lewmar also purchased the Barlow winch company, then discontinued both the Barient and Barlow manufacturing. Clever way to beat the better competition–buy them out and then keep making only their own inferior product! Parts are no longer made for Barient winches, but the good news is you can find old Barient winches that with some servicing, are probably as good as, or better than the new ones made by other companies.
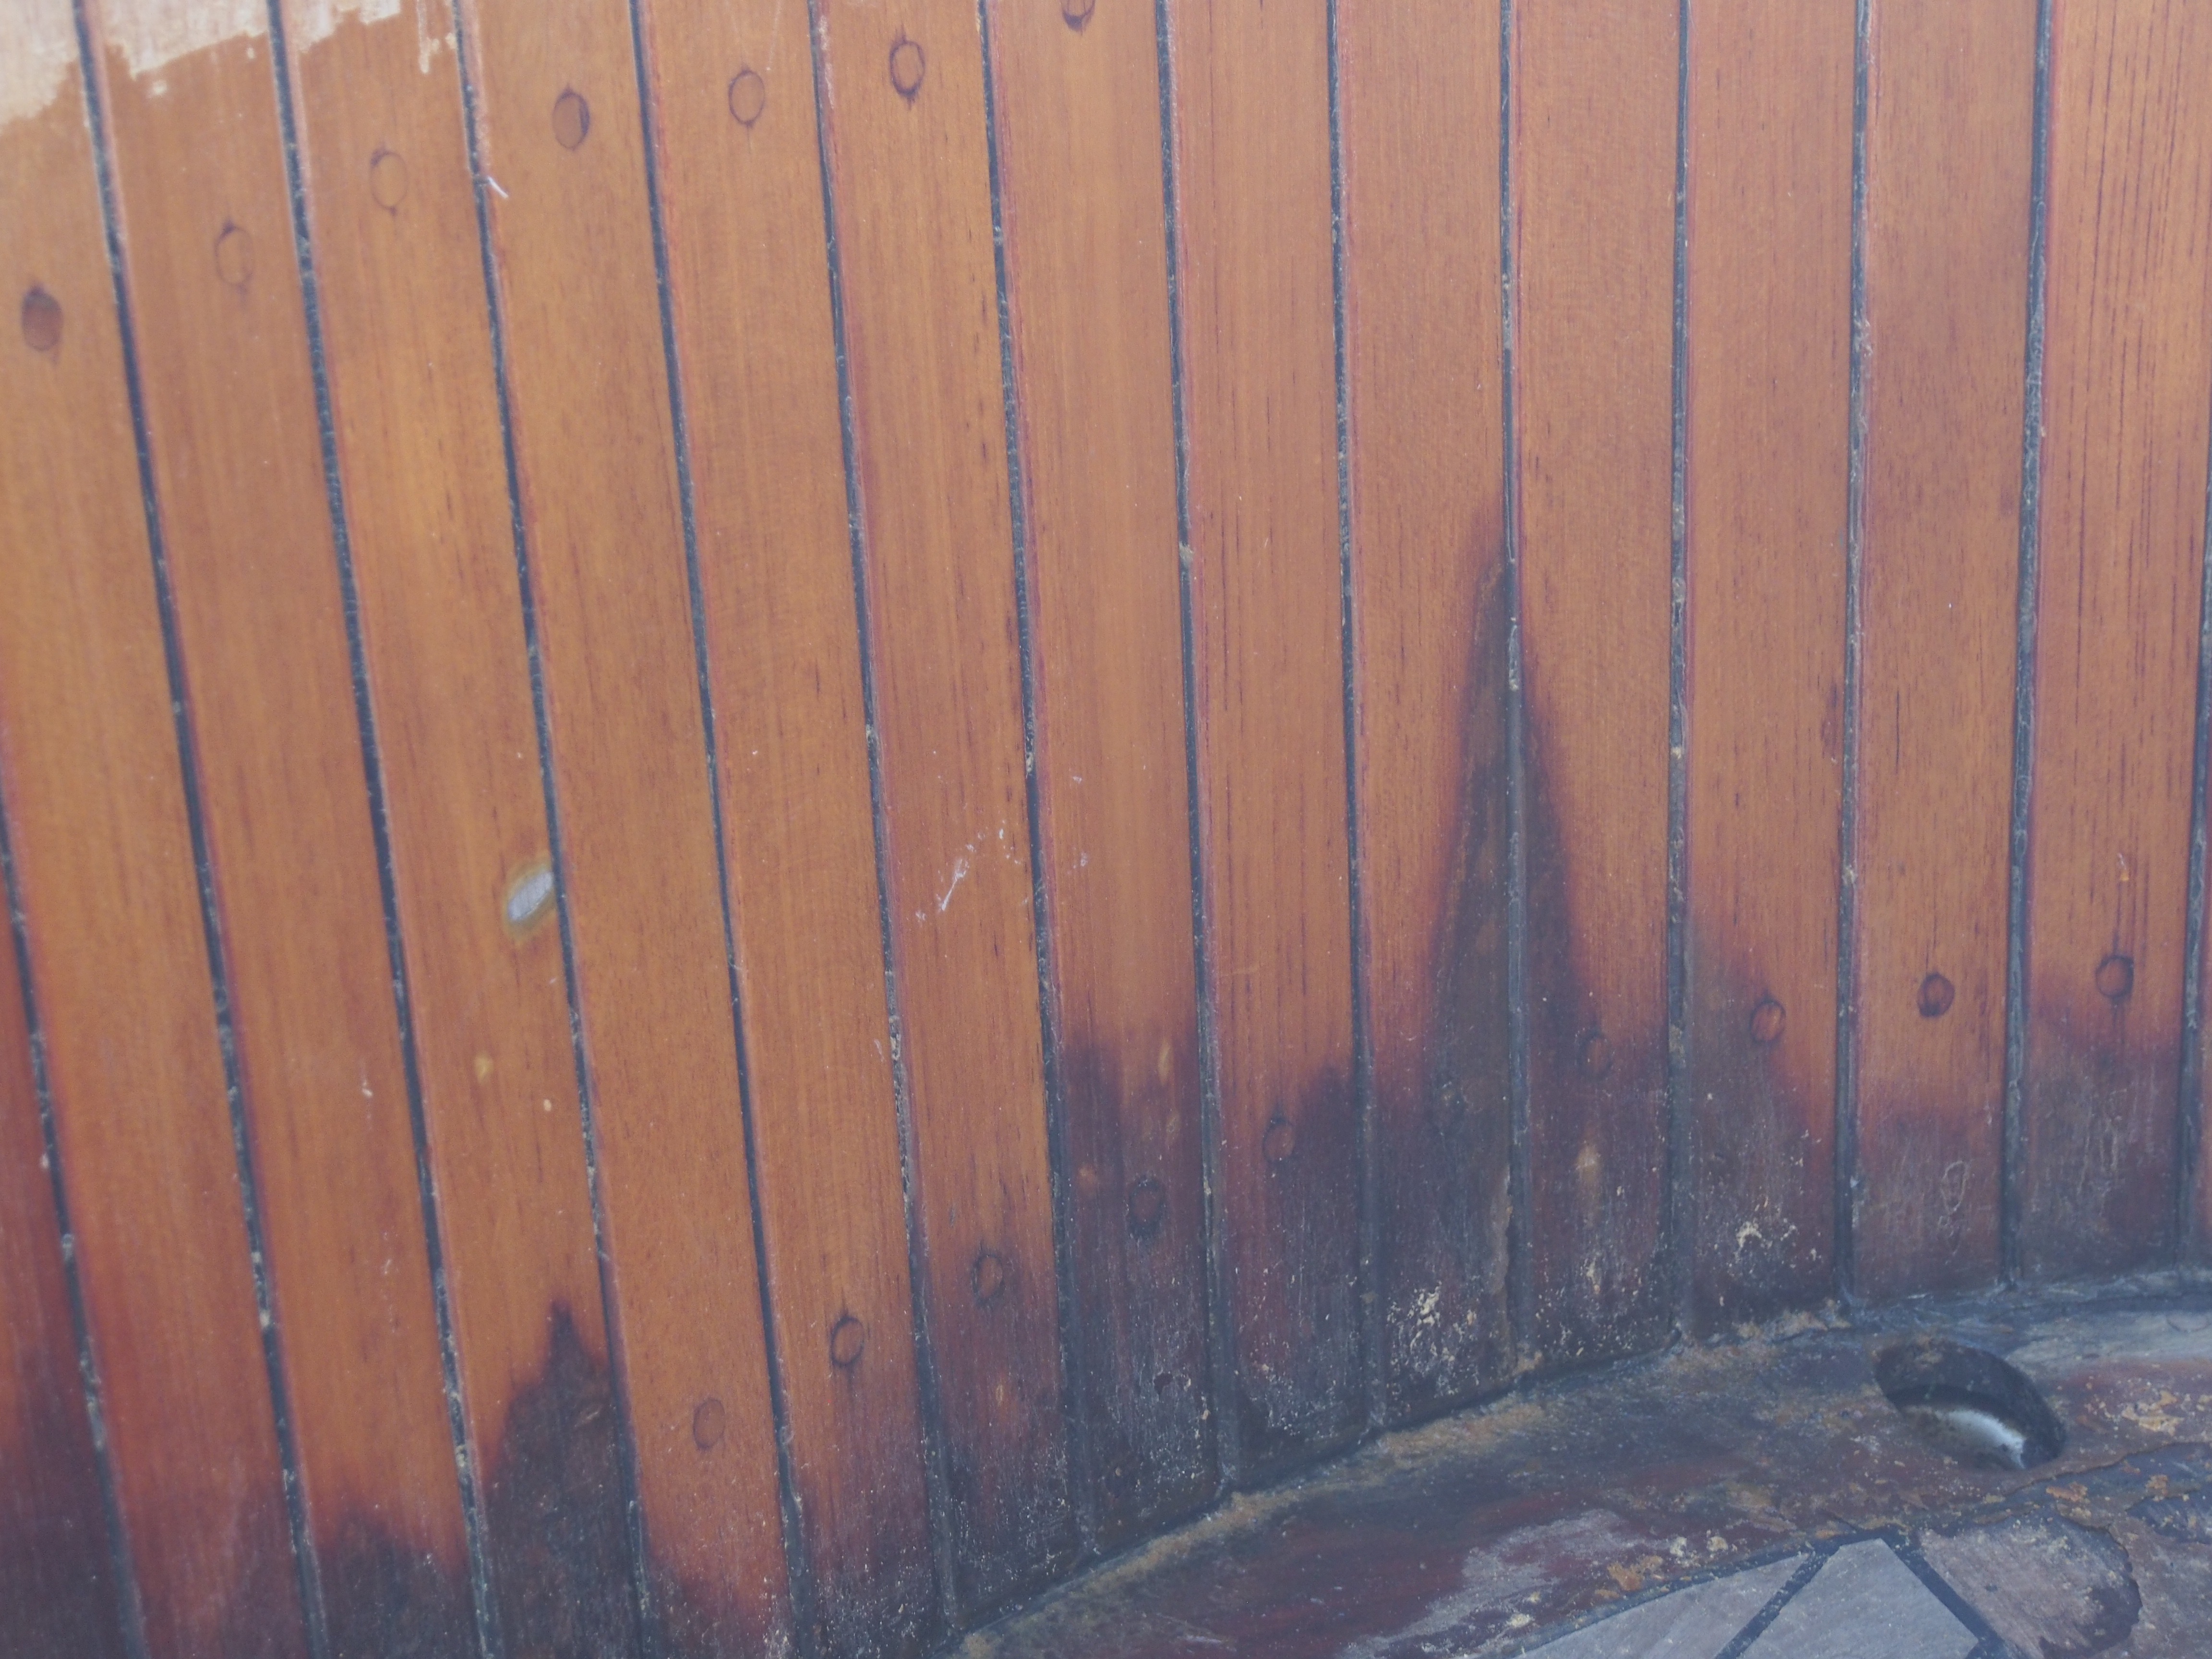
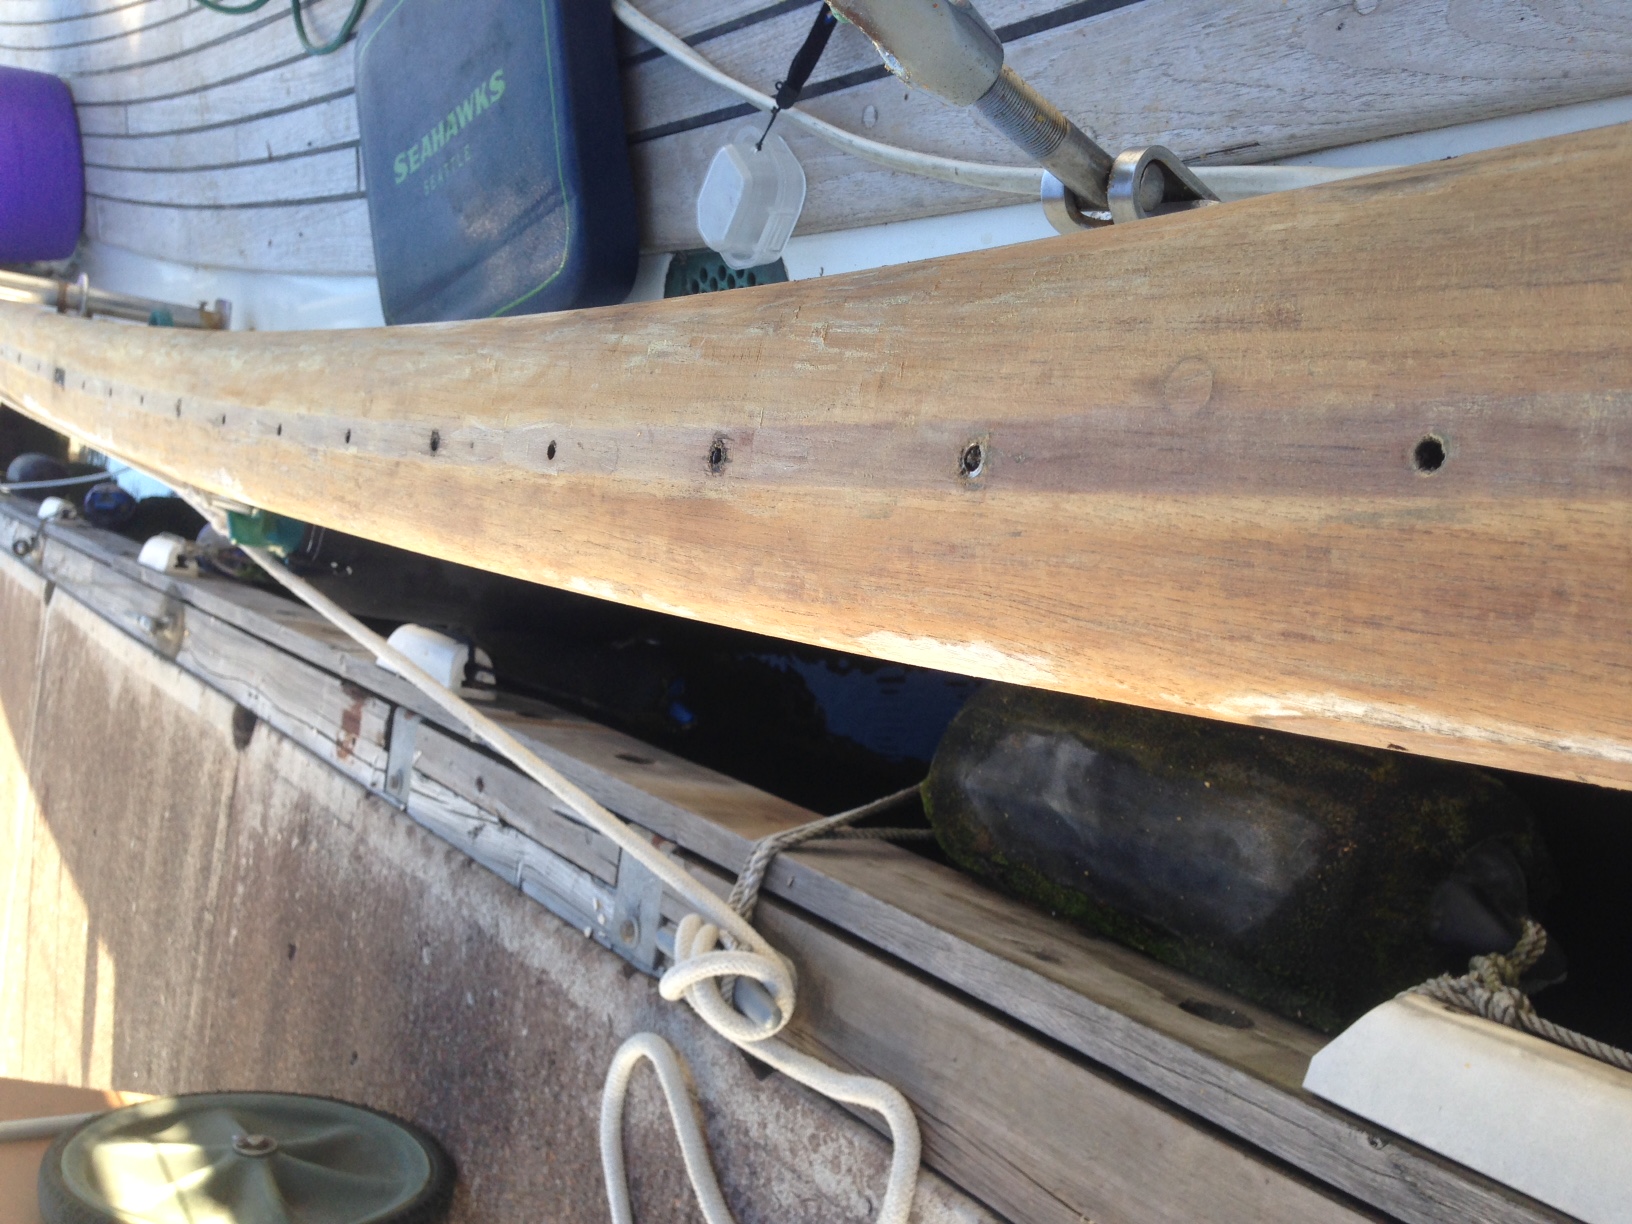
I decided to refinish another section of brightwork during a small window of good weather. As long as I got the section stripped and sanded, applied the primer and 2 coats of Awlwood Clear, the remaining coats could be done as the weather allowed. So in a fury of 3 sunny days, I stripped, sanded, primered, and got 2 coats of clear on the cockpit inner cap rail and the cockpit vertical teak planks (the cockpit horizontal planks will be done later). The lower parts of the vertical planks have been an eyesore for some years due to water wicking under the varnish at the joint between the vertical and horizontal planks.
Removed varnish from cockpit inner cap rail
Dark areas are where water penetrated under the varnish
Removed varnish from cockpit vertical planks
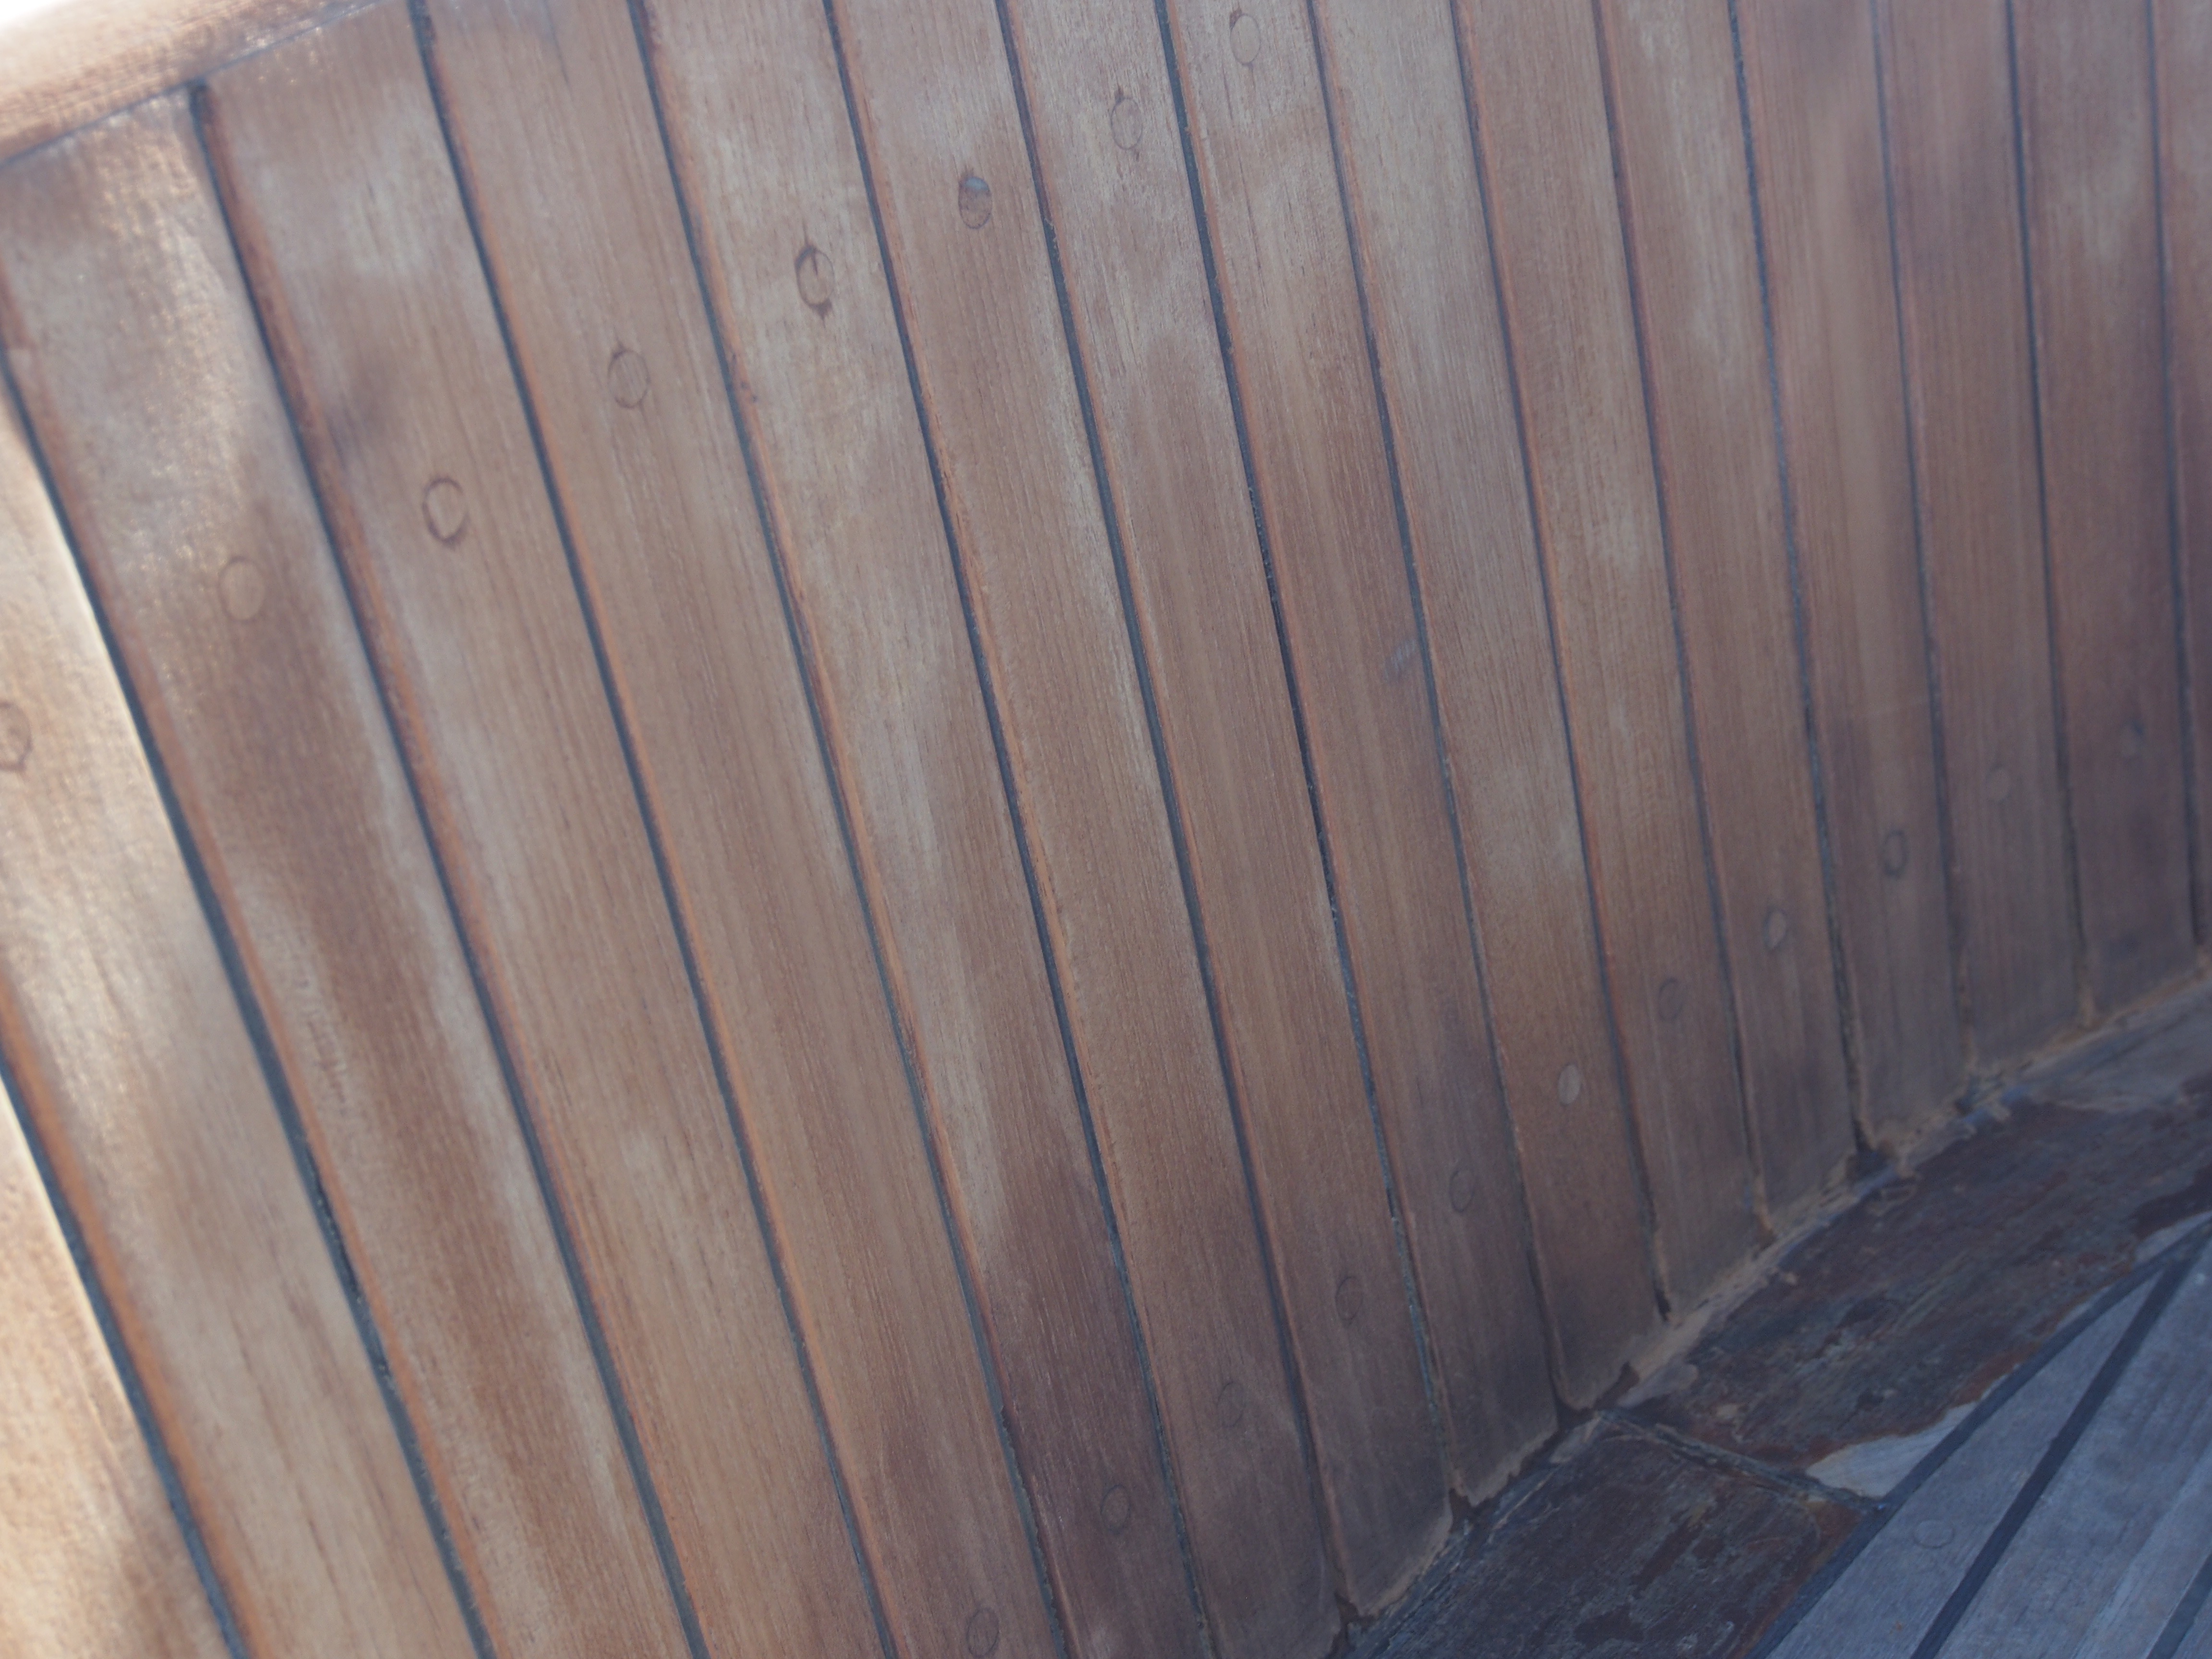
After final sanding
After applying Alwood Primer
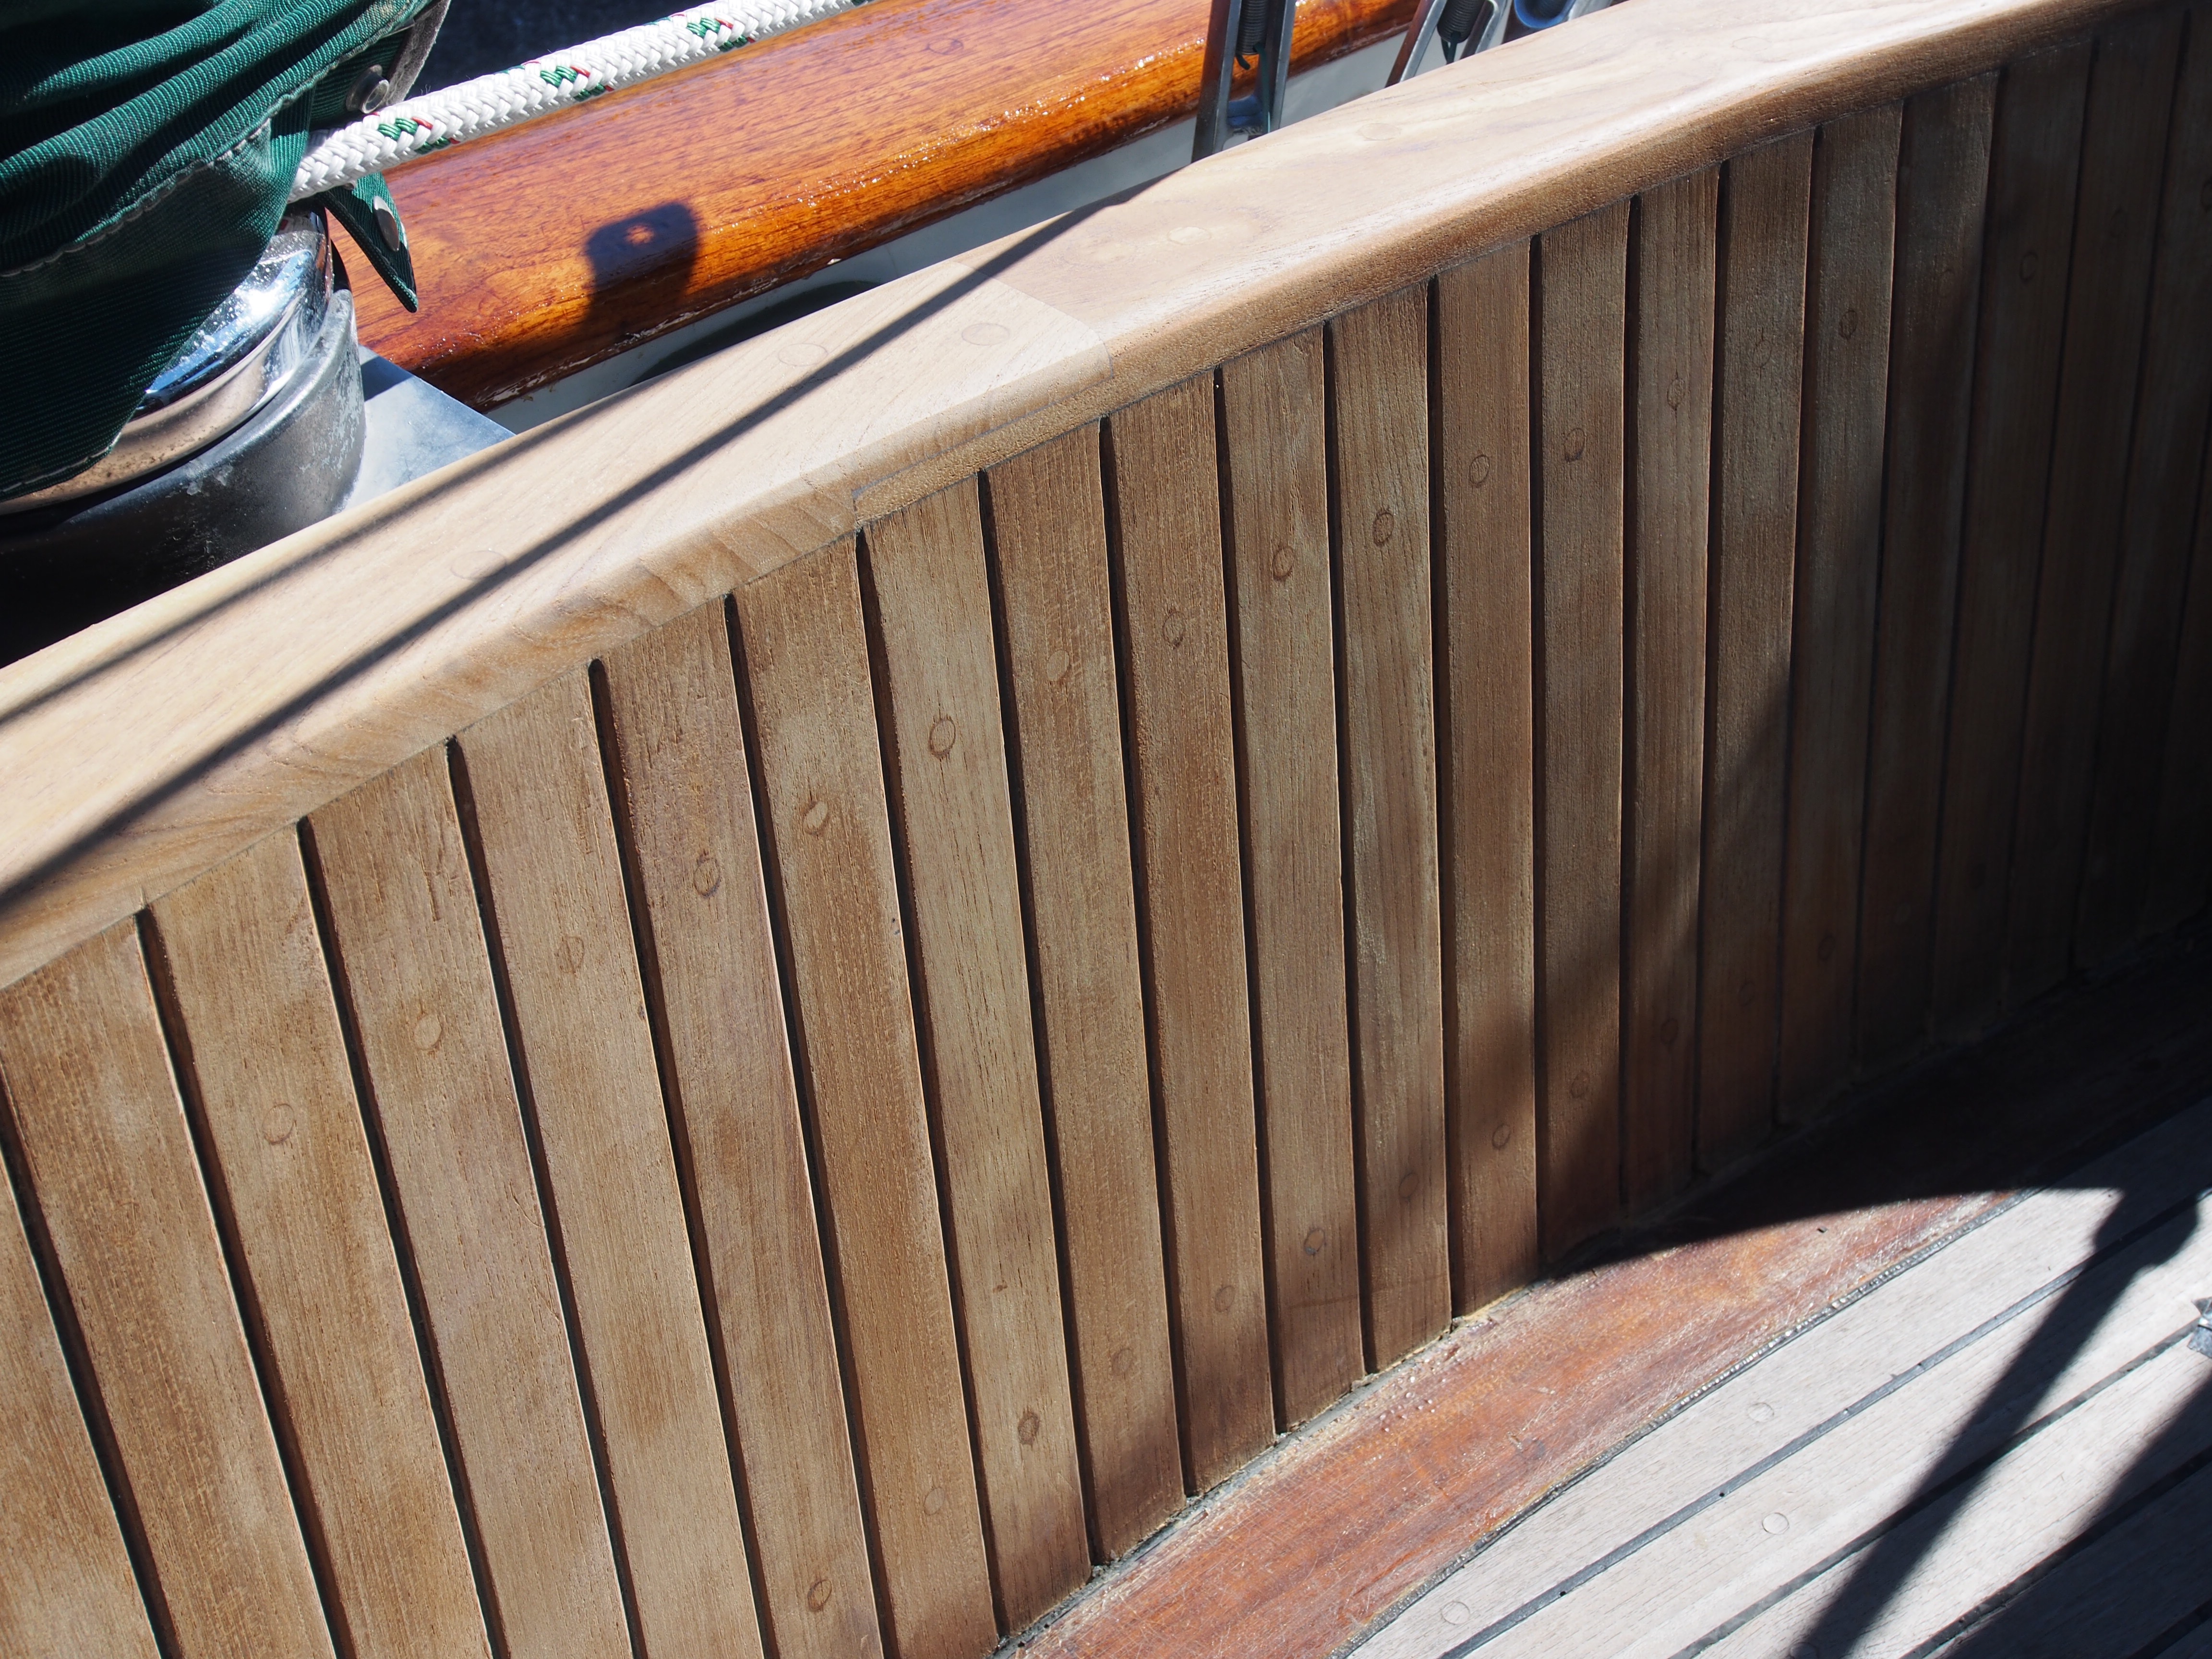
After the 3 sunny days, it rained in Seattle for almost 2 weeks until we finally got another few days of clear weather, during which time I applied Awlwood Clear coats 3 through 8.
Cockpit combing finished with 8 coats of Awlwood Clear
In my last post, I wrote about how bad Apropos’ teak brightwork looked and how I would have to tackle it “some day”. Well, I decided to get started on it after seeing the long-range weather forecast showing sunny conditions for most of September and into October.
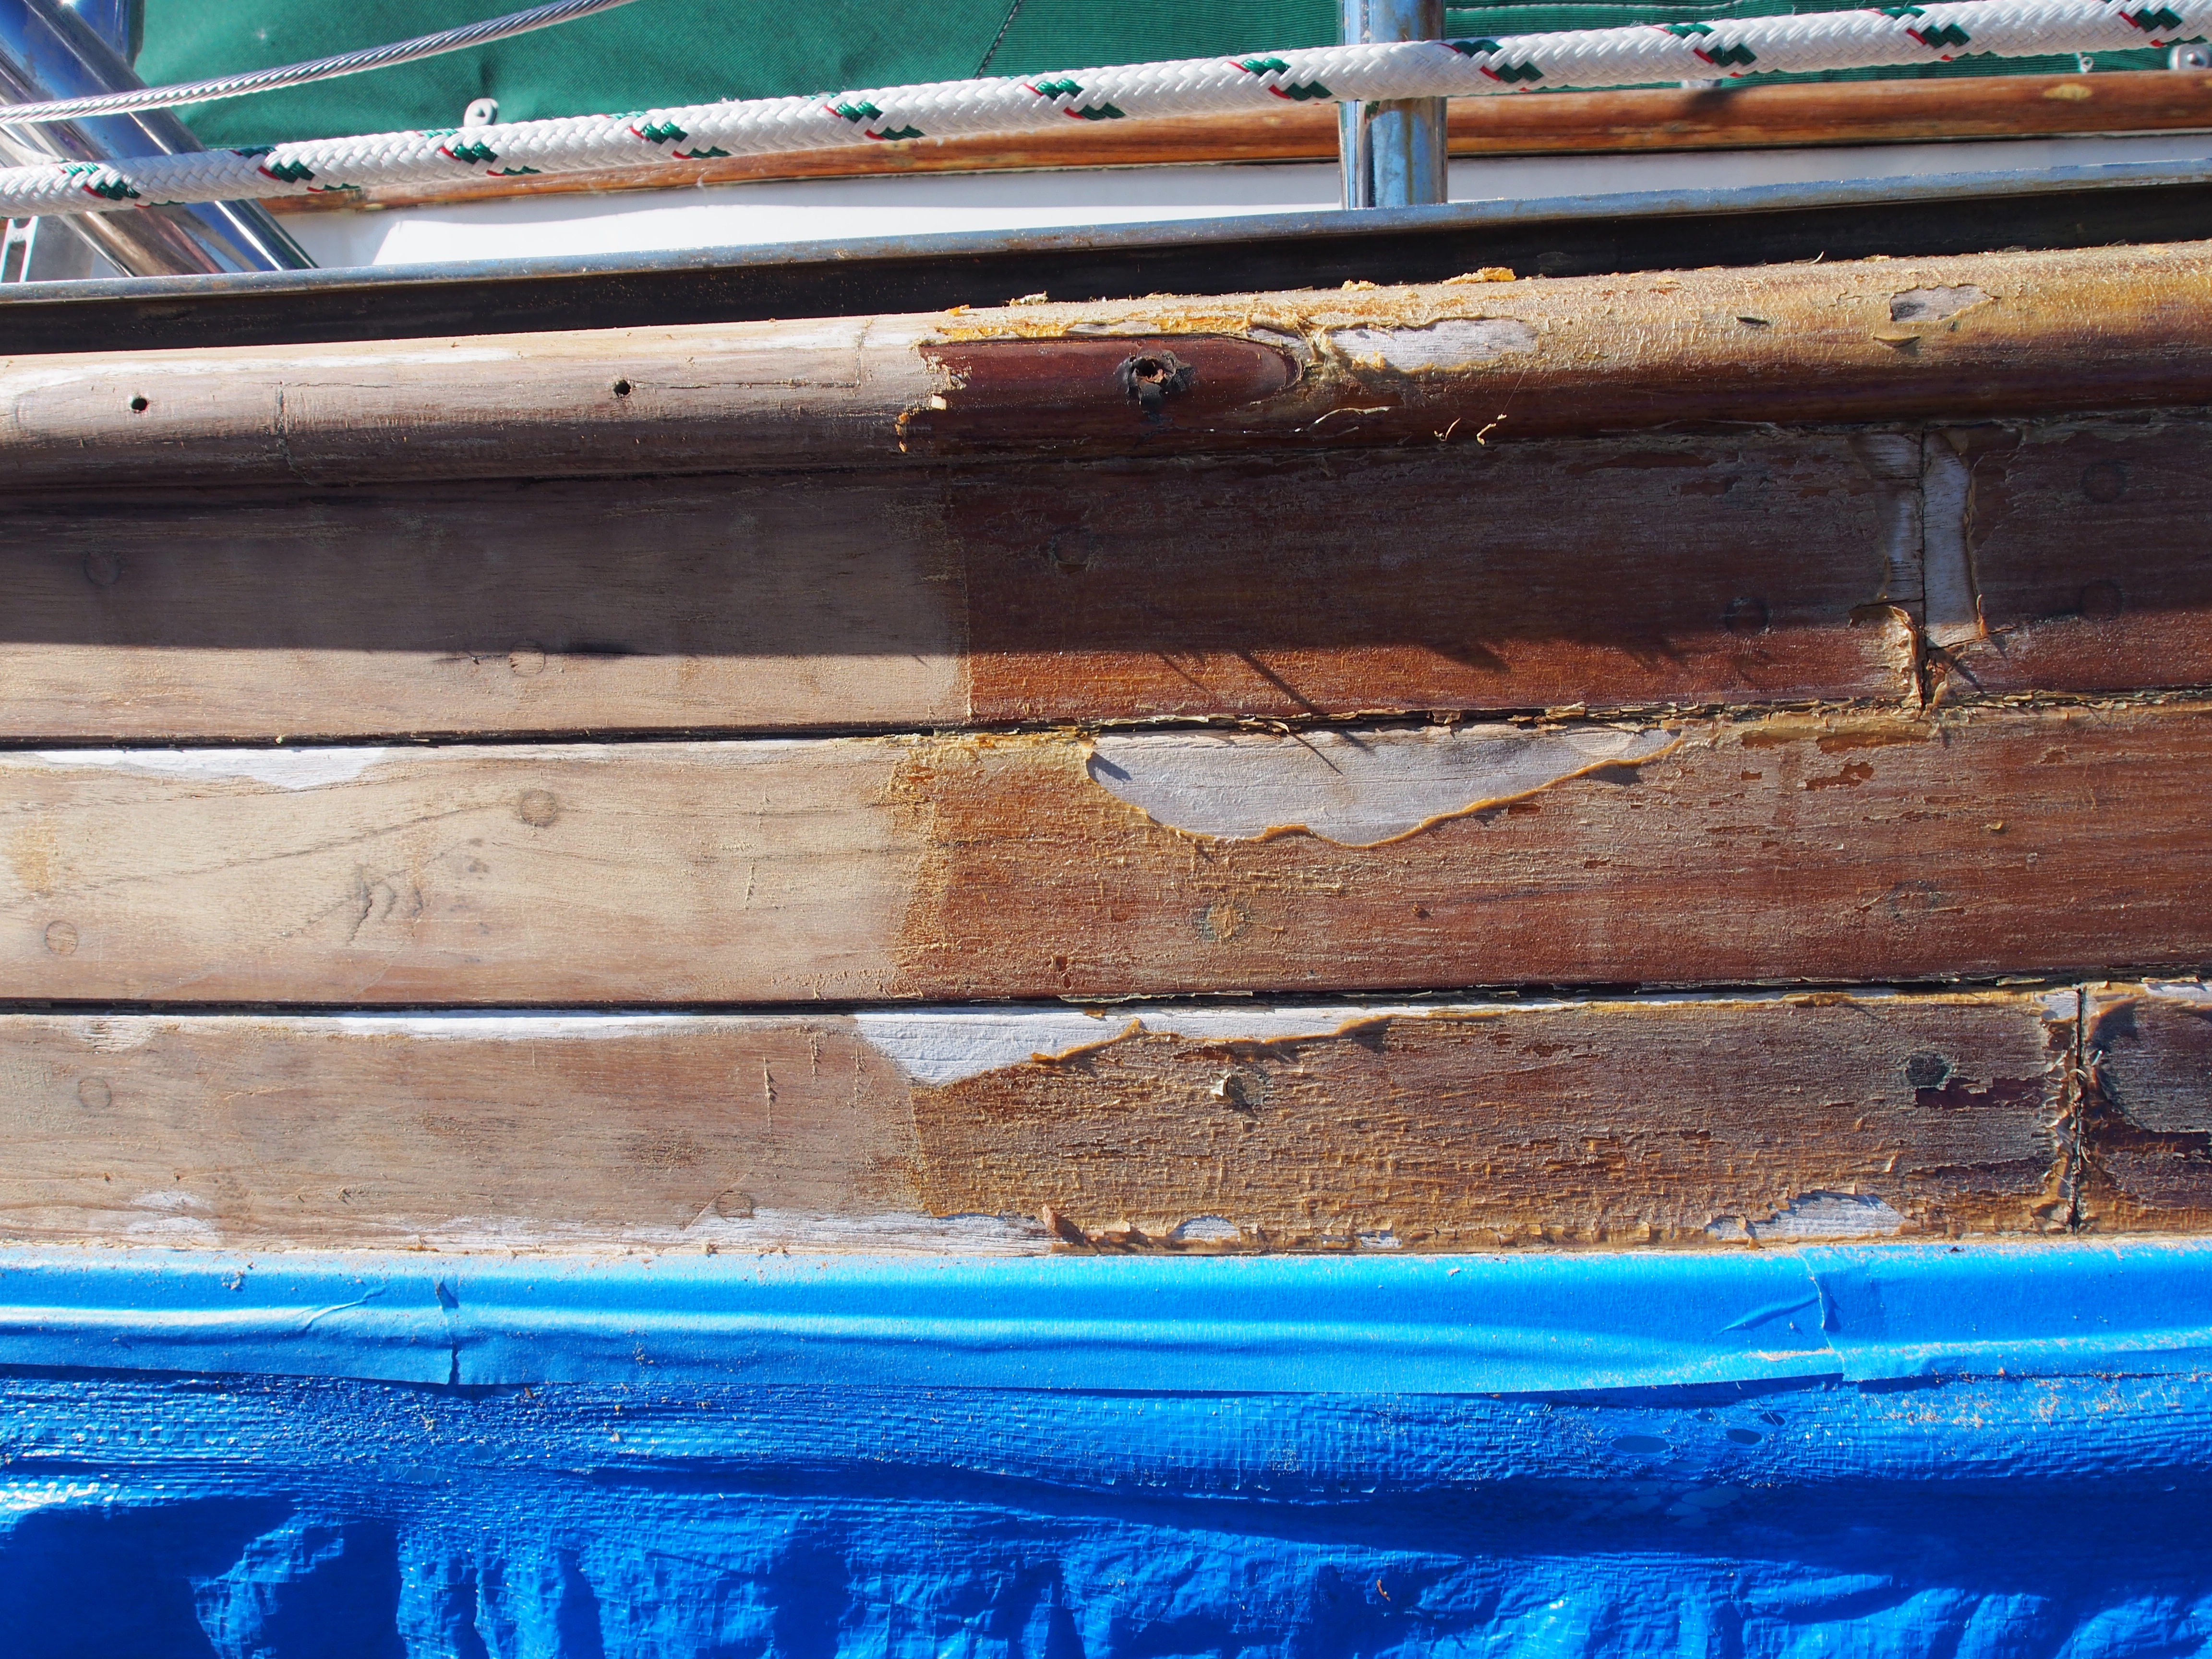
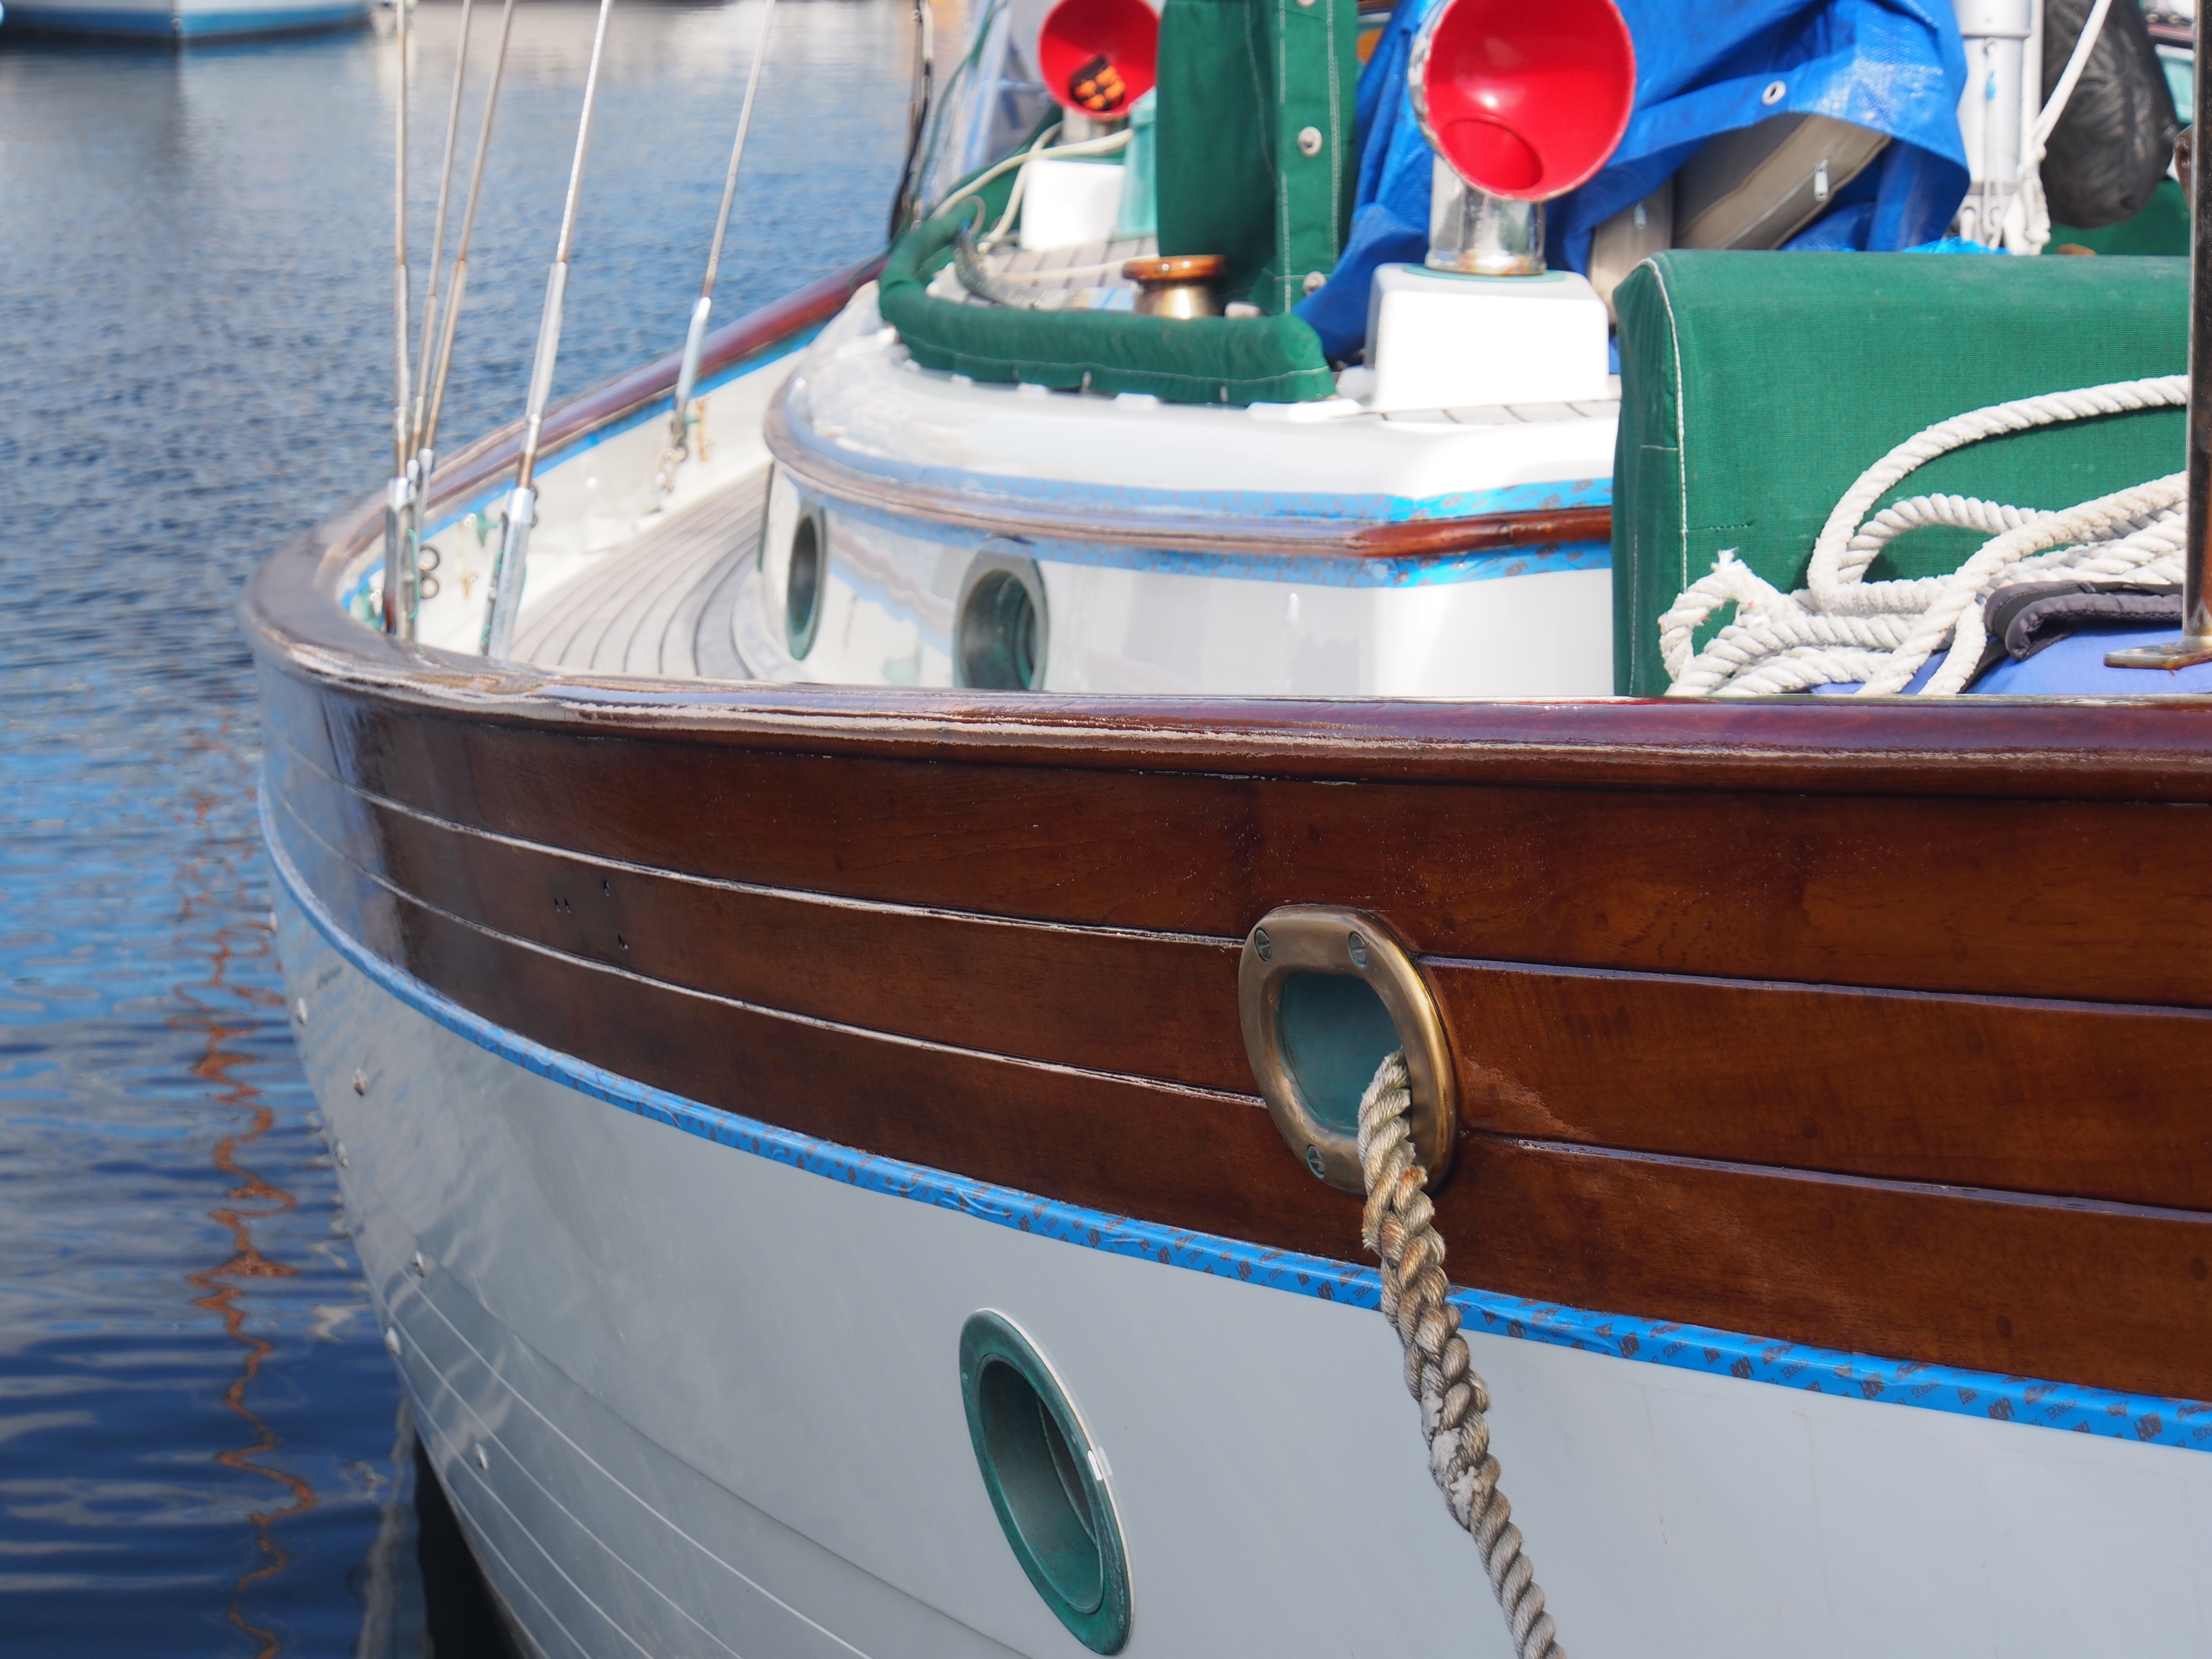
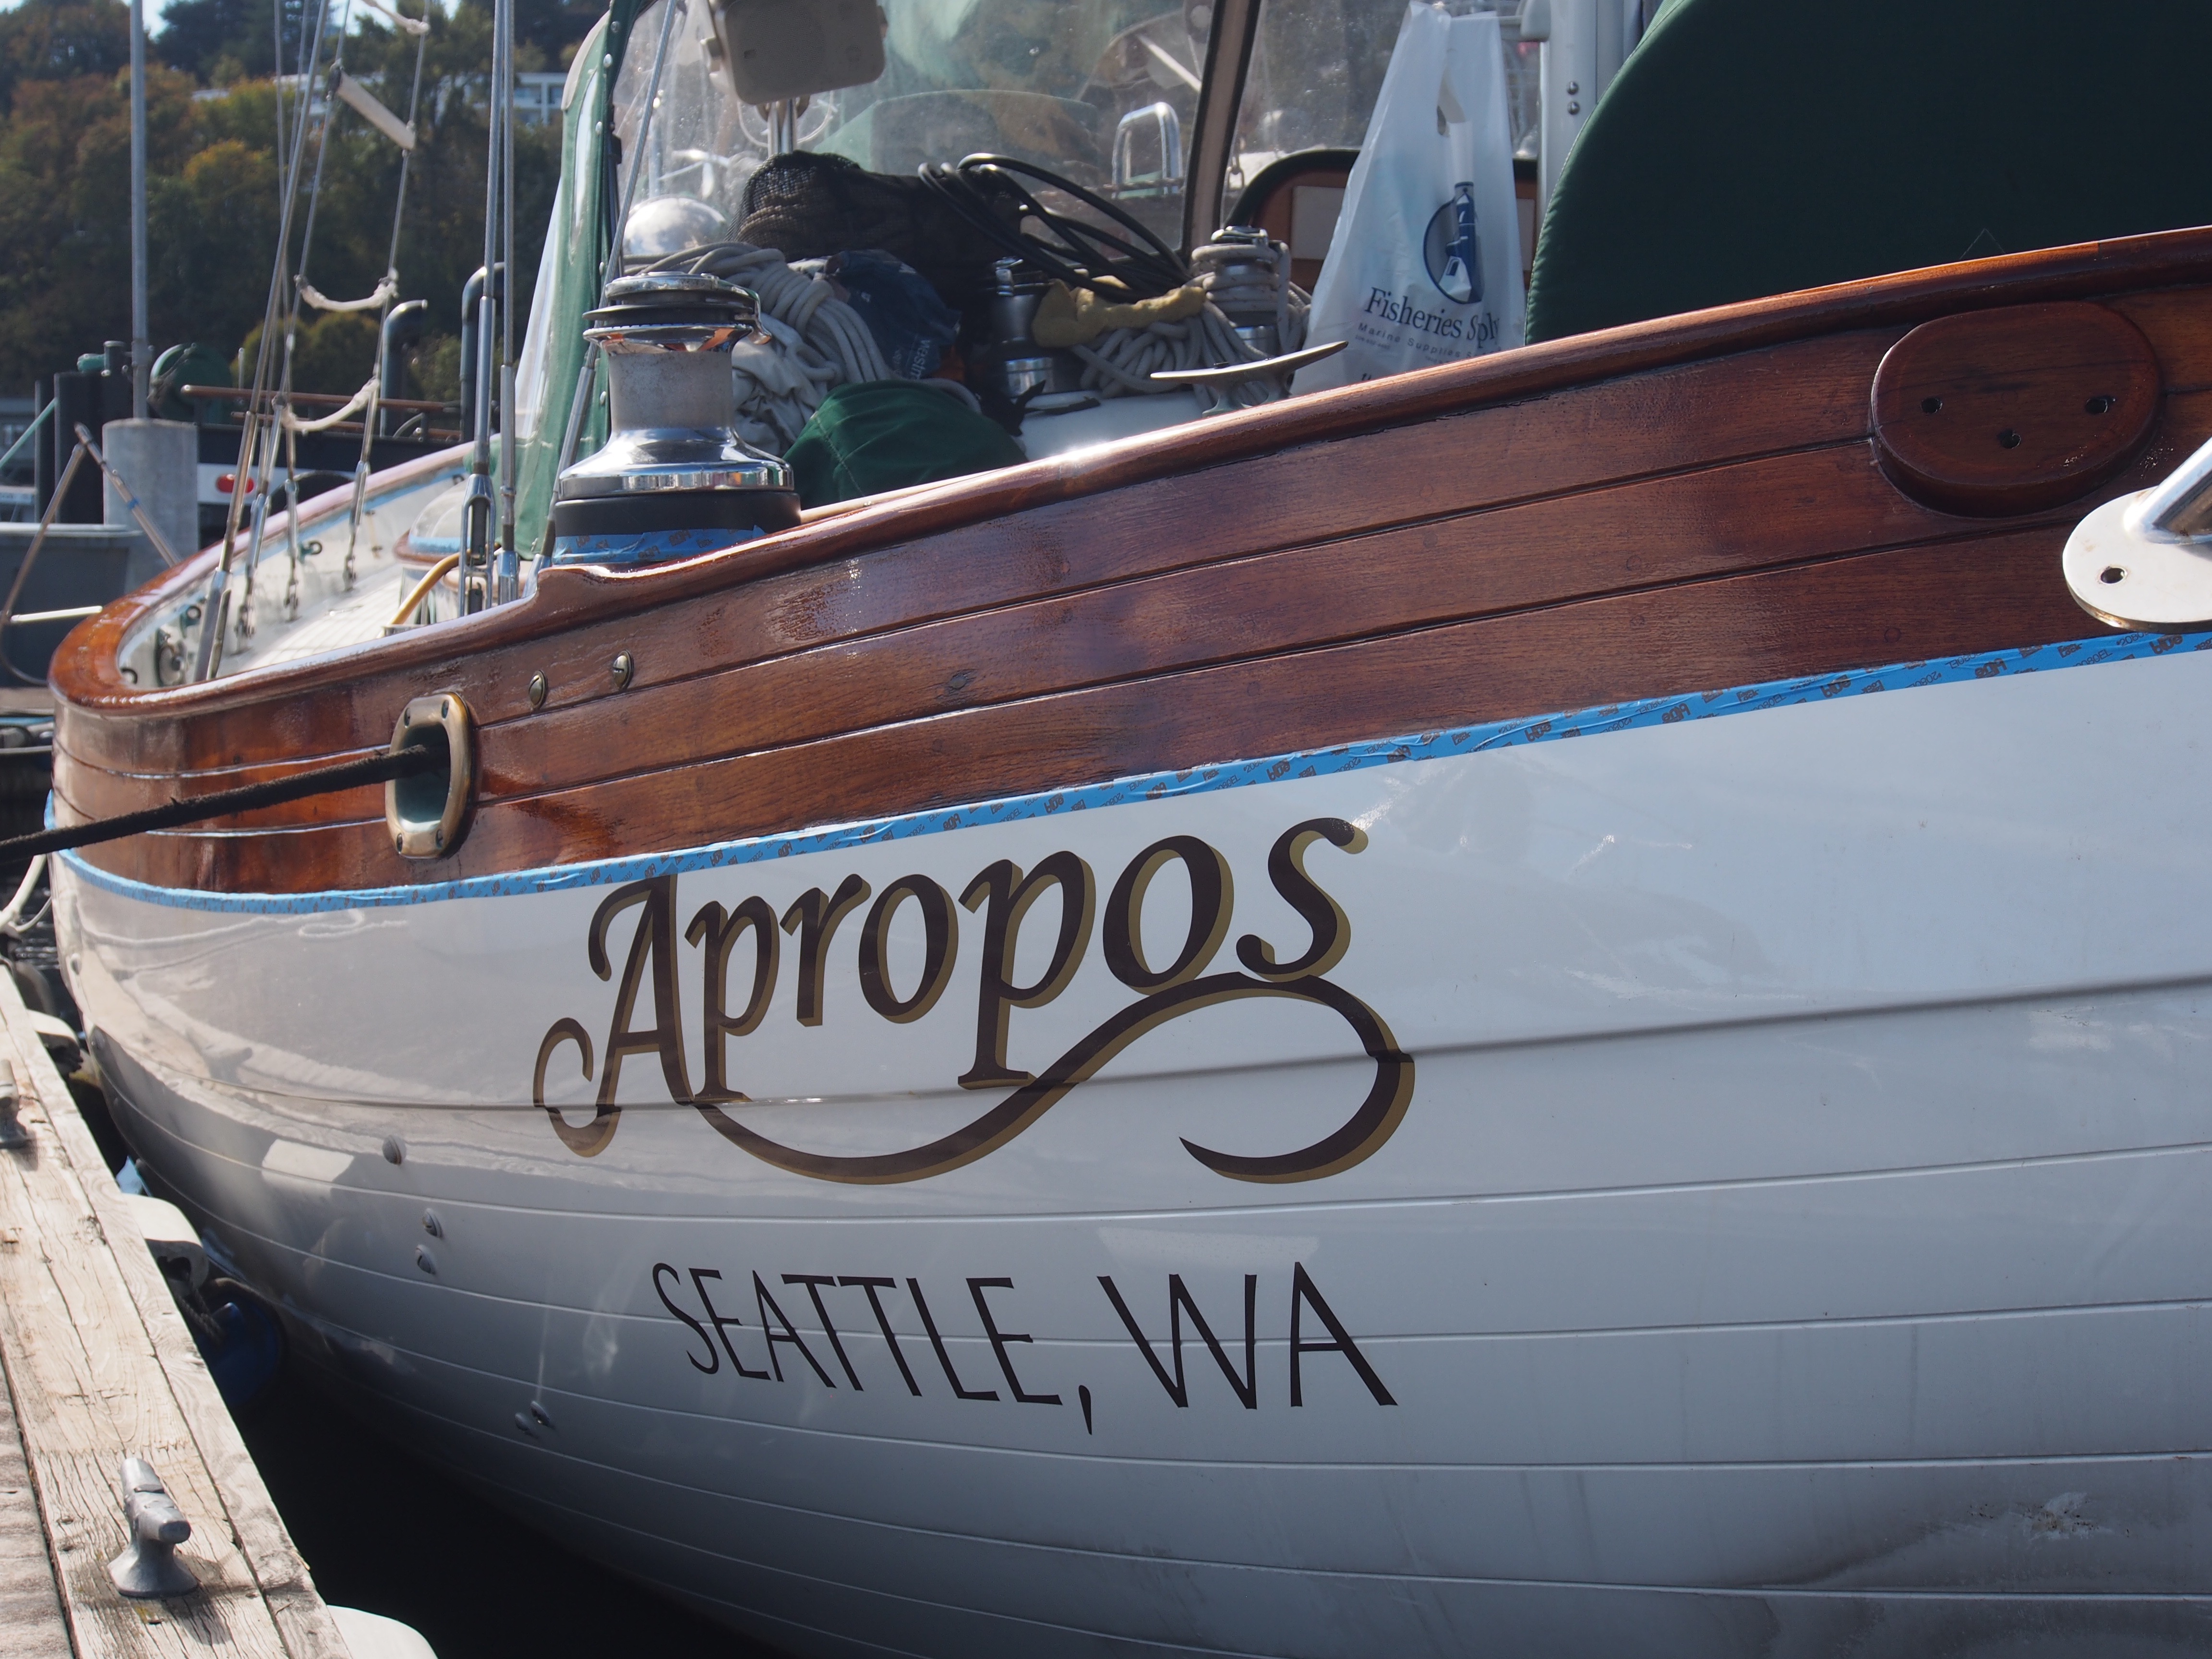
Over the previous 12 years, I applied 2 “refresher coats” to most of the exposed brightwork–cap rails, turtle/hatch, coach-roof trim, cockpit, boom gallows, etc. The brightwork that was normally covered by canvas would get refresher coats every other year–deck boxes, grab-rails, helm seat, butterfly hatch, etc. But after spending 2 years in the tropics, sitting on land for 6 months in Fiji, and sailing 16,000 nautical miles in the ocean, all of the varnish was in very poor condition. The worst were the cap rails, outer planks, cockpit, and coach-roof trim since they were exposed to UV rays most of the time. I decided to attack these first.
Cap-rail, outer planks, and coach-roof trim
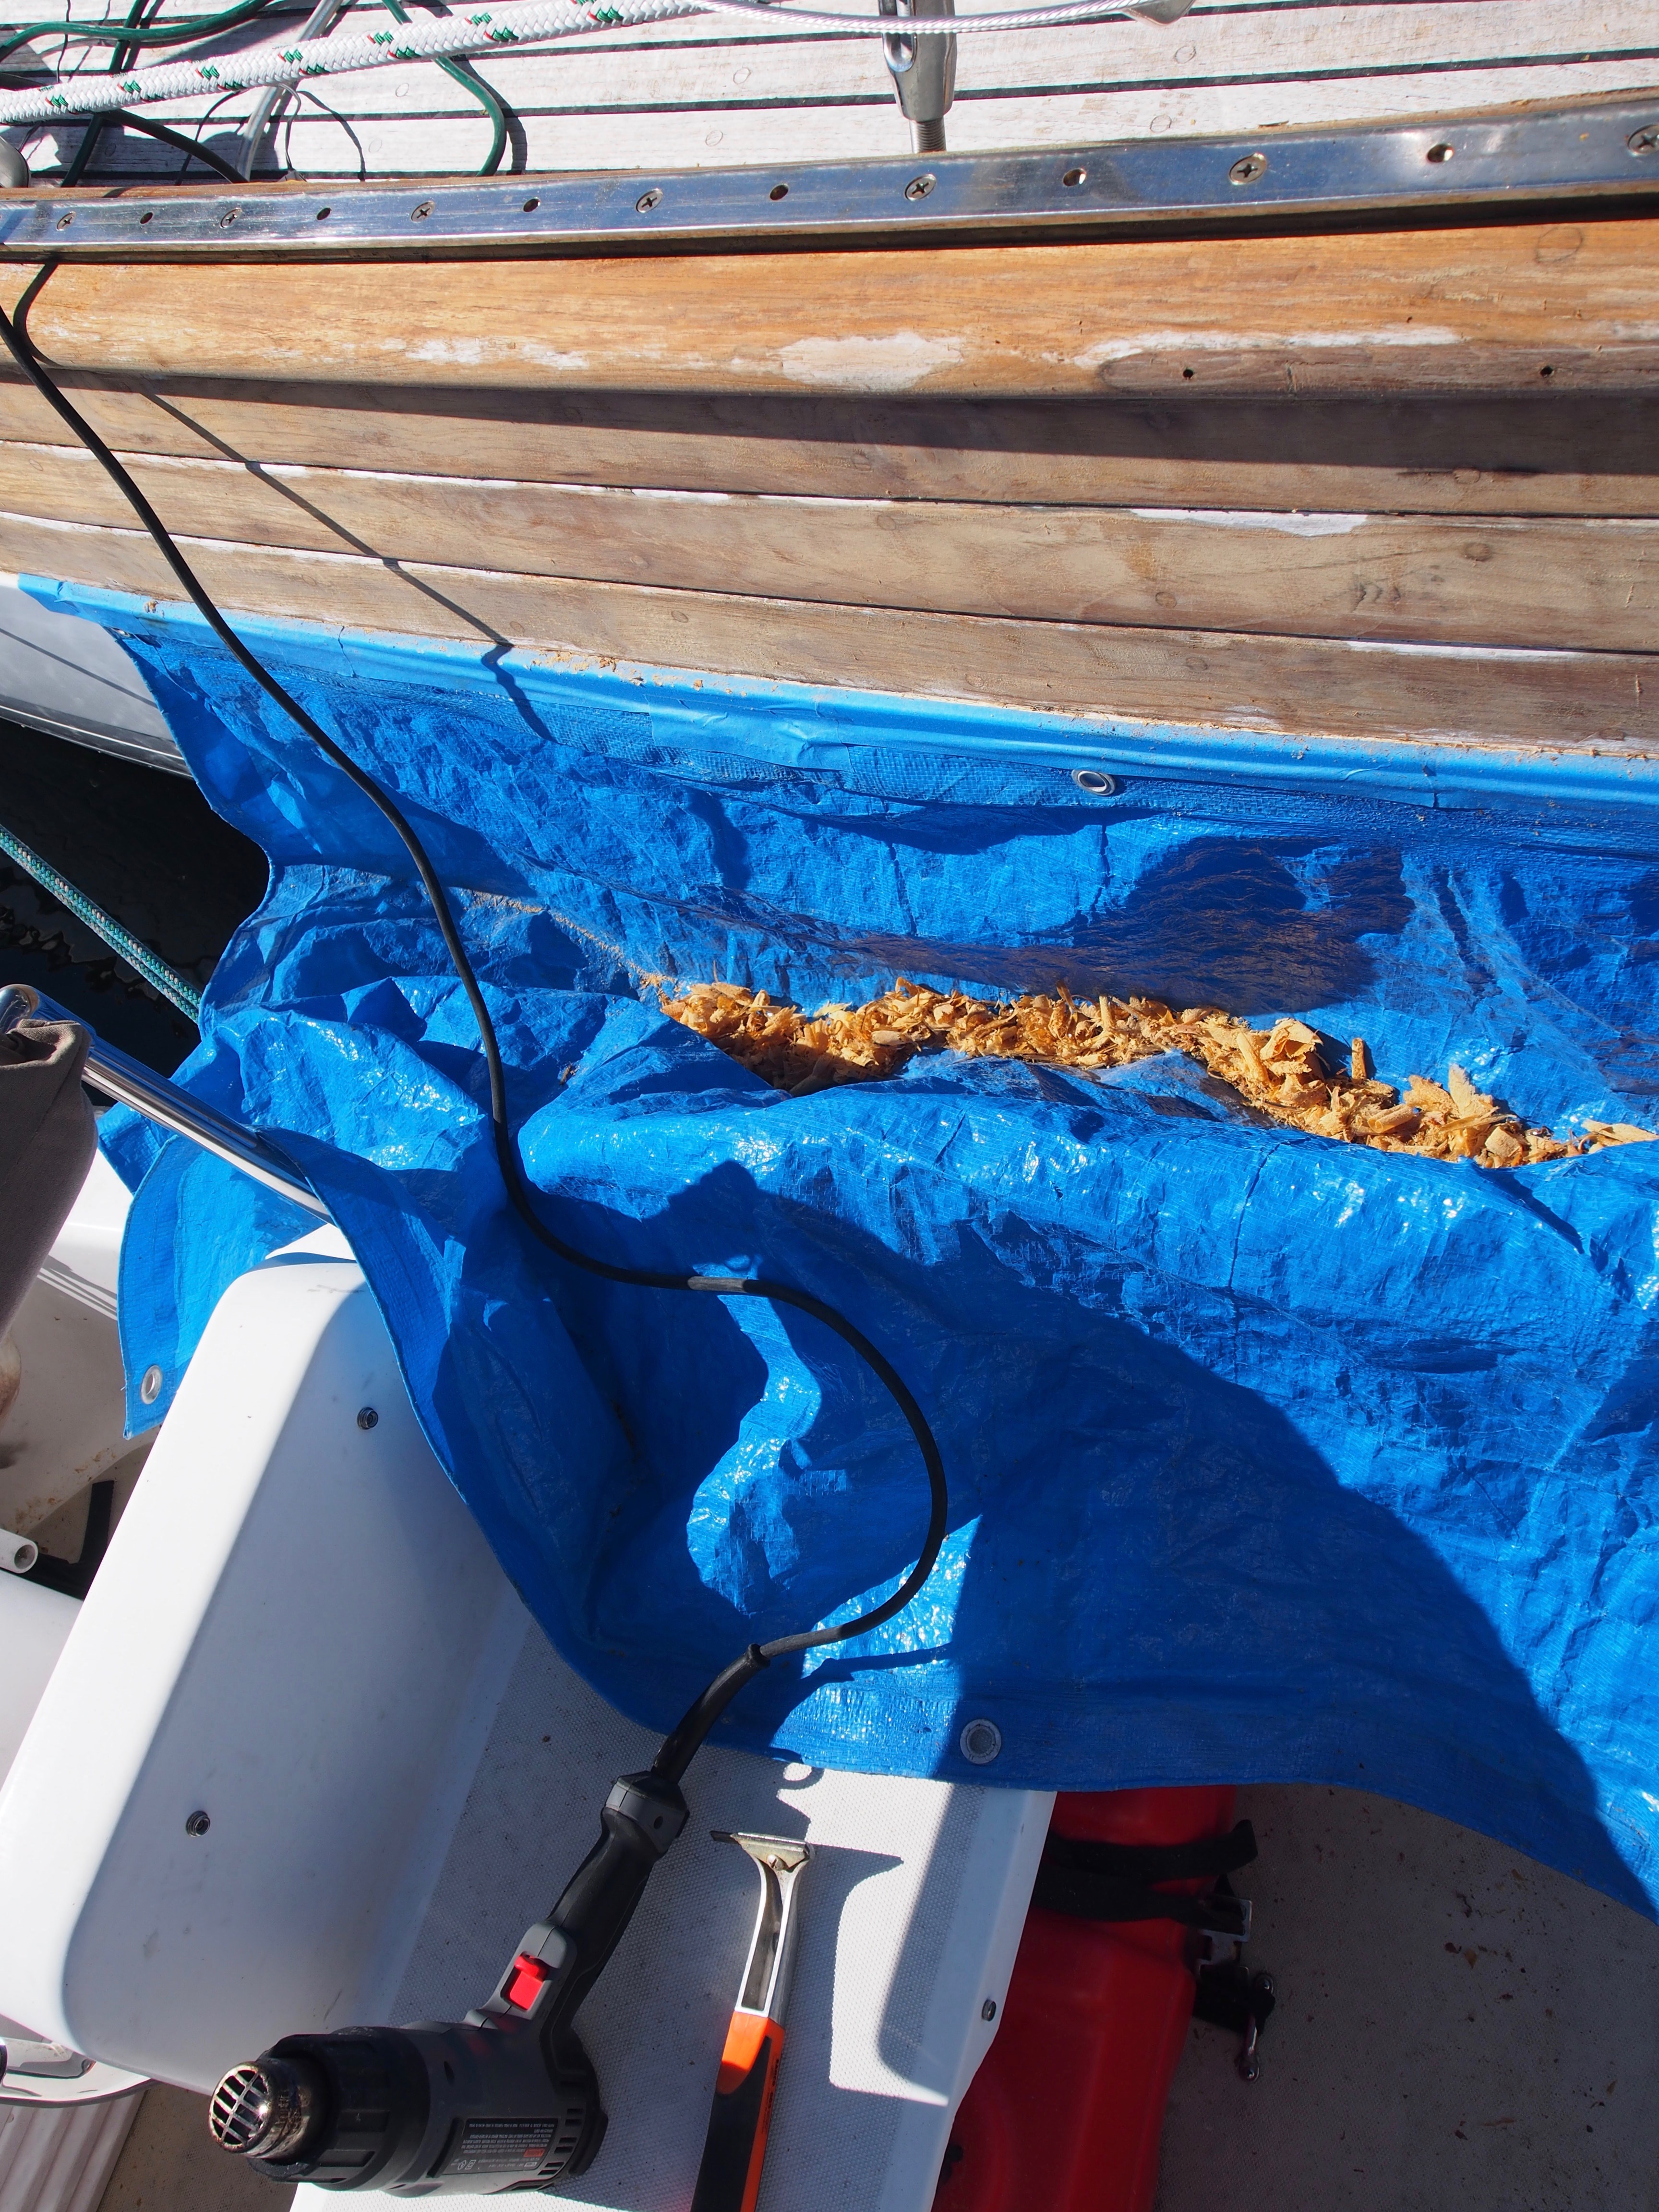
I used a heat gun and scraper to remove the old varnish. It’s time-consuming but effective, and I got better at it the more I did. When I first started, I hadn’t removed much from the boat besides small things like cleats and fender protectors. But as time went on, I realized how much easier (and how much better of a job) it would be to remove as much as possible, so I ended up removing the stanchions, lifelines, bimini, genoa tracks, whisker stays, and the stern pushpit. Even though it took over a day, it was worth it as it made the varnish removing, sanding, taping, and applying the new finish much easier and faster. Since I was working with the boat in the water, I was able to use the finger dock when working on the port side. For the starboard side, I borrowed a small Boston Whaler from a friend and used it to move along-side Apropos. I tarped below the outer planks to keep the removed varnish chips from reaching the water and vacuumed up gallons of it from the tarp. It took about a week of full-time (10-hour days) work to remove the varnish from the cap rail, outer planks, and coach-roof trim.
Heating and scraping the old varnish
Down to bare teak
Cap rail with the genoa track removed
Next came the sanding to remove any scrape marks left behind after melting and scraping off the old varnish. This also removed the gray areas where the varnish had completely lifted, exposing bare teak to the elements. I first used a 5″ orbital sander with 120 grit paper and followed it by hand sanding with a 15″ long-board to get the surfaces as level as possible. This took a couple of days. A friend helped with masking the joint between the cap rail and outer planks and I applied a marine sealant to fill the small void, possibly the cause of some of the water entry we experienced during the trip.
Mike was an expert with the masking tape
Sealant applied between the cap rail and outer planks
Now that the surface was ready for re-finishing, I made sure to cover it with plastic to keep the overnight dew from reaching the bare teak.
Covering the bare teak
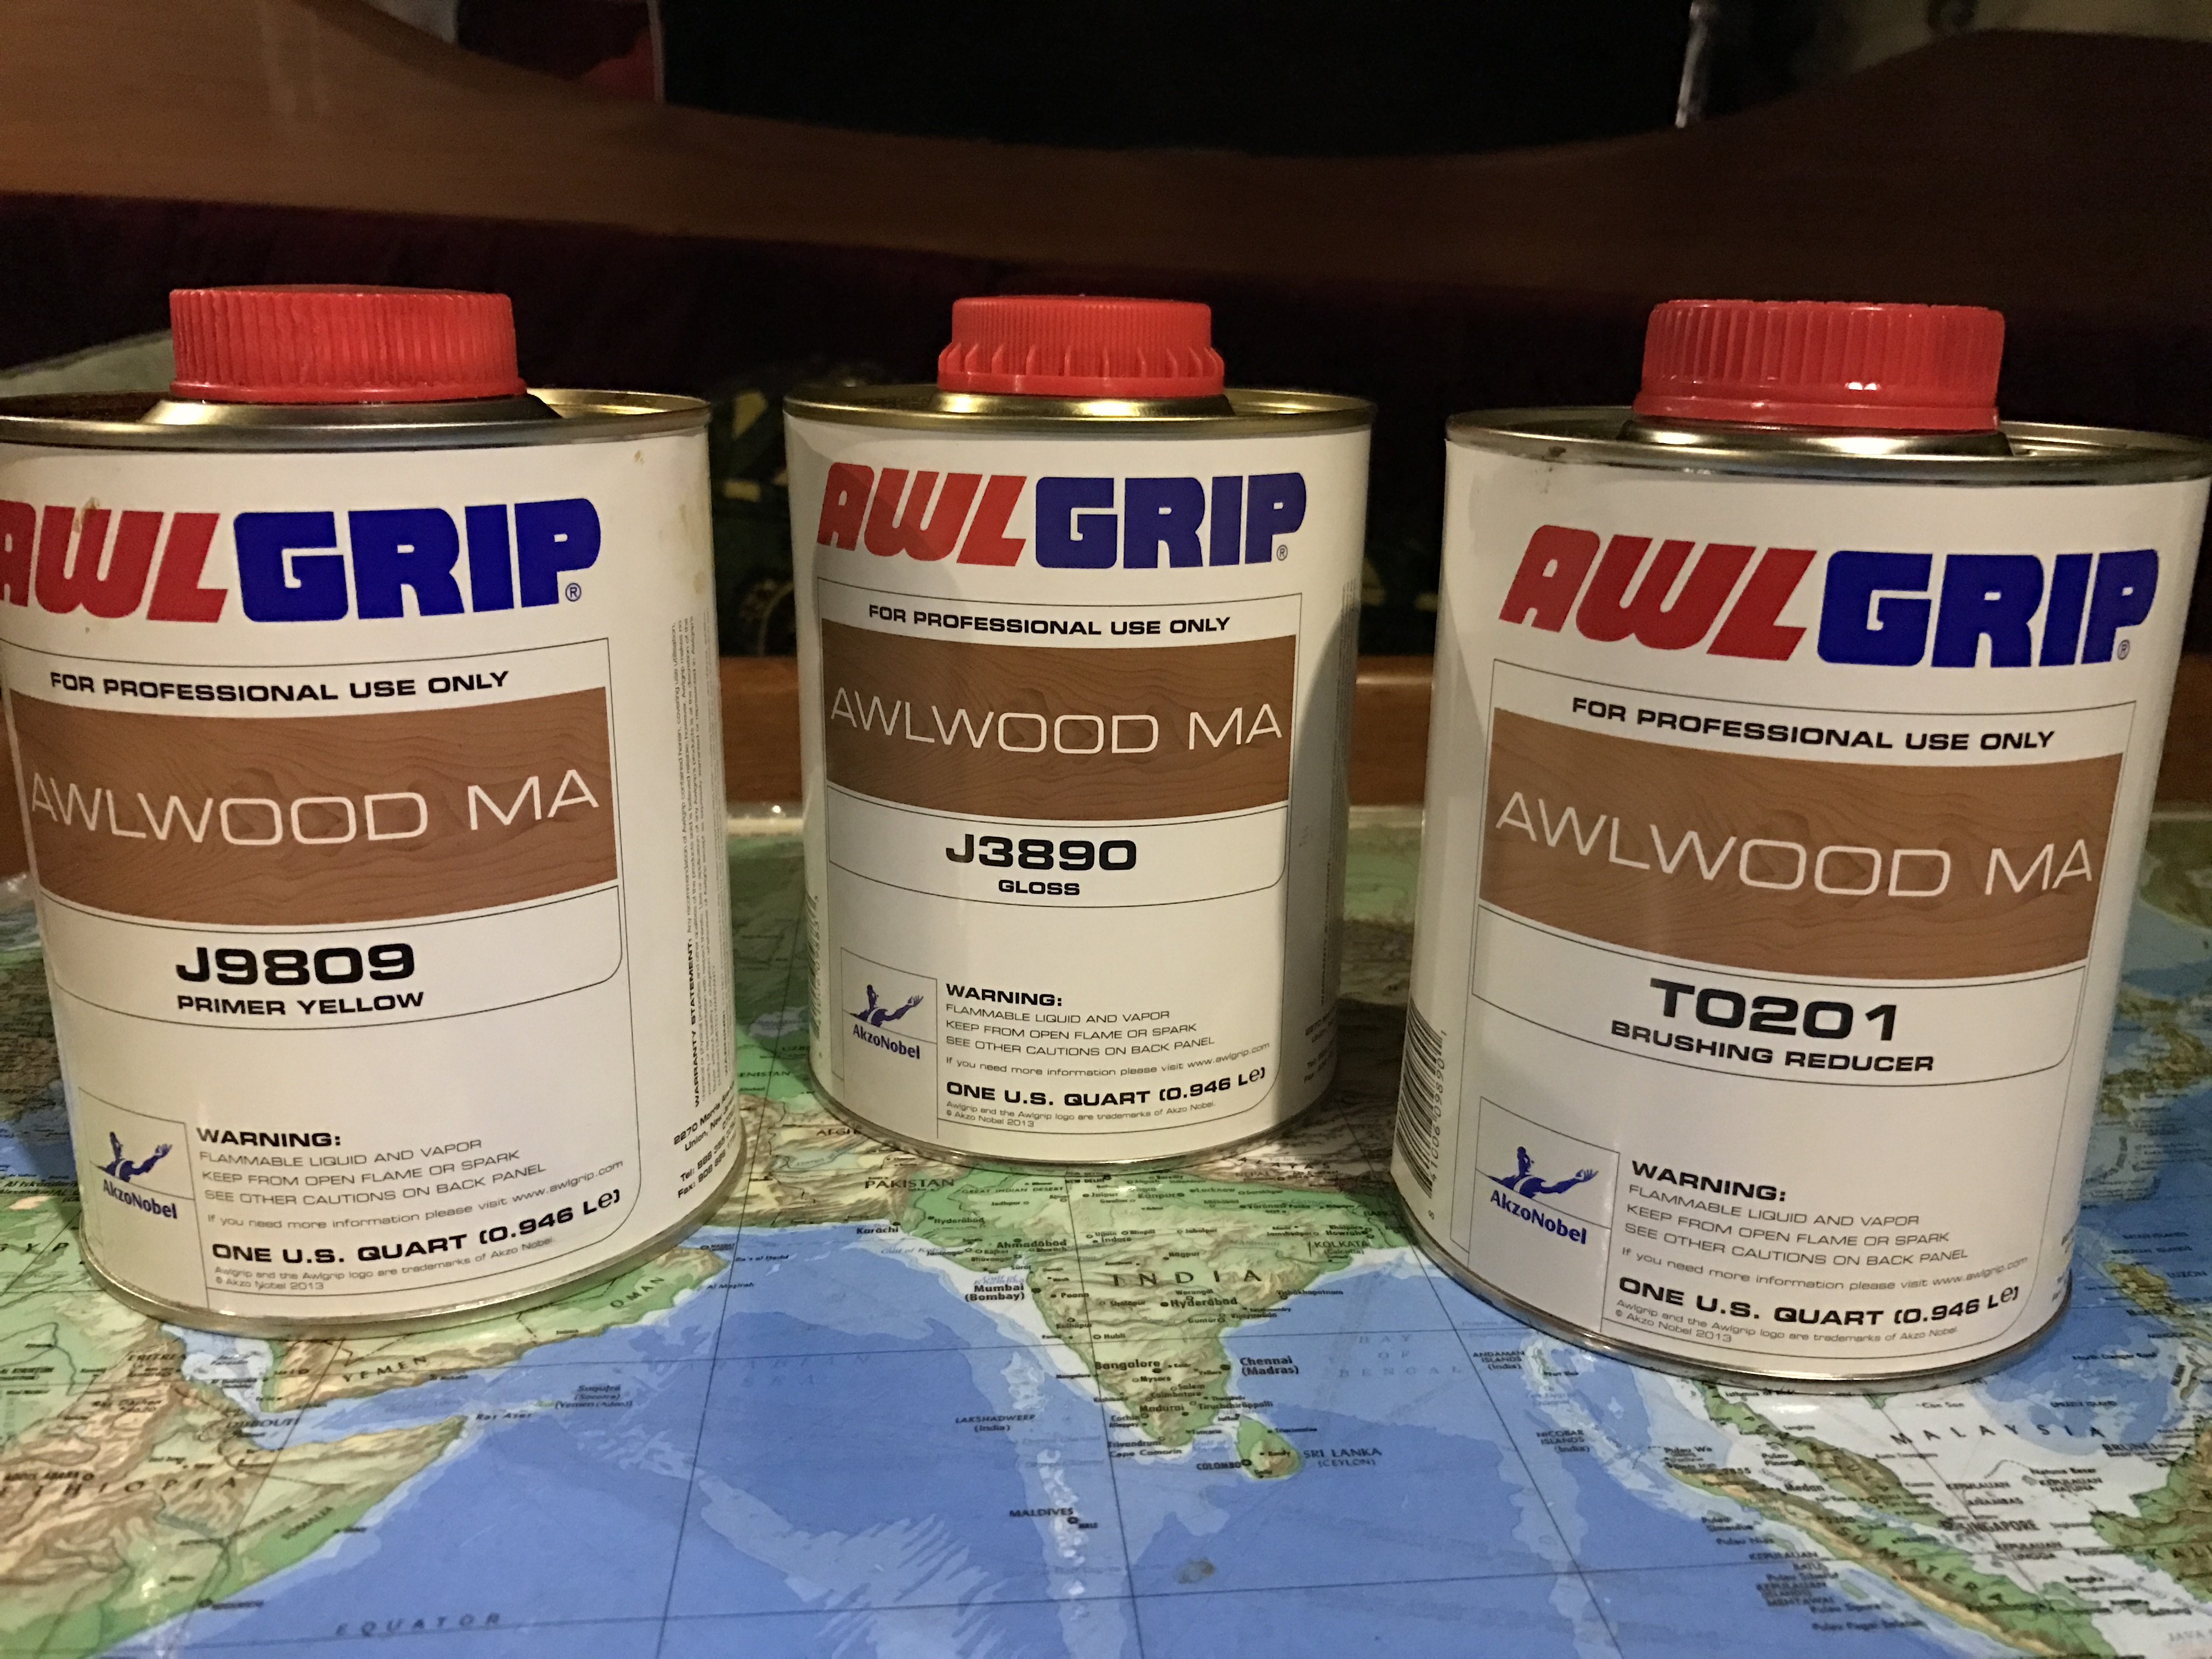
Finally it was time to apply the new finish. I looked into alternatives to varnish, and decided on a product called Awlwood system made by AwlGrip. It’s a one-part system that catalyzes by the moisture in the air (as opposed to a 2-part system that requires a hardener). It’s relatively new, but testing claims it outlasts traditional varnish and can go several years between refresher coats. Some of the downfalls with it–it’s expensive at $65/quart, and it takes some getting used to applying. Since it catalyzes with moisture, you need to work with a small amount at a time. I settled on 4 ounces and found that I could apply that amount in 20-30 minutes, before it became too thick.
Awlwood System
The first step with the Awlwood system was to apply a primer coat for the clear coat to adhere to. The primer coat contains a yellow dye to give the teak a more consistent and deeper tone. It was easy to apply with a cloth–similar to applying stain. This was an important step and without it, the top coat would just peel right off.
Applying the primer coat
Finally, the clear top-coats were applied using Awlwood Clear. They recommend 8 coats, and one of the advantages of the product is that multiple coats can be applied in one day. A 4-hour dry time is needed between coats, and it took me 3 hours to apply, leaving an hour to rest in between! I settled in on applying 2 coats per day for 3 days, lightly sanding at the beginning of each day to remove imperfections. I found tiny bubbles forming in the first few clear coats (not sure why this happened, but a friend who used the same product on teak also found this). A light sanding each morning removed these imperfections and allowed the next coat to flow better. Prior to the 8th (final) coat, I let the 7th coat dry for 24 hours, gave it a final sanding, then applied Awlwood Clear thinned 5% with Awlwood Brushing Reducer and was pleased with the final outcome.
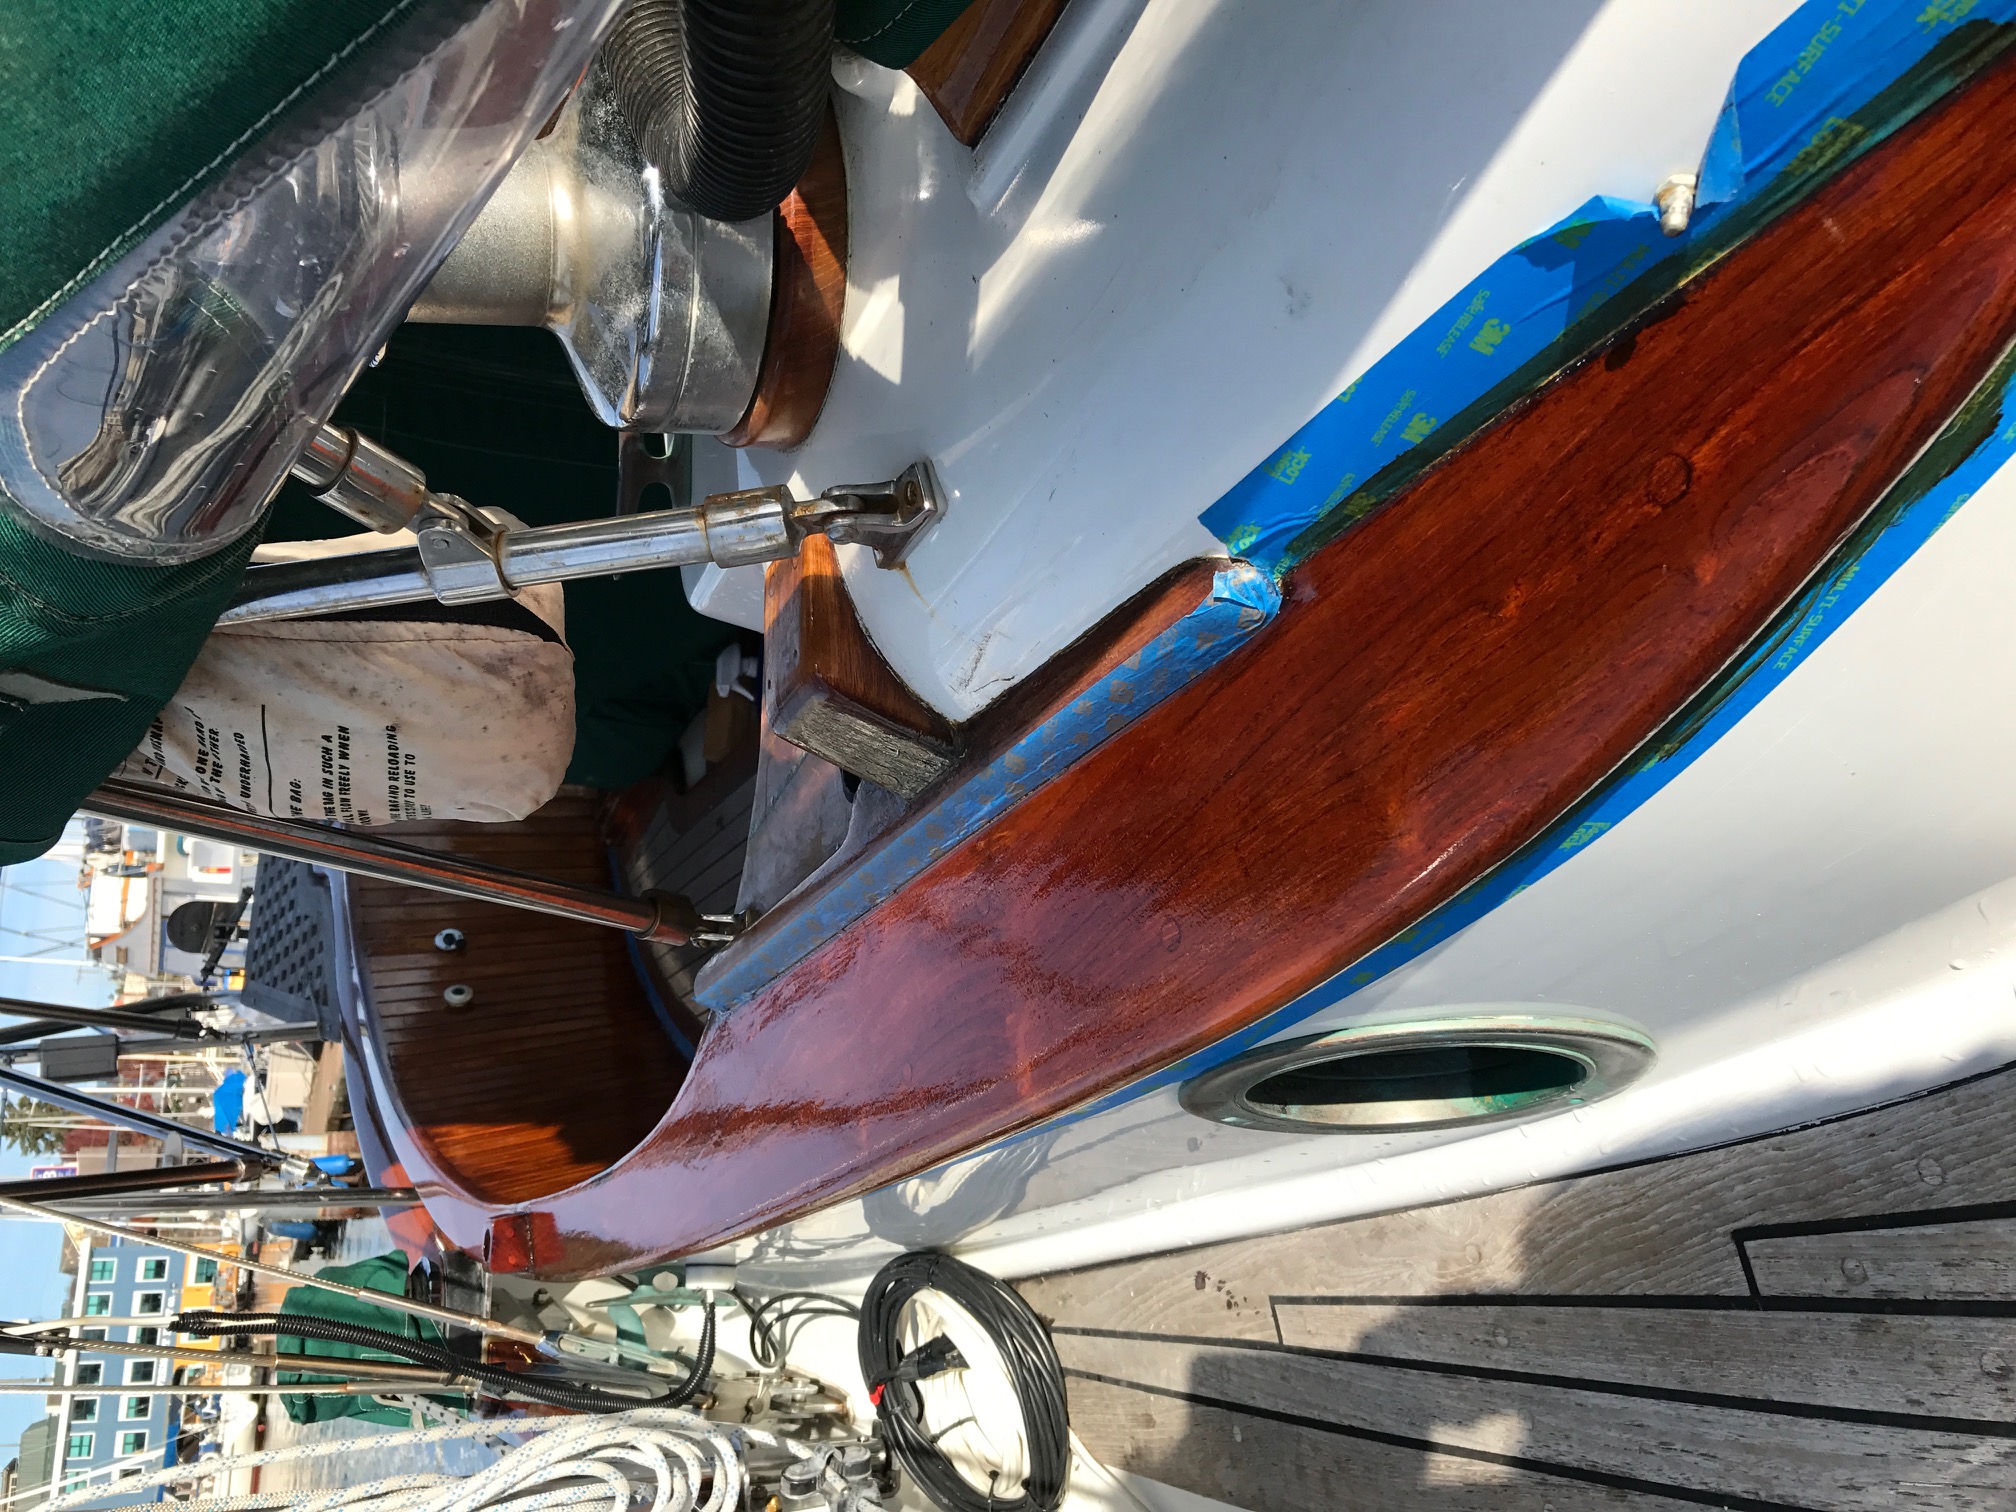
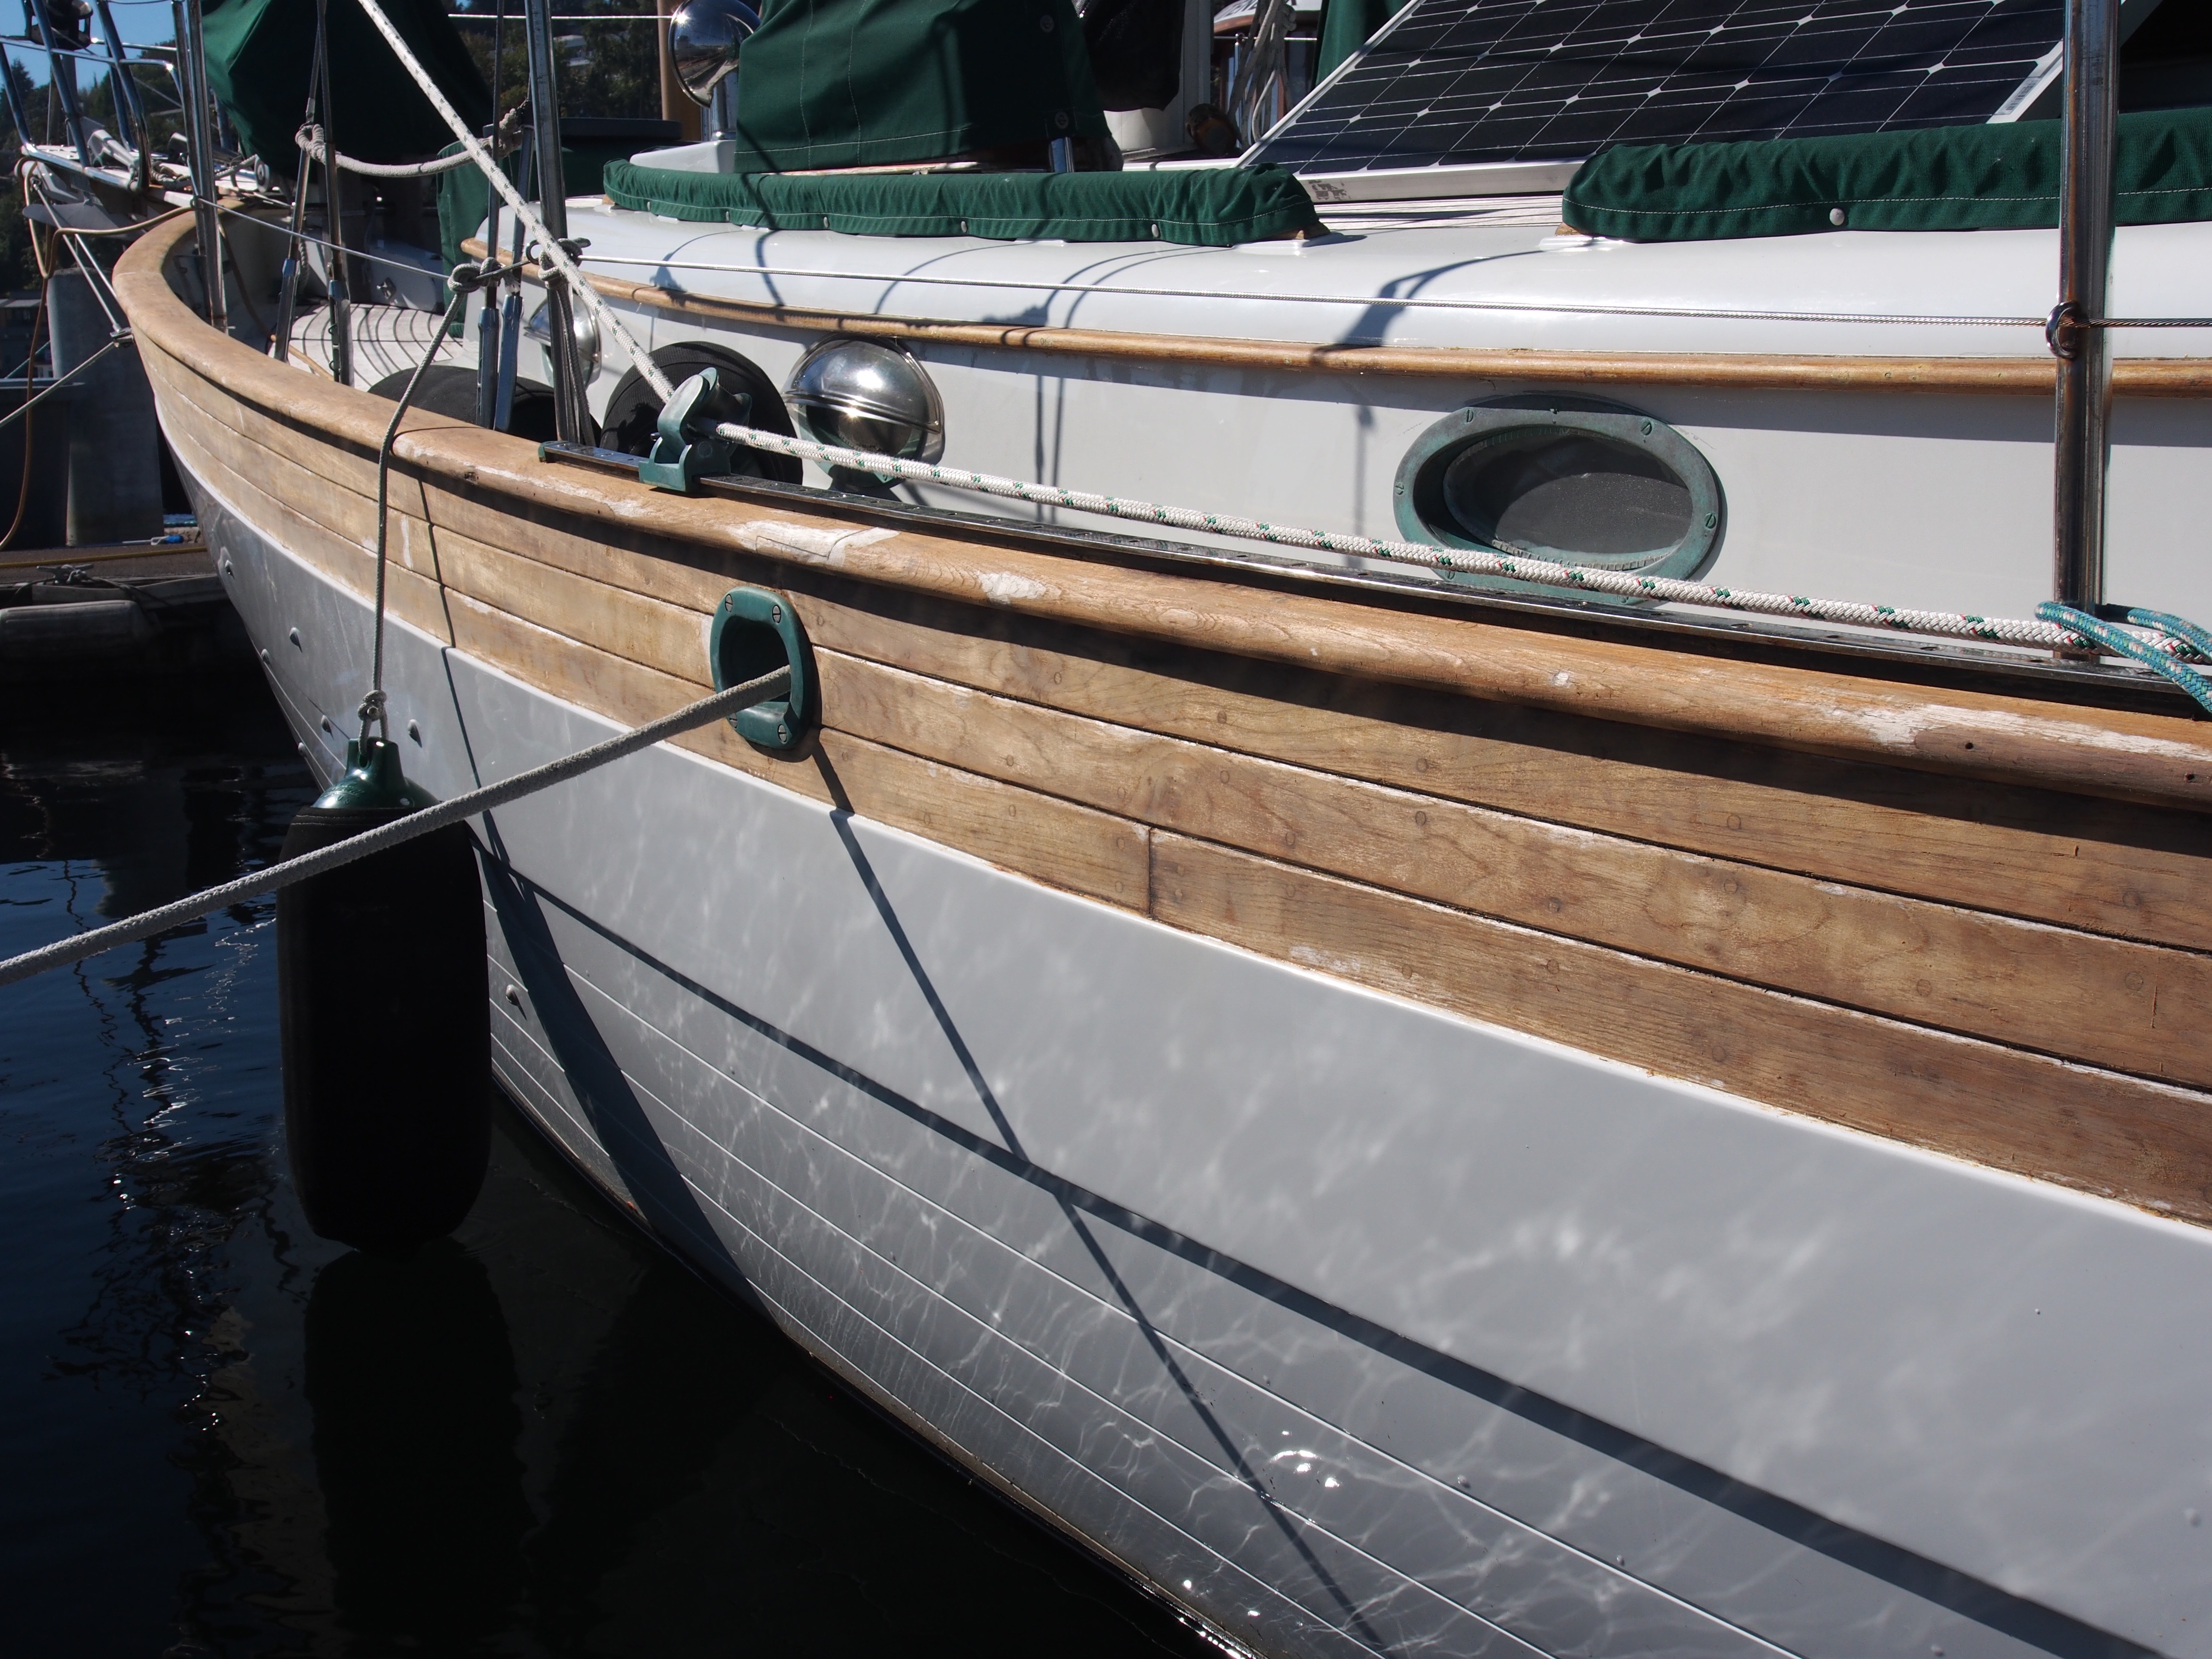
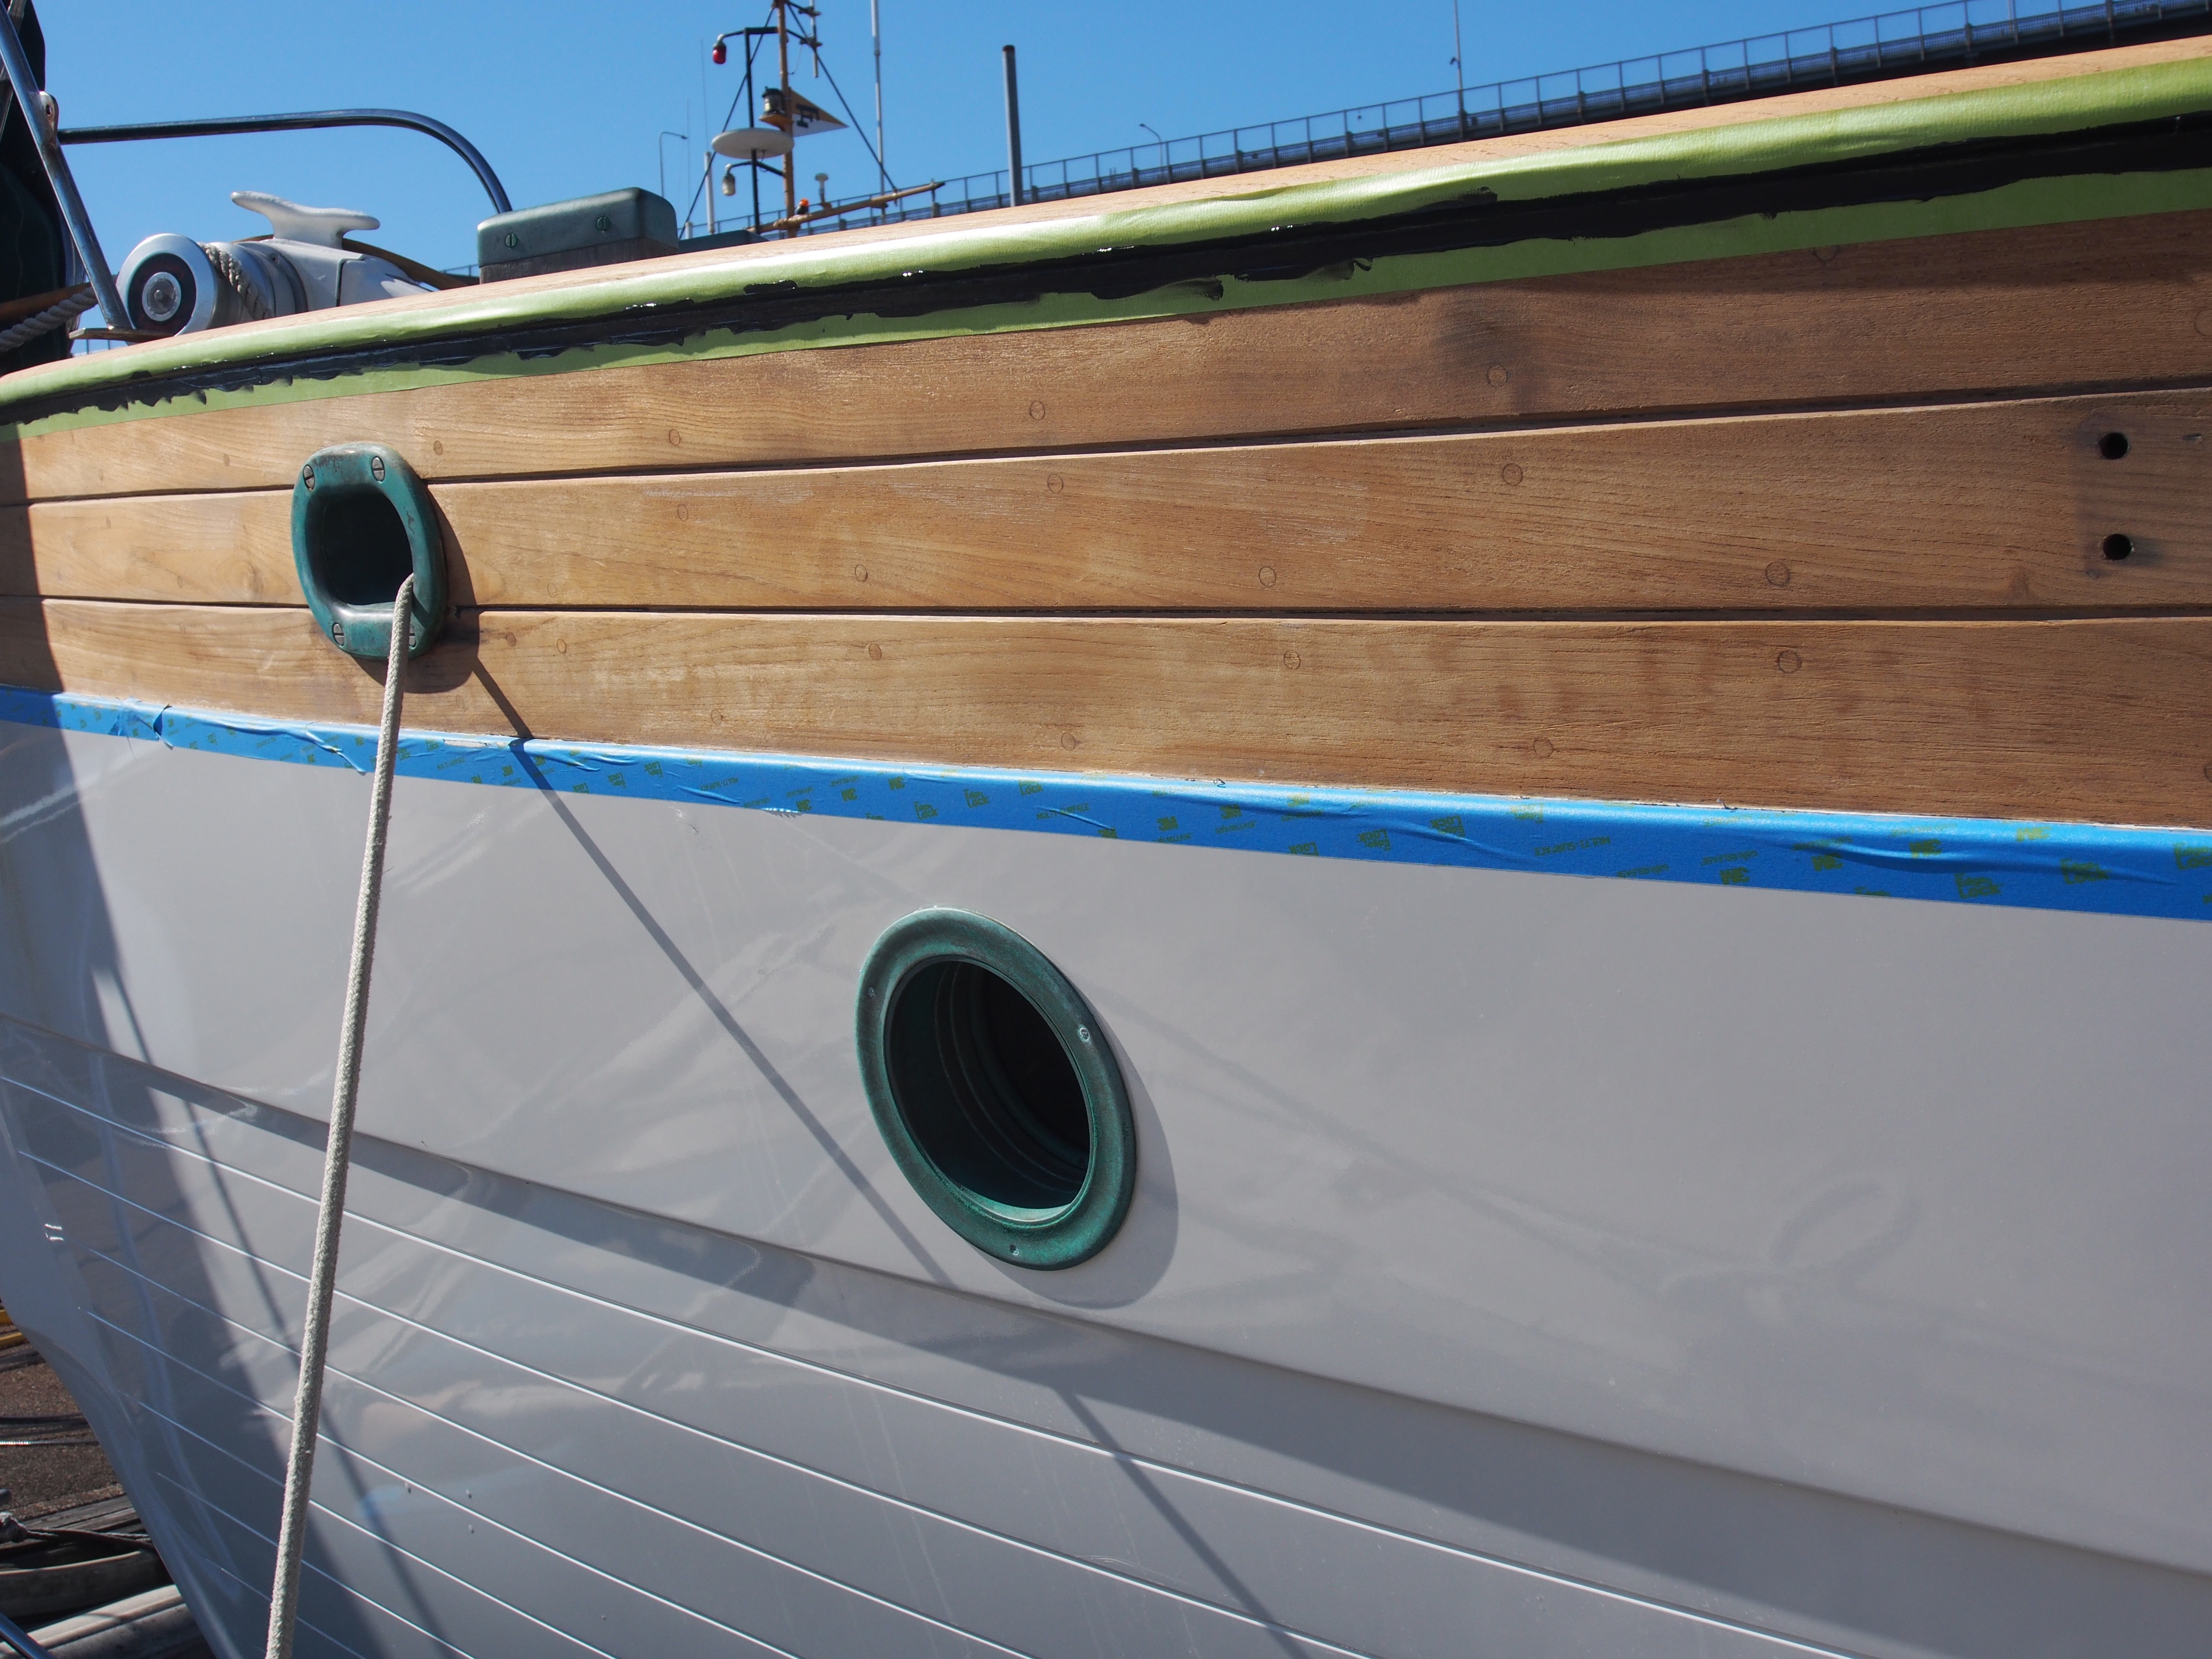
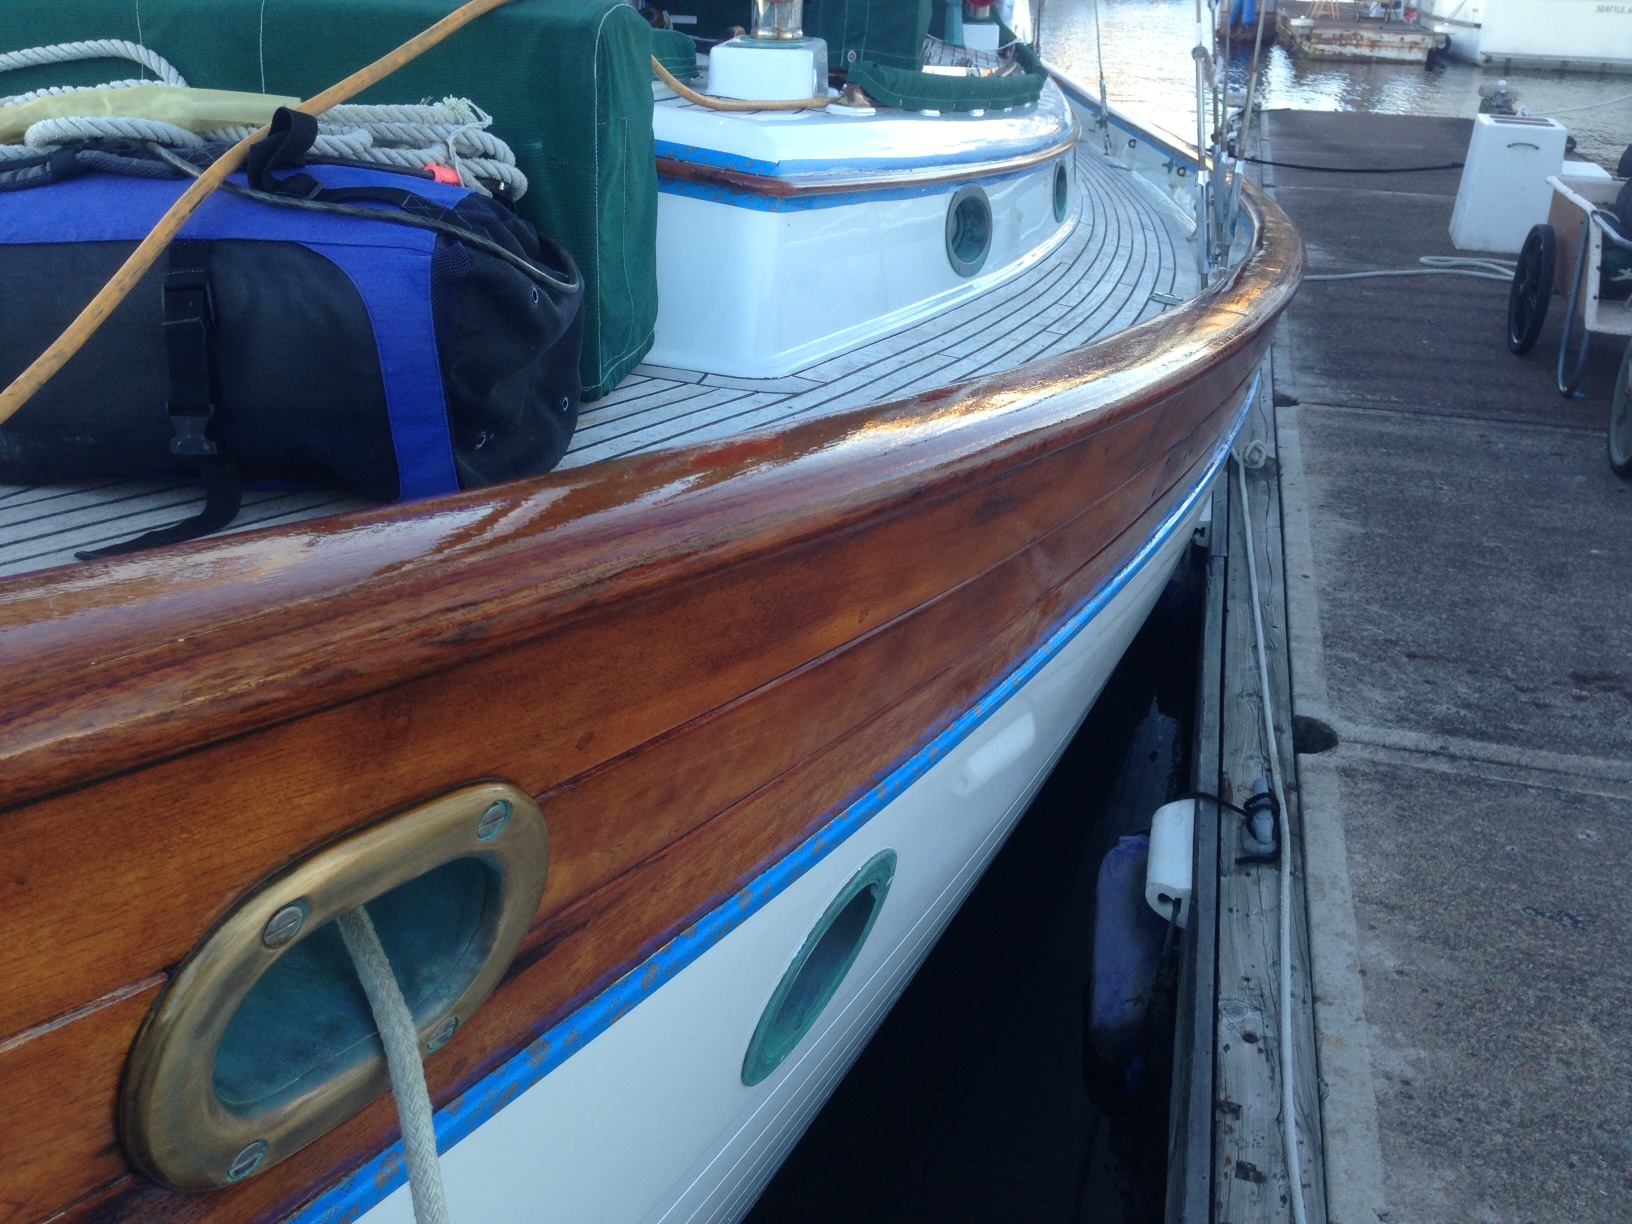
After 8 coats of Awlwood Clear
After 8 coats of Awlwood Clear
After 8 coats of Awlwood Clear
The final step was to re-bed the stanchion brackets, genoa tracks, whisker stay bases, etc. I polished all the stainless steel stanchions, push-pit, bimini, and genoa tracks using Fitz Polishing Compound prior to re-installing them.
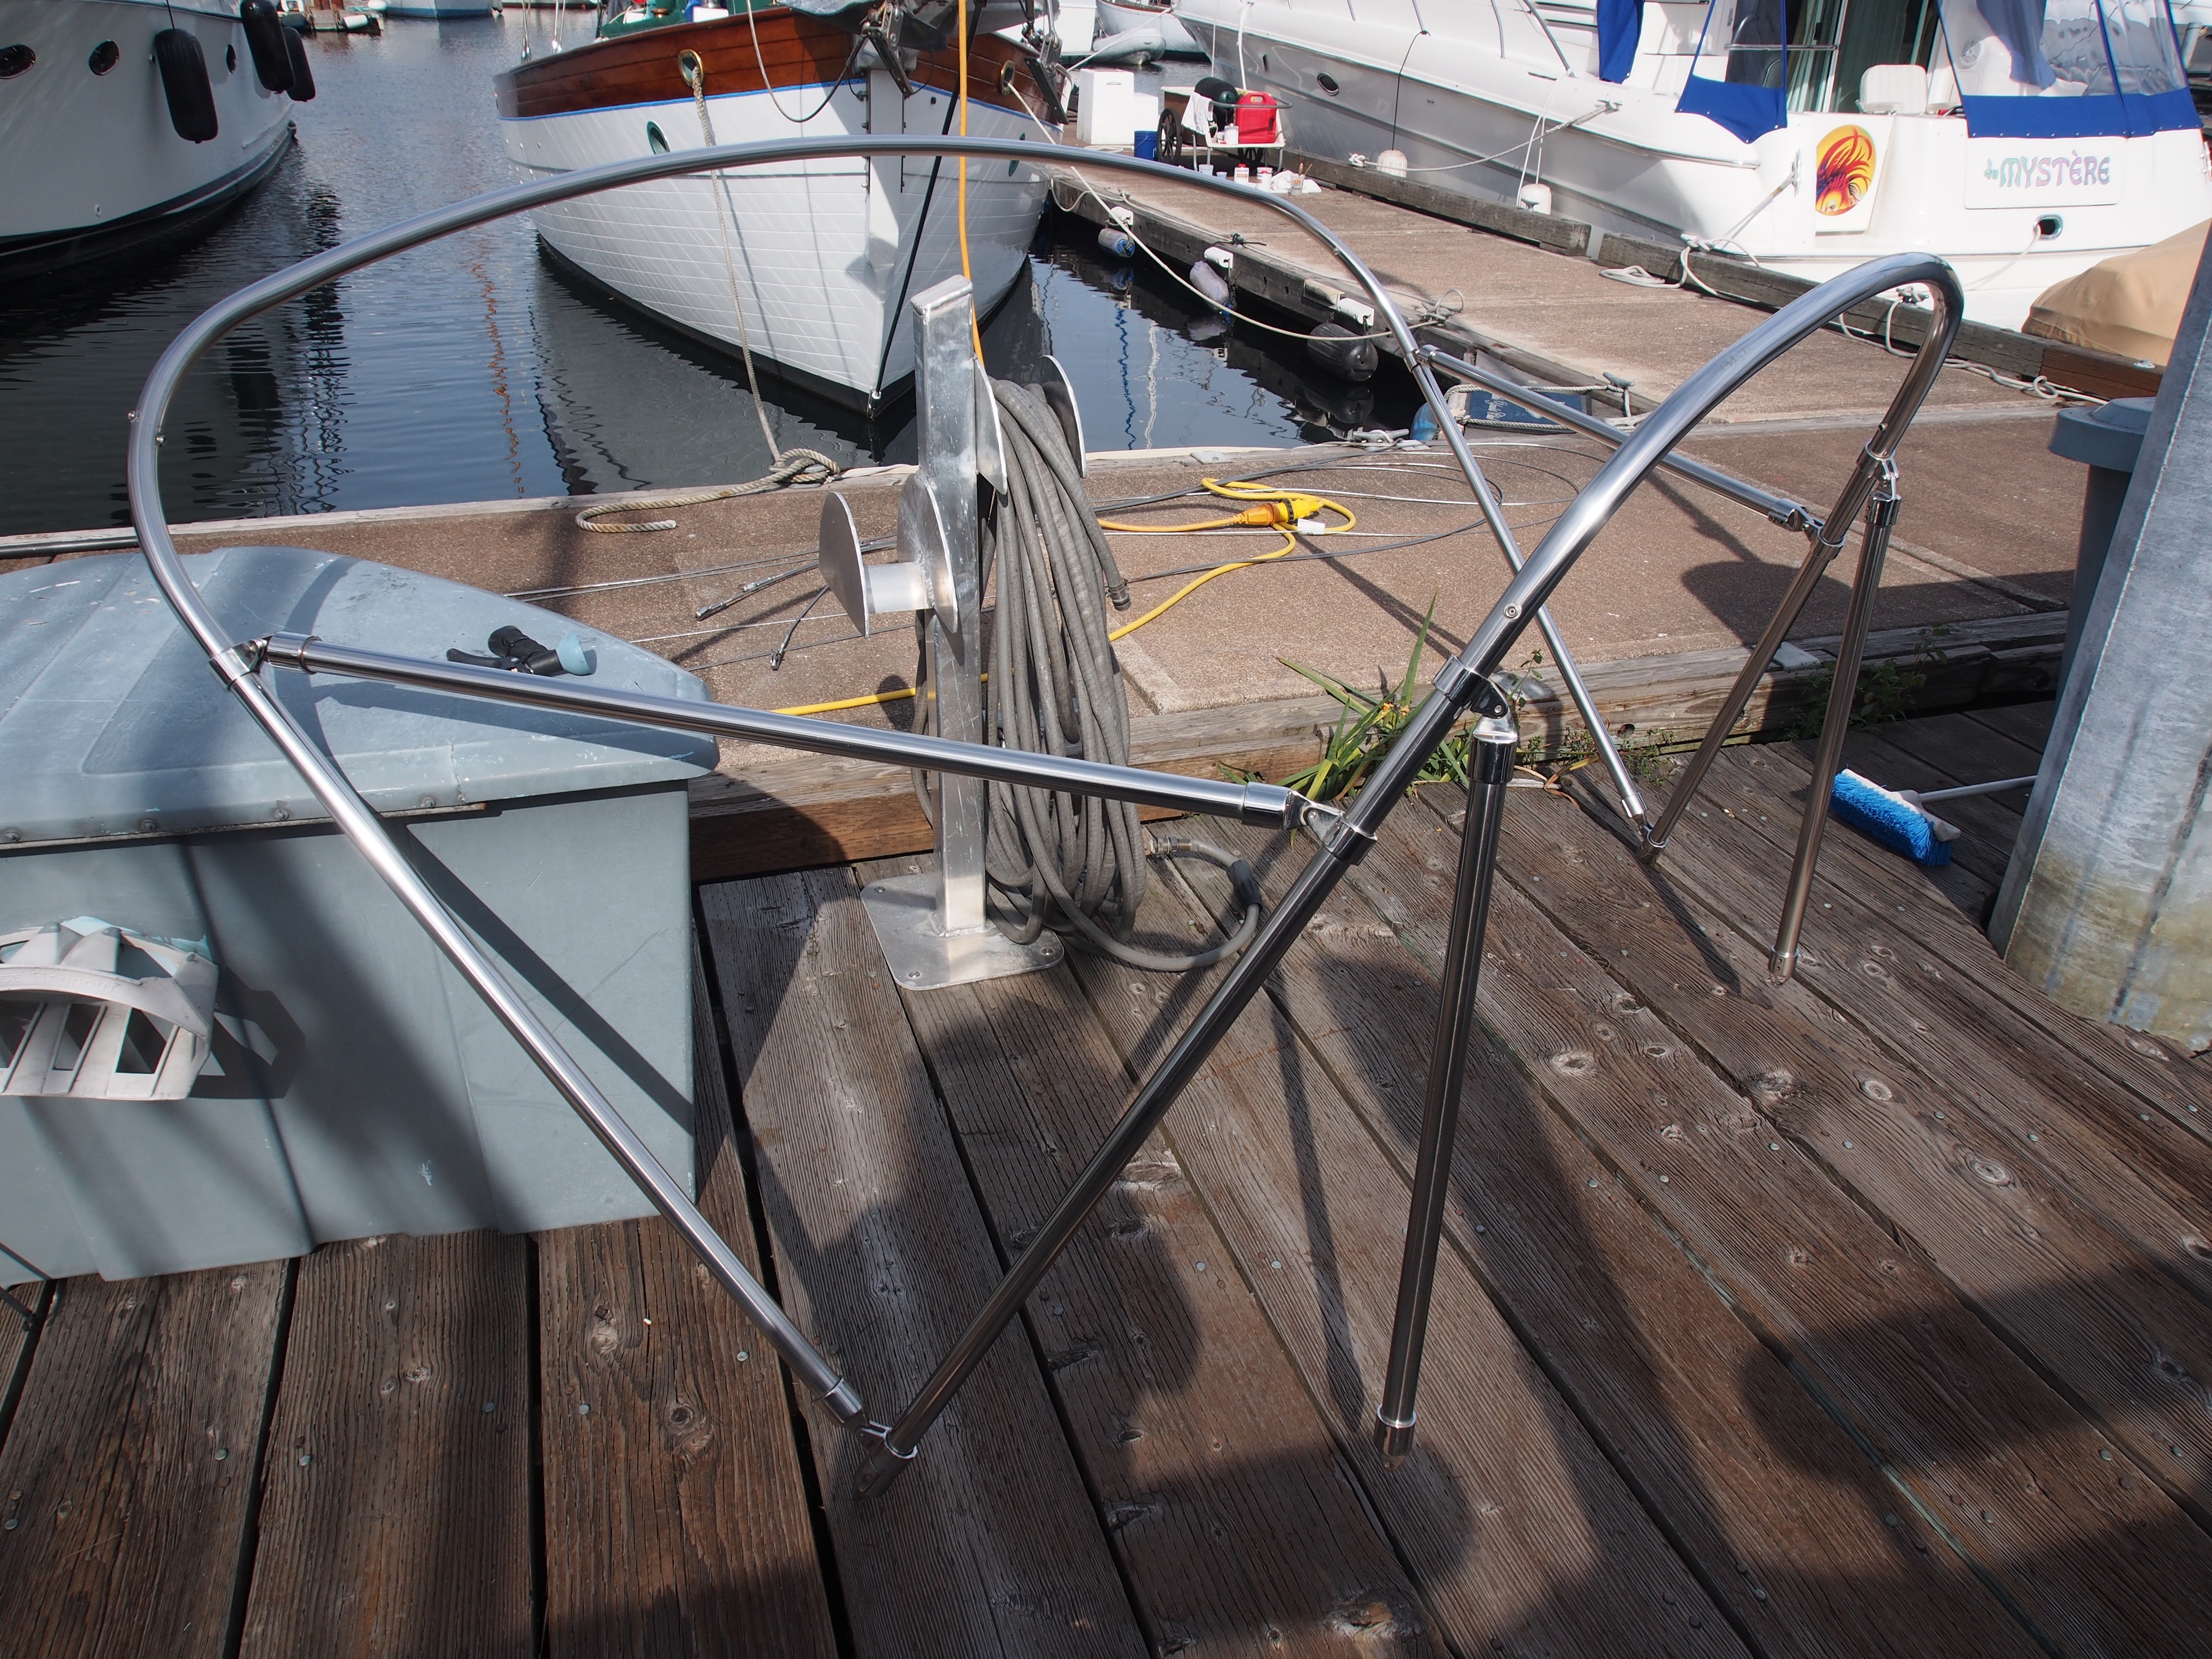
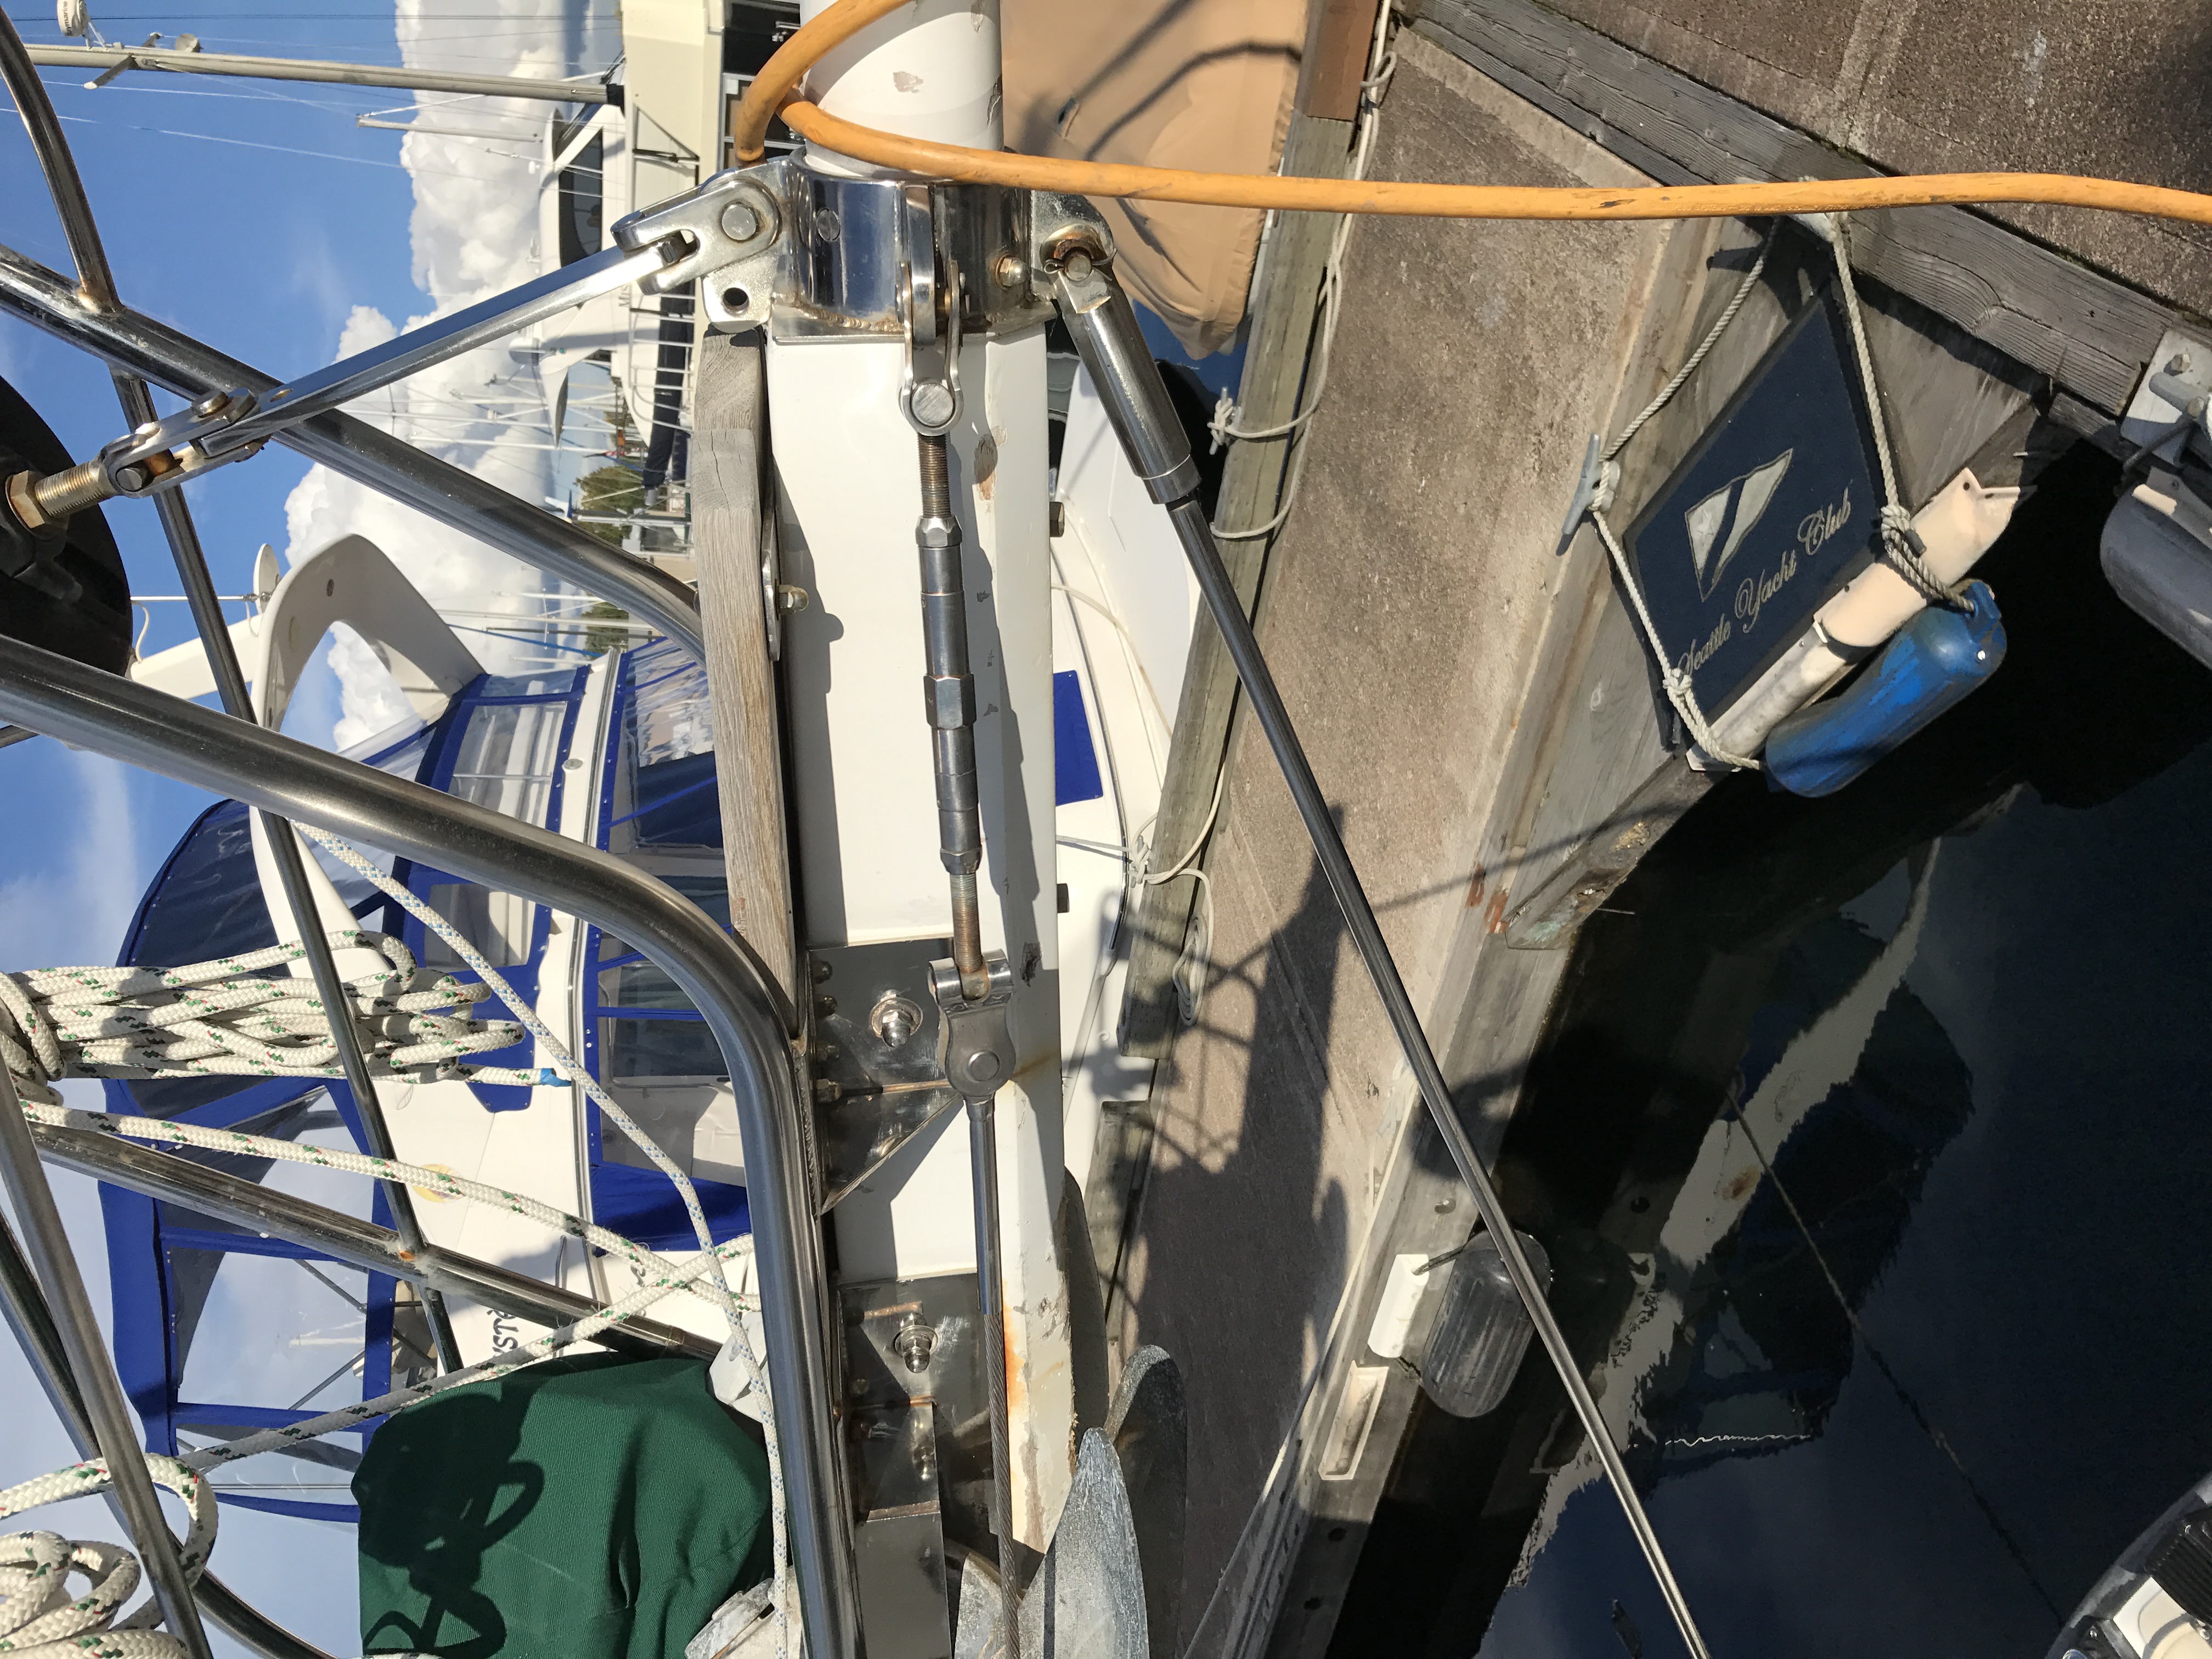
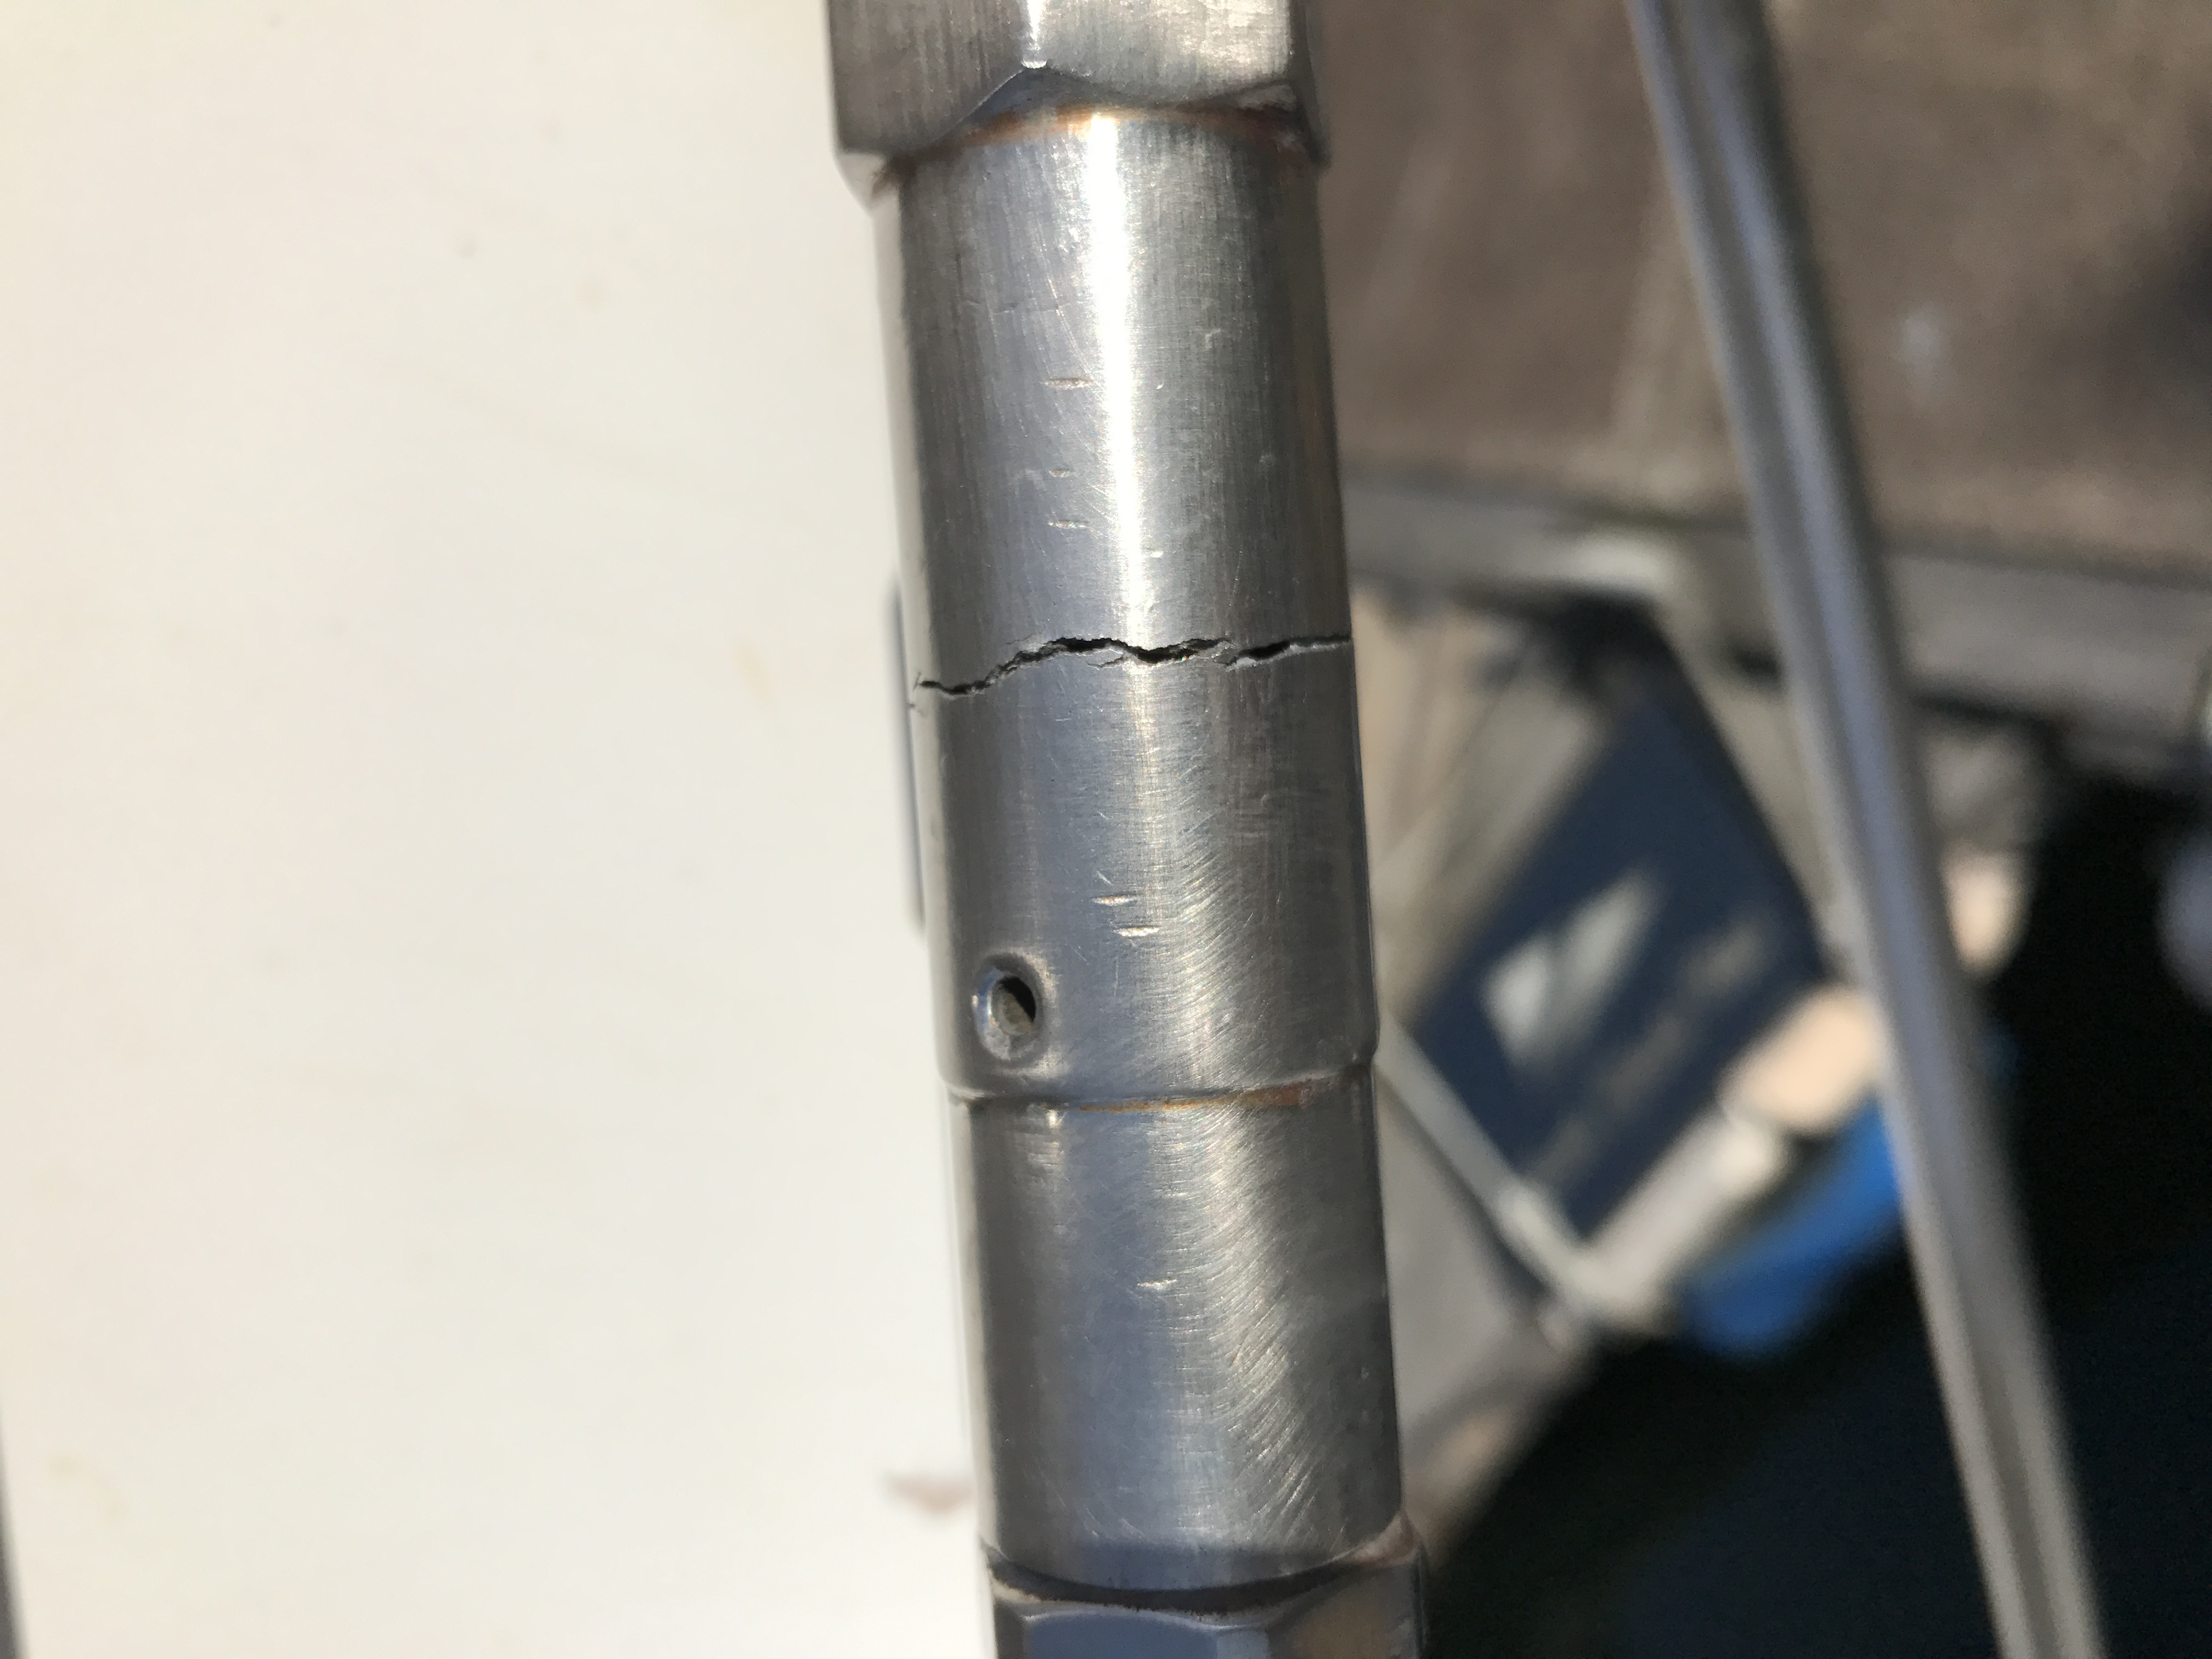
While polishing the stainless steel around the bowsprit, I noticed that one of the whisker stay stainless steel turnbuckle bodies had nearly failed. A stress crack on the starboard turnbuckle probably occurred somewhere between Fiji and Seattle on a starboard tack due to heavy shock-loads on the bowsprit when beating upwind with the genoa. A complete failure of the turnbuckle could have overloaded the bowsprit and, in a worst case scenario, brought down the rig!
Starboard whisker stay turnbuckle
Stress crack in turnbuckle body
The entire job took about a month of full-time work and covered the largest area of brightwork on Apropos. But there is still lots to do–cockpit, deck boxes, butterfly hatch, grab rails, helm seat, instrument turtle box, winch bases, cabin doors, companion way hatch, wheel, boom crutch, and several small pieces of teak. These will have to wait until next spring when the weather is drier–phase 2.
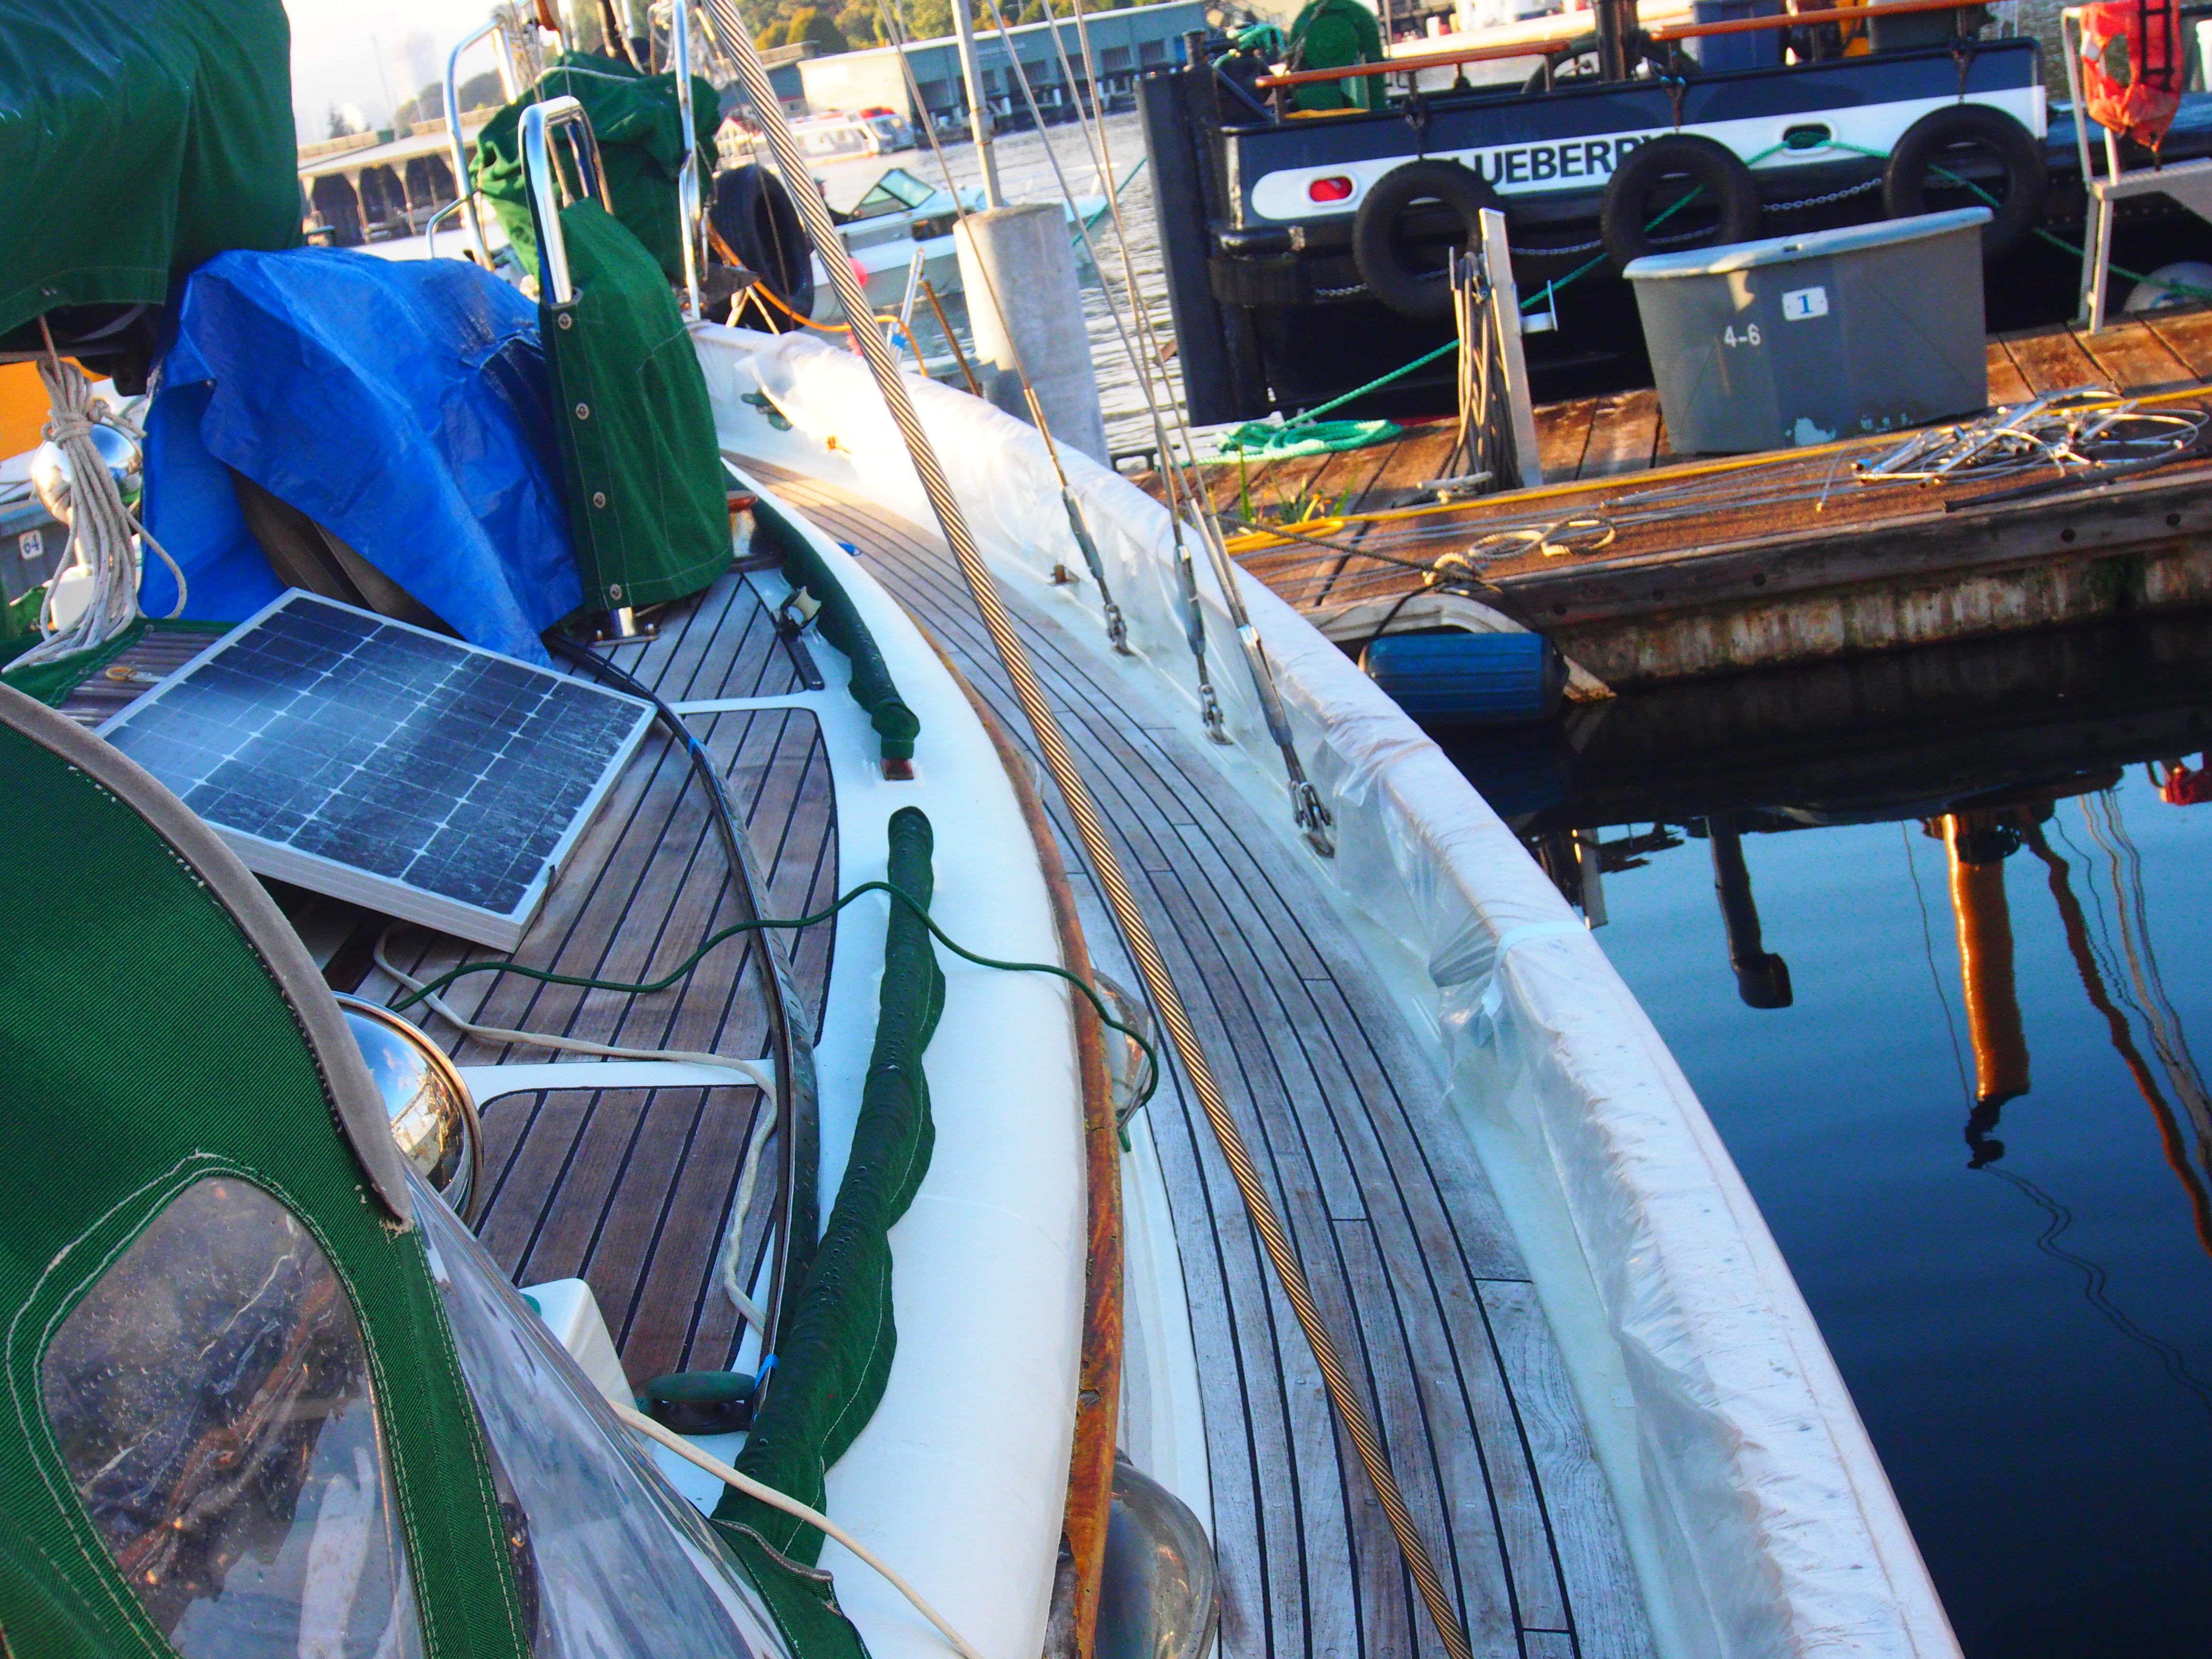
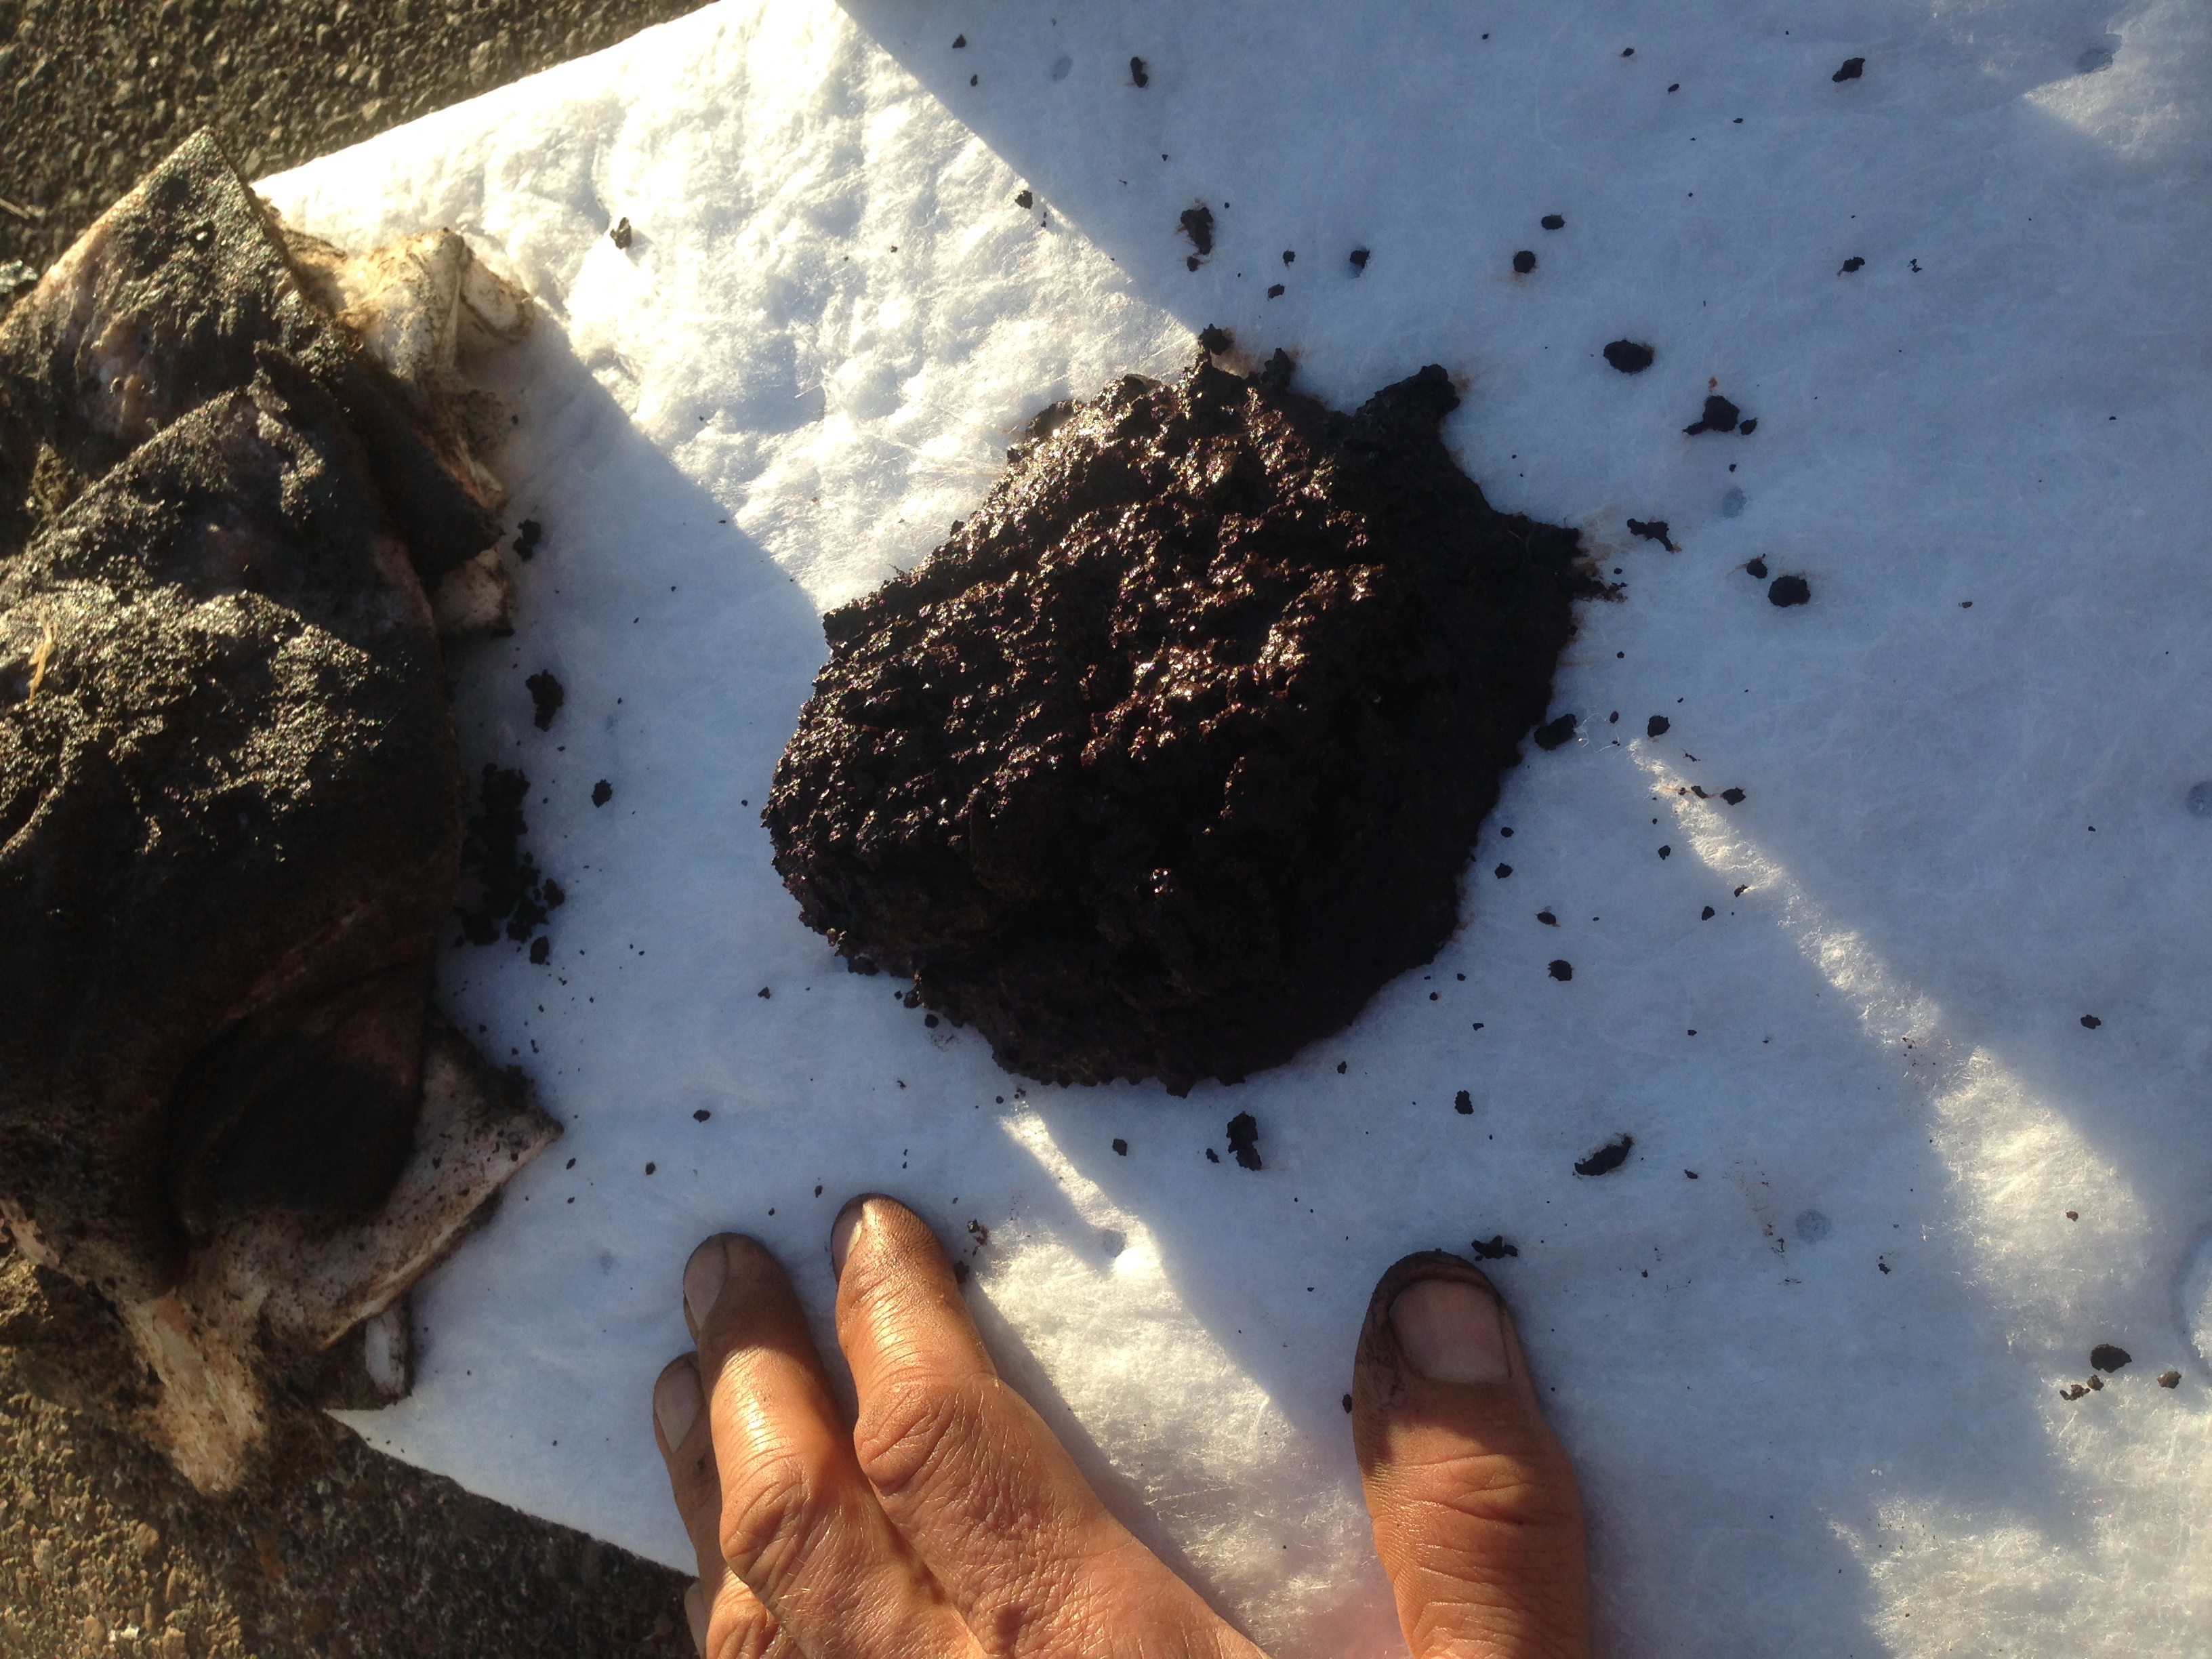
Now that we’re back from cruising, it’s time to clean, repair, and restore Apropos. Being in the tropics for almost 2 years and sailing 16,000nm in the ocean is hard on a boat. We had every nook and cranny of the boat packed–under floorboards, under cabinet drawers, the v-berth (“garage”), etc. The first thing I did was to remove a lot of “stuff” and give the boat a thorough cleaning. A solution of tea-tree oil and vinegar was used to wipe down all the walls and inside cabinets and drawers. Next I tackled some of the recent problems related to fuel. I emptied both fuel tanks and scooped out the debris at the bottom. Almost all the refueling outside the US was done with jerry cans and never did we see any sign of dirty fuel in the bottom of the cans, so I assume the debris was from the growth of microbes. I always add a small amount of Biobore fuel additive when refueling, but maybe the tropical heat, and having the boat sit in Fiji for 6 months, accelerated the microbe growth. While I had the tanks empty, I also took the opportunity to replace the 4 old gate-style valves with ball valves. Refueling the tanks from empty also allowed me to precisely measure the tank capacity. I’ve always knew the total diesel capacity to be about 120 gallons (from the boat specs), and assumed the 2 tanks were equal capacity. I now know the port tank holds 64.4 gallons and the starboard tank holds 55.6 gallons!
Debris taken from the empty diesel tanks
4 new ball valves between diesel tanks and engine
Moving to the outside of the boat, I gave it a good wash to remove the salt that accumulated from the Hawaii to Seattle passage. I also removed some of the solar panels, the dinghy and outboard engine, the life raft and stored them in the garage until they’re needed next summer. Then I stepped back and looked at the poor state of the sun-wreaked varnish and thought about the monumental task “somewhere down the road”.
A quick trip to Lautoka for provisioning, banking, and renewing a cruising permit was followed by a flurry of activity back at the marina. We finally got the boat out of the pit and into stands to do the bottom paint. With 4 of us working, we sanded and scraped, then rolled on 3 gallons of Interlux Micron Extra bottom paint and changed the zincs, then were launched into the water at the end of the day. Here’s a short video showing just how fast we worked!